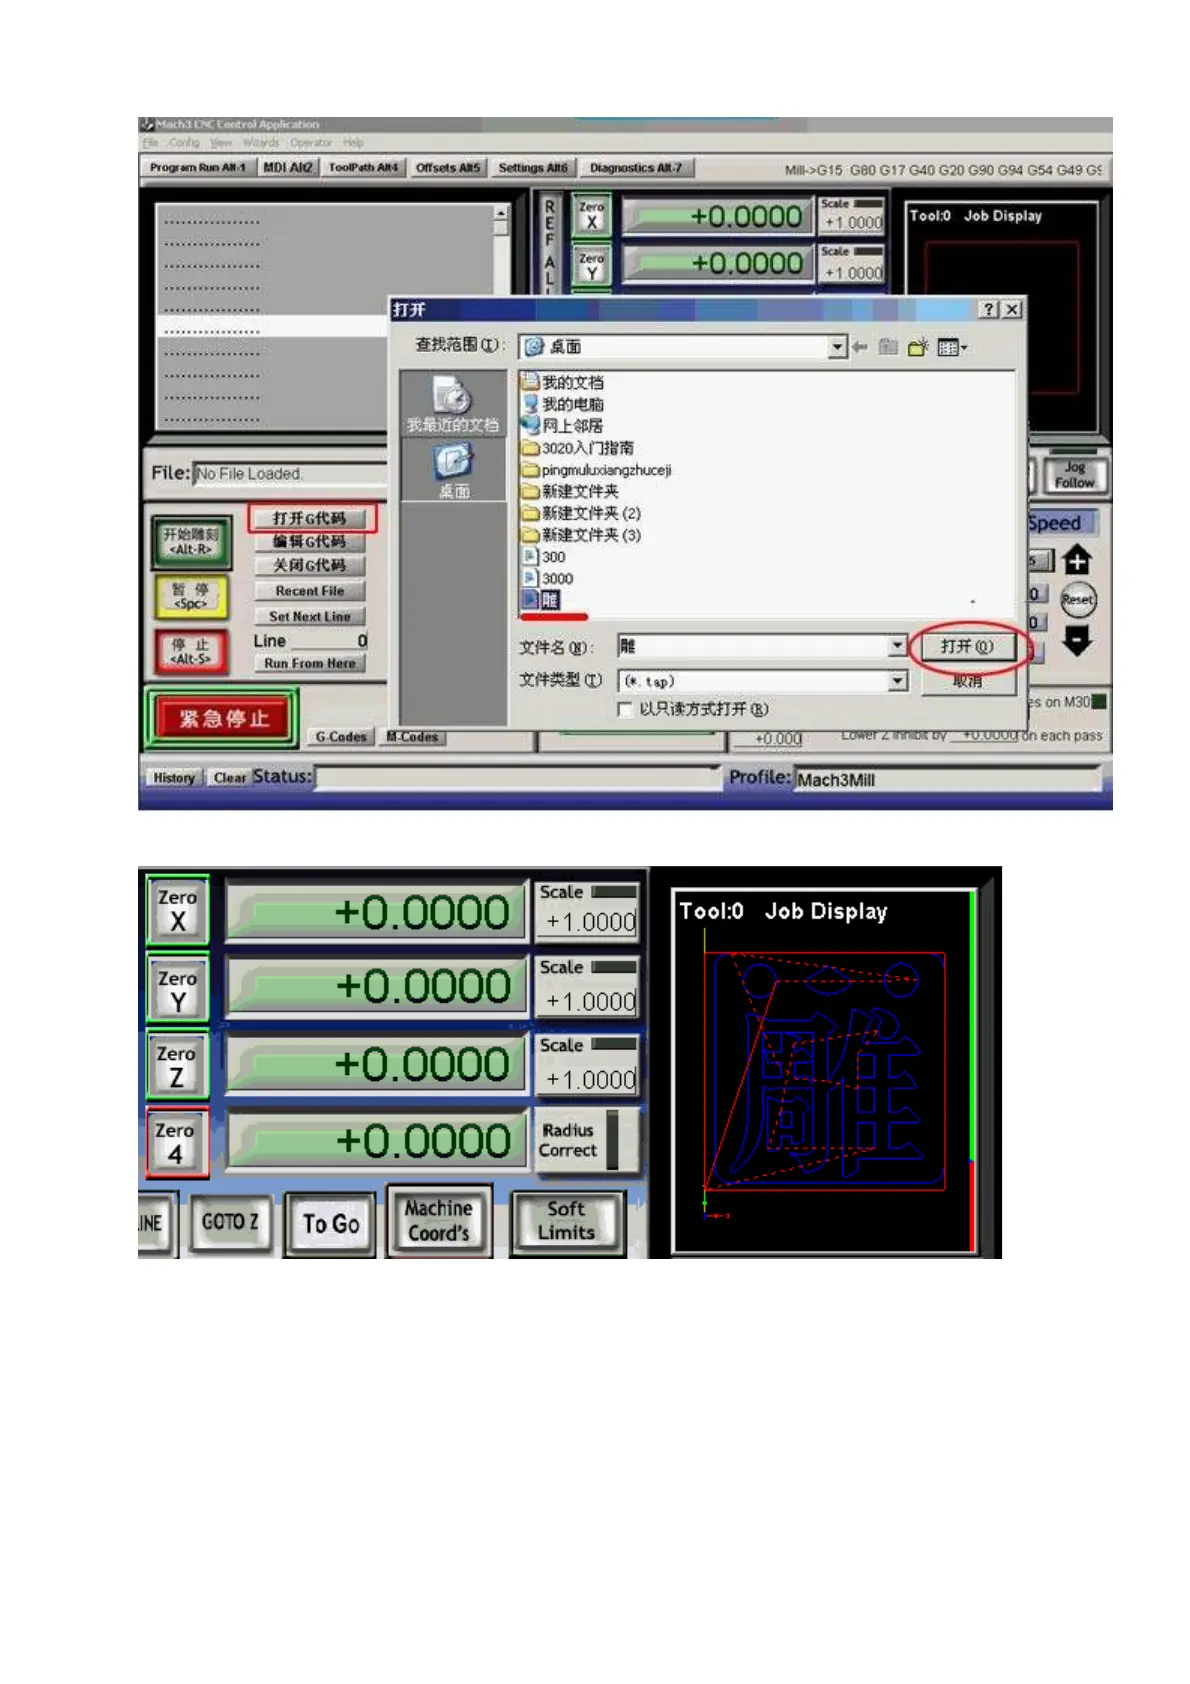
(2)Import the G code of”
雕
”, then it will display on the PC as below
(3)Power on the control box driver, move the spindle tool bit to the left-bottom of the material board by
manual control the three axis, the area in the red circle(the image below)is the safe area. The left
bottom red-green WCS arrowhead above is the original point, move the spindle bit (without cutter) to
this point.
(4)Put the Z axis a little higher to avoid to touching the clamping nuts. Clear all the axis to zero and
click the Green (ALT-R) button to start.At the same time, please pay attention to the windows of the
software, the moving dashed is the trace of the machine. If you find the trace is incorrect, please
power off the drive and check the unit of the Mach 3 whether is “MM” and axis WCS.
(5)This test engraving dimension is 7*7*CM,1MM thickness, engrave it twice, each time the depth is