MAINTENANCE
The following sections instruct on how to remove and replace internal
valve components. Care must be taken to avoid damage to parts during
removal and installation.
WARNING
• Depressurizeanddrainthepipingsystem
beforeattemptingtoremovethecoverplate
fromthevalve.
Failuretofollowthisinstructioncouldresult
inseriouspersonalinjuryand/orproperty
damage.
CAUTION
• Anyactivitiesthatrequiretakingthe
valveoutofservicemayeliminatethefire
protectionprovided.
• Beforeservicingortestingthesystem,
notifytheauthorityhavingjurisdiction.
• Considerationofafirepatrolshouldbe
givenintheaffectedareas.
Failuretofollowtheseinstructionscould
resultinseriouspersonalinjuryand/orprop-
ertydamage.
REMOVINGANDREPLACINGTHECLAPPERSEAL
1. Perform steps 1 – 13 of the “Required Internal Inspection” section.
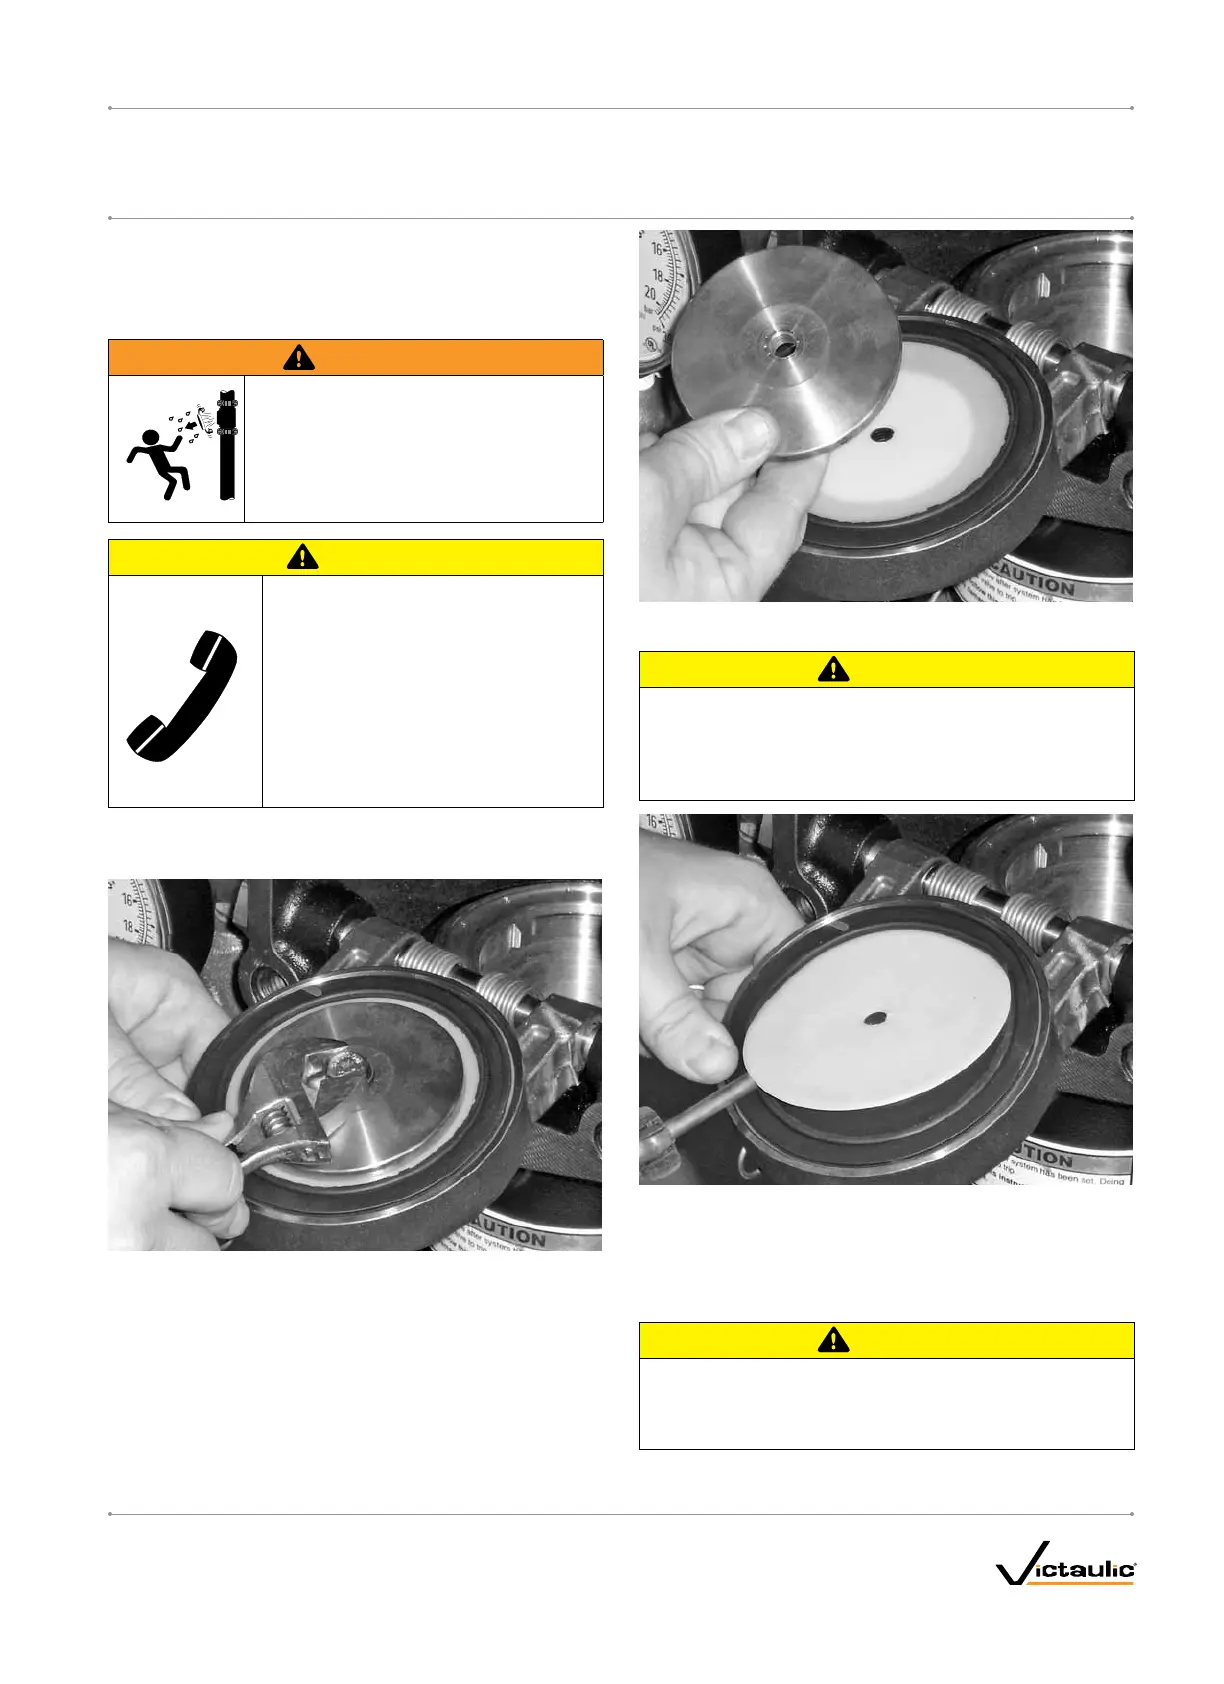
2. Remove the seal assembly bolt/bolt seal from the clapper seal.
3. Remove the seal-retaining ring.
CAUTION
• DONOTprythesealwasheroutoftheclappersealfromthe
innerhole.
Failuretofollowthisinstructioncoulddamagethesealwasher,
resultinginimproperclappersealingandvalveleakage.
4. Pry the edge of the seal washer from inside the clapper seal, as
shown above. DONOTPRYTHESEALWASHEROUTFROM
THEINNERHOLE.
5. Remove the seal washer from the clapper seal. Dry up any
moisture that is under the seal washer and on the clapper seal.
CAUTION
• UseonlyVictaulic-suppliedreplacementparts.
Failuretofollowthisinstructioncouldcauseimpropervalve
operation,resultinginpropertydamage.
REV_B
FireLockNXT™AutoConvertPreactionValve
SERIES 769
PreactionElectricAutoConvertDryTrim
I-769P.AC/ELECINSTALLATION,MAINTENANCE,ANDTESTINGMANUAL
www.victaulic.com
VICTAULIC IS A REGISTERED TRADEMARK OF VICTAULIC COMPANY. © 2009 VICTAULIC COMPANY. ALL RIGHTS RESERVED. PRINTED IN THE USA.
I-769P.AC/ELEC_41

 Loading...