66251750-EN - V1.0 - 05/06/17
23
4000 Series Vandal Resistant Digital GSM - Technical Manual
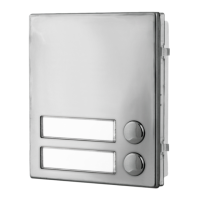
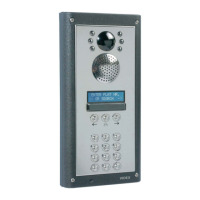
4000 Series Vandal Resistant Digital GSM Audio Intercom with Proximity
4000 Series Back Box Installation
INSTALLING A SURFACE MOUNT DOOR STATION
1. Place the surface box against the wall (165-170cm between the top of the box and the oor level as shown in Fig.34) and mark
the xing holes A for the wall plugs B and the hole for the cables E (Fig.35). Observe the orientation of the box with the hinge
on the left;
In order to prevent water ingress we highly recommend using a silicon sealant between the wall and the back box C
(Fig.36) and around the back box opening D (Fig.36);
2. As shown in Fig.35, drill the xing holes A, insert the wall plugs B and feed the cables E through the surface box opening D, x
the surface box C to the wall using the screws F;
3. Remove the cross bar G from the module support frame H using the approprite hand tool (where required it may be necessary
to wear the appropriate clothing, e.g. protective gloves and eye protection, when doing this) as shown in Fig.37;
4. Before installation of the module support frame H to the surface box G, t the module I to the support frame H as shown in
Fig.38 then, as shown in Fig.39, t the module xing brackets J using the xing screws K;
5. Next take the frame’s hinges L and hook the module support frame H to the surface box C, starting from the left following the guide
arrows, as shown in Fig.40. Ensure that the frame’s hinges L (Fig.40) t inside the relevant hinge mounts M inside the surface box C,
following the guide arrows, as shown in Fig.41;
6. Pull back the module support frame H from the surface box C while moving it slightly to the left, following the guide arrows,
as shown in Fig.42;
7. Next open the module support frame H and clip the hinge locks N to the hinge mounts M, following the guide arrows, as shown
in Fig.43;
8. Make the required wiring connections into the terminal block O using the screwdriver provided P (using the at blade end)
then plug the terminal block O into the module’s terminal block connector Q, as shown in Fig.44. Make any other necessary
panel adjustments required (connecting the antenna cable, tting the SIM card and setting the dip-switches etc.);
9. After the system has been tested and is working correctly, move back the module support frame H carefully and then x it to the
surface box C using the screwdriver provided P (using the torx end) and the torx pin security screws provided R
, as shown in Fig.45.
Note: do not over tighten the screws more than is necessary.
Note: if additional holes are made in the surface box, oxidation problems may appear unless the unprotected metal is
coated with a protective paint.