52
6167 818 - 10
Vitodens 100-W, B1HE/B1KE Combi Installation/Service
Service
Checking the Burner Gasket and Flame Body Assembly
(continued)
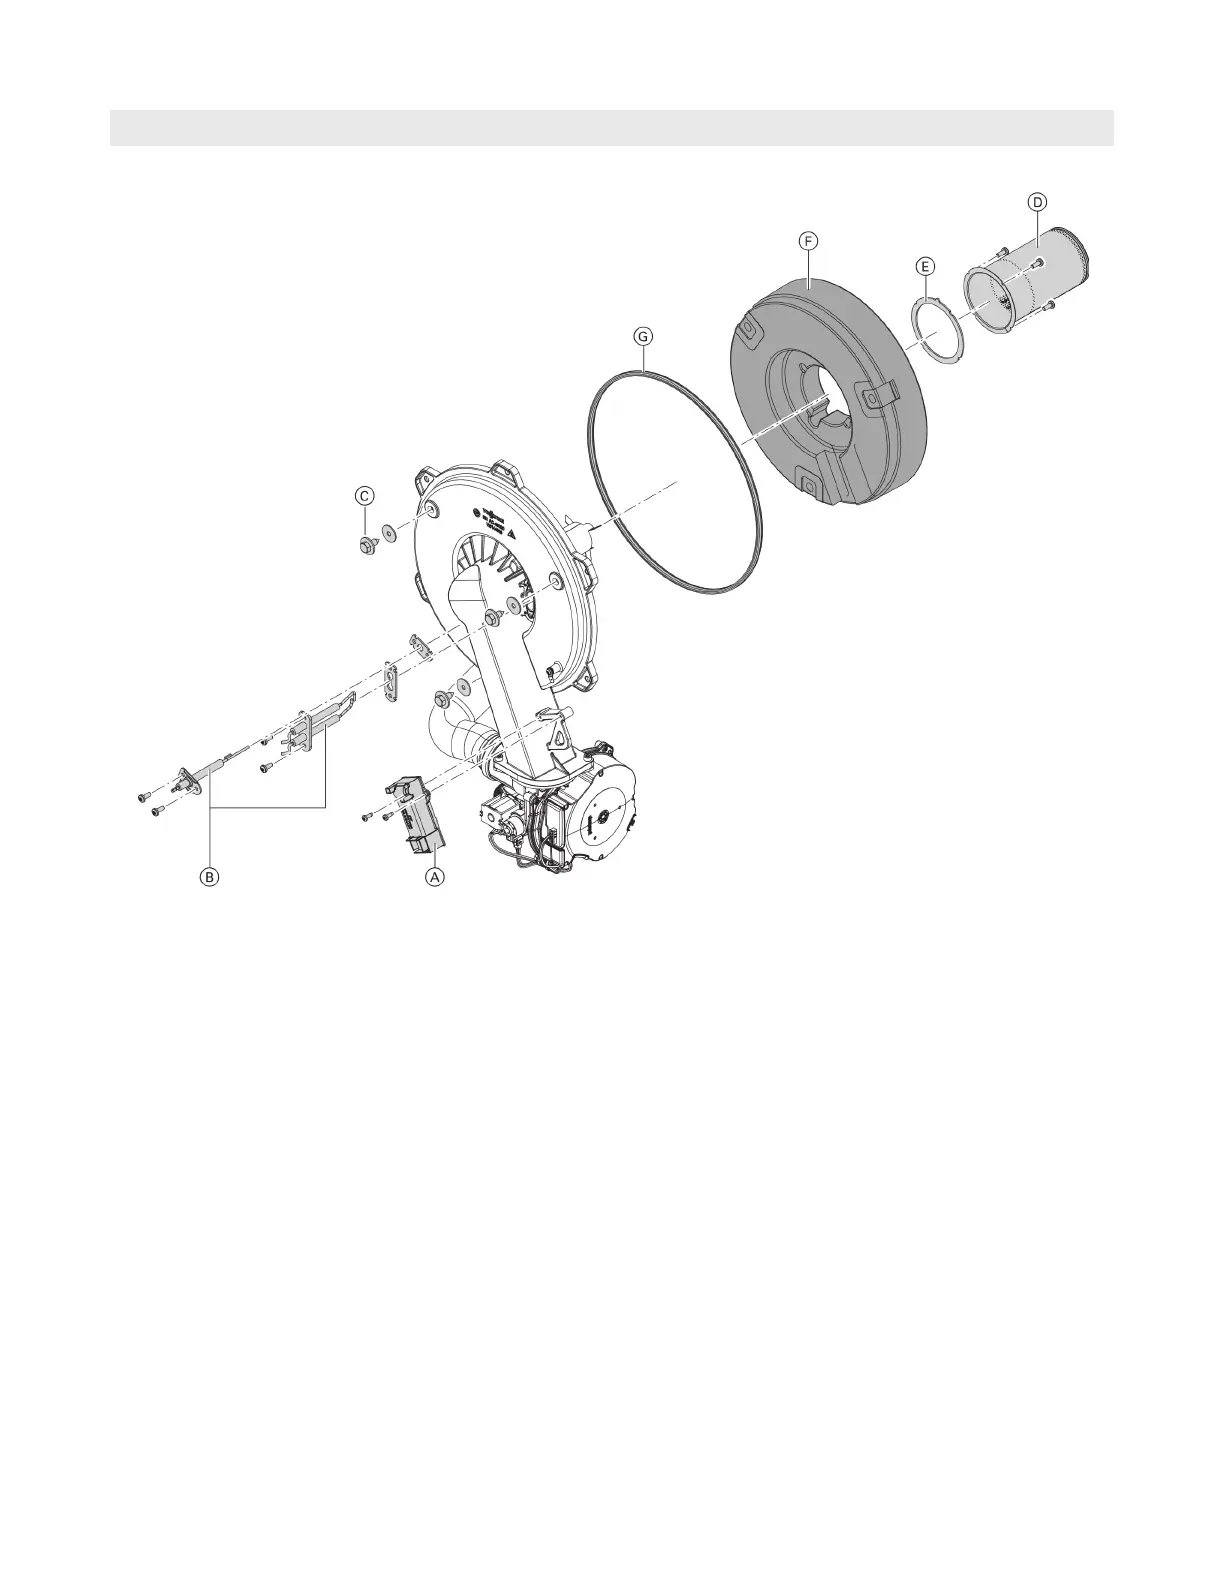
B1HE/KE 150 and 199
4. Loosen the 4 torx screws C. Remove any seal
residues if necessary. Do not damage the seal seat.
5. Install new flame body D with new gasket E.
Torque: 40 lb.in (4.5Nm)
6. Install new burner door gasket G.
Ensure correct alignment!
7. Secure flame body assembly D and gasket E with
4 Torx screws C. Torque: 40 lb.in (4.5 Nm).
8. Place the inner and outer insulation mats in the burner
door. Insert thermal insulation ring F. Ensure that the
outer insulation mat is not under the 3 support points
of the retaining clips. Secure the thermal insulation
ring with 3 hex head screws Torque: 35 lb.in (4 Nm).
Check thermal insulation ring F for firm seating.
9. Fit electrodes B. Check clearances, see following
chapter. Torque: 40 lb.in (4.5 Nm).
Check flame body assembly D, electrodes B, thermal
insulation ring F and gasket G for damage. Only remove
and replace components if they are damaged or worn.
Note: If replacing the flame body assembly, also replace
the flame body assembly gasket and the fixing
screws.
1. Disconnect plug with ignition electrode leads from
ignition unit A.
2. Remove electrodes B.
3. Loosen the 3 hex. screws. Hold the insulation ring
and then carefully remove it upwards over the
flame body.
If the insulation mats behind the insulation ring are in
good condition after removal, it is not necessary to
replace them.