This document is a user guide for the Vinten flowtech™ 75 and flowtech™ 100 tripods. It provides comprehensive information on the product's safe installation, operation, and maintenance.
Function Description
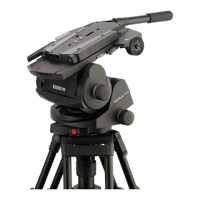
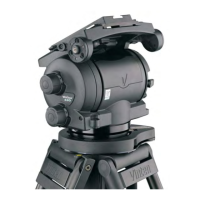
The Vinten flowtech™ 75 and flowtech™ 100 tripods are professional-grade tripods designed for use in television studios and outdoor locations. Their primary function is to support fluid heads and cameras, providing a stable and adjustable platform for various shooting requirements. The tripods feature quick-release levers for rapid height adjustment, hinge locks for setting leg angles, and magnetic clasps for secure leg closure during transport. They are compatible with a range of optional accessories, including mid-level spreaders, ground spreaders, rubber feet, attachment mounts, carry straps, and carry handles, enhancing their versatility and adaptability to different shooting environments.
Important Technical Specifications
flowtech™ 75 Tripod:
- Bowl: 75 mm
- Maximum payload: 20 kg (44 lb)
- Weight (Tripod Only): 2.9 kg (6.39 lbs)
- Transport Length: 68 cm (26.7 in.) (Excluding rubber foot)
- Operational Temperature: -40°C to 60°C (-40°F to 140°F)
- Maximum Operational Height (On Hinge Lock): 153 cm (60.23 in.)
- Minimum Operational Height (On Hinge Lock): 26 cm (10.23 in.)
- Maximum Operational Height (On Mid-Level Spreader): 157 cm (61.81 in.)
- Minimum Operational Height (On Mid-Level Spreader): 63 cm (24.8 in.)
- Maximum Operational Height (On Ground Spreader): 158 cm (62.2 in)
- Minimum Operational Height (On Ground Spreader): 41 cm (16.4 in)
- Extensions: X2
- Material: Carbon Fibre
flowtech™ 100 Tripod:
- Bowl: 100 mm
- Maximum payload: 30 kg (66 lb)
- Weight (Tripod Only): 3.2 kg (7.01 lbs)
- Transport Length: 68 cm (26.7 in.) (Excluding rubber foot)
- Operational Temperature: -40°C to 60°C (-40°F to 140°F)
- Maximum Operational Height (On Hinge Lock): 153 cm (60.23 in.)
- Minimum Operational Height (On Hinge Lock): 26 cm (10.23 in.)
- Maximum Operational Height (On Mid-Level Spreader): 155 cm (61.00 in.)
- Minimum Operational Height (On Mid-Level Spreader): 52 cm (20.47 in.)
- Maximum Operational Height (On Ground Spreader): 159 cm (62.5 in)
- Minimum Operational Height (On Ground Spreader): 43 cm (16.9 in)
- Extensions: X2
- Material: Carbon Fibre
General Specifications:
- Part Numbers: V4150-0001 (flowtech™ 75), V4160-0001 (flowtech™ 100)
- Warranty: One year standard, extended warranty available upon registration.
- Safety: The manual emphasizes warnings regarding trip hazards, toppling hazards, locking leg clamps, supporting payload weight, finger entrapment, and exceeding payload capacity.
Usage Features
Setting up the Tripod:
- Leg Separation: Legs are secured by magnetic catches. Pull the legs from the bottom to separate them. This step can be done before or after placing the tripod on the ground.
- Height Adjustment: Place the tripod on the ground, lift the quick-release levers fully, and raise the tripod to the desired height.
- Leg Locking: Lower the quick-release levers to lock the legs in position. Ensure levers are fully closed (down) for secure locking.
Hinge Lock Operation (No Spreader Mode):
- The tripod offers three lock positions: 20°, 46°, and 72°.
- Engaging Lock: Press the hinge lock button to engage the lock.
- Opening Legs: Pull the leg outward until it stops at the 20° lock position.
- Selecting Other Angles (46° or 72°):
- To disengage the lock, move the leg slightly inwards to relieve tension.
- Push the hinge lock slider down and pull the leg outwards to the desired 46° or 72° position.
- Alternative Locking Method: Release the hinge lock, fully open the leg to 90°, then engage the lock. Move the leg towards the body; an audible click will indicate each lock point (72°, 46°, 20°), preventing further opening without disengaging the lock.
- Caution: In No Spreader Mode (Hinge Lock ON), ensure feet are free to adapt to a new footprint when adjusting height. Only use the 72° hinge lock setting with legs fully retracted and do not apply excessive load.
Spreader Mode (with Mid-Level or Ground Spreader):
- The tripod is delivered with the Hinge Lock in the OFF (spreader mode) position.
- Mid-Level Spreader Attachment:
- Hold the spreader, squeeze release buttons, and align latching pins with tripod leg holes.
- Release buttons to lock the spreader in place.
- Unlock spreader arms to extend as needed, then tighten locks when legs are in position.
- flowtech™ 100 Mid-Level Spreader: Press and hold the arm release button, extend the inner arm to the required length, and release the button. Visual distance markers aid in setting arm length. The spreader has 4 locking positions (50°, 40°, 30°, 0°) adjusted by rotating the cap anticlockwise.
- Ground Spreader Attachment:
- Place the spreader flat on the floor.
- Place the tripod foot on the ball of the spreader foot.
- Bend the rubber strap and engage the lever in the tripod recess.
- Lift the lever upwards until it locks in place. Repeat for all three legs.
- Operation: Use your foot to press and hold the arm release button, then extend the inner arm to the desired length (12 positions available).
- Caution: Ensure latching pins are fully engaged for spreaders. If the spreader doesn't lay flat, check the Hinge Lock is in the OFF position. Ensure ground spreader legs are all the same length before folding the tripod to prevent damage.
- Closing Tripod with Ground Spreader: Ensure all spreader legs are at the same distance, lift the spreader using the center knob, then close the legs.
Accessories:
- Attachment Mount: Three accessory docks are available. Attach the supplied mount or other accessories (e.g., Variable Friction Arm) by inserting the screw and tightening clockwise with a 5mm Hex key.
- Carry Strap: Fit the attachment mount, then attach the split ring to the mounting point at the bottom of the upper section, and finally attach the strap clasps.
- Rubber Feet: Place the rubber foot between the spikes, ensuring the 'flowtech' marking faces outwards. Bend the rubber strap and engage the lever in the tripod recess, then lift the lever to lock.
- Carry Handle (S2051-1057): Lever the plug from the top of the handle to reveal the mounting screw. Align the screw with an accessory dock and tighten clockwise using the supplied Hex key. Insert the plug back, ensuring the groove is uppermost.
Maintenance Features
Cleaning:
- General Cleaning: Periodically wipe down with a lint-free cloth. Remove dirt/debris with a vacuum cleaner. Pay attention to the ball base of the tripod.
- Outdoor/Adverse Conditions: Wash off salt spray with fresh water. Remove sand and dirt with a semi-stiff brush or vacuum cleaner.
- Flushing the Tripod (for extreme conditions):
- Place the tripod in a bucket of clean, 30 cm deep water.
- Release quick-release levers and extend the tripod fully.
- Repeatedly collapse and extend the tripod while feet are in water to flush leg sections.
- If needed, turn the tripod upside down and repeat.
- Wipe the outer surface with a clean, dry cloth.
- Caution: Do not use solvent, oil-based cleaners, abrasives, or wire brushes as they can damage protective surfaces. Use clean water only.
Hinge Lock Cleaning:
- Operate the button and hinge slider repeatedly while blowing out debris until the mechanism moves smoothly.
- Disassembly (if debris persists):
- Pull the leg out to access the M4 lock screw.
- Remove the M4 lock screw by turning anticlockwise using a 2.5mm or 3/32" ball-ended hex key.
- Raise the leg to the horizontal position, push the hinge slider towards the bowl, and lift it out.
- Lift out the hinge lock button.
- Use compressed air and a soft brush to remove debris.
- Work the hinge lock up and down with a screwdriver to dislodge debris.
- Reassembly: Reverse steps 2-4.
- Caution: Wear safety glasses when using compressed air. If the screw is dropped, turn the tripod upside down to shake it out or retrieve with pliers. When replacing the M4 lock screw, turn anticlockwise until a click is felt before tightening clockwise to prevent cross-threading.
Checking Brake Force:
- Procedure:
- Extend middle and lower leg sections 20 cm each.
- Place a rubber mat on scales, stand one leg on the scales, and apply vertical downward force.
- With an average downward force of 20-30 kg (44-66 lb) for flowtech™ 75 or 30-40 kg (66-88 lb) for flowtech™ 100, the leg should remain extended.
- If the leg collapses before reaching the specified force, adjustment is needed.
- Caution: Use a non-slip mat. Be aware of finger entrapment.
Adjusting Brake Force:
- Procedure:
- Lift the quick-release lever to clear the adjustment screw.
- Use a 2.5mm or 3/32" hex key to turn clockwise to increase brake force. (10 full turns = 2 kg / 4.4 lb additional force).
- Test the brake force on scales and repeat if necessary.
- Repeat for remaining legs.
- Caution: Do not adjust more than required to prevent increased wear and stress on brake components. If adjustment range is insufficient, contact a service center.
Leg Friction Adjustment:
- Procedure:
- Open the legs to access M5 friction screws on the underside of the tripod.
- Adjust M5 screws to a torque of 2.5Nm to 3.5Nm Max using a torque screwdriver.
- Tighten screws in an opposite pattern as shown in the diagram.
- If a torque screwdriver is unavailable, use a Hex Key, following the pattern, and tighten screws by a small amount, avoiding over-tightening.
- Test legs for correct friction and readjust if necessary.
- Caution: Do not adjust more than required to prevent increased wear and stress on leg friction components and damage to the bowl.