WWW.VISIONQUESTCE.COM
12
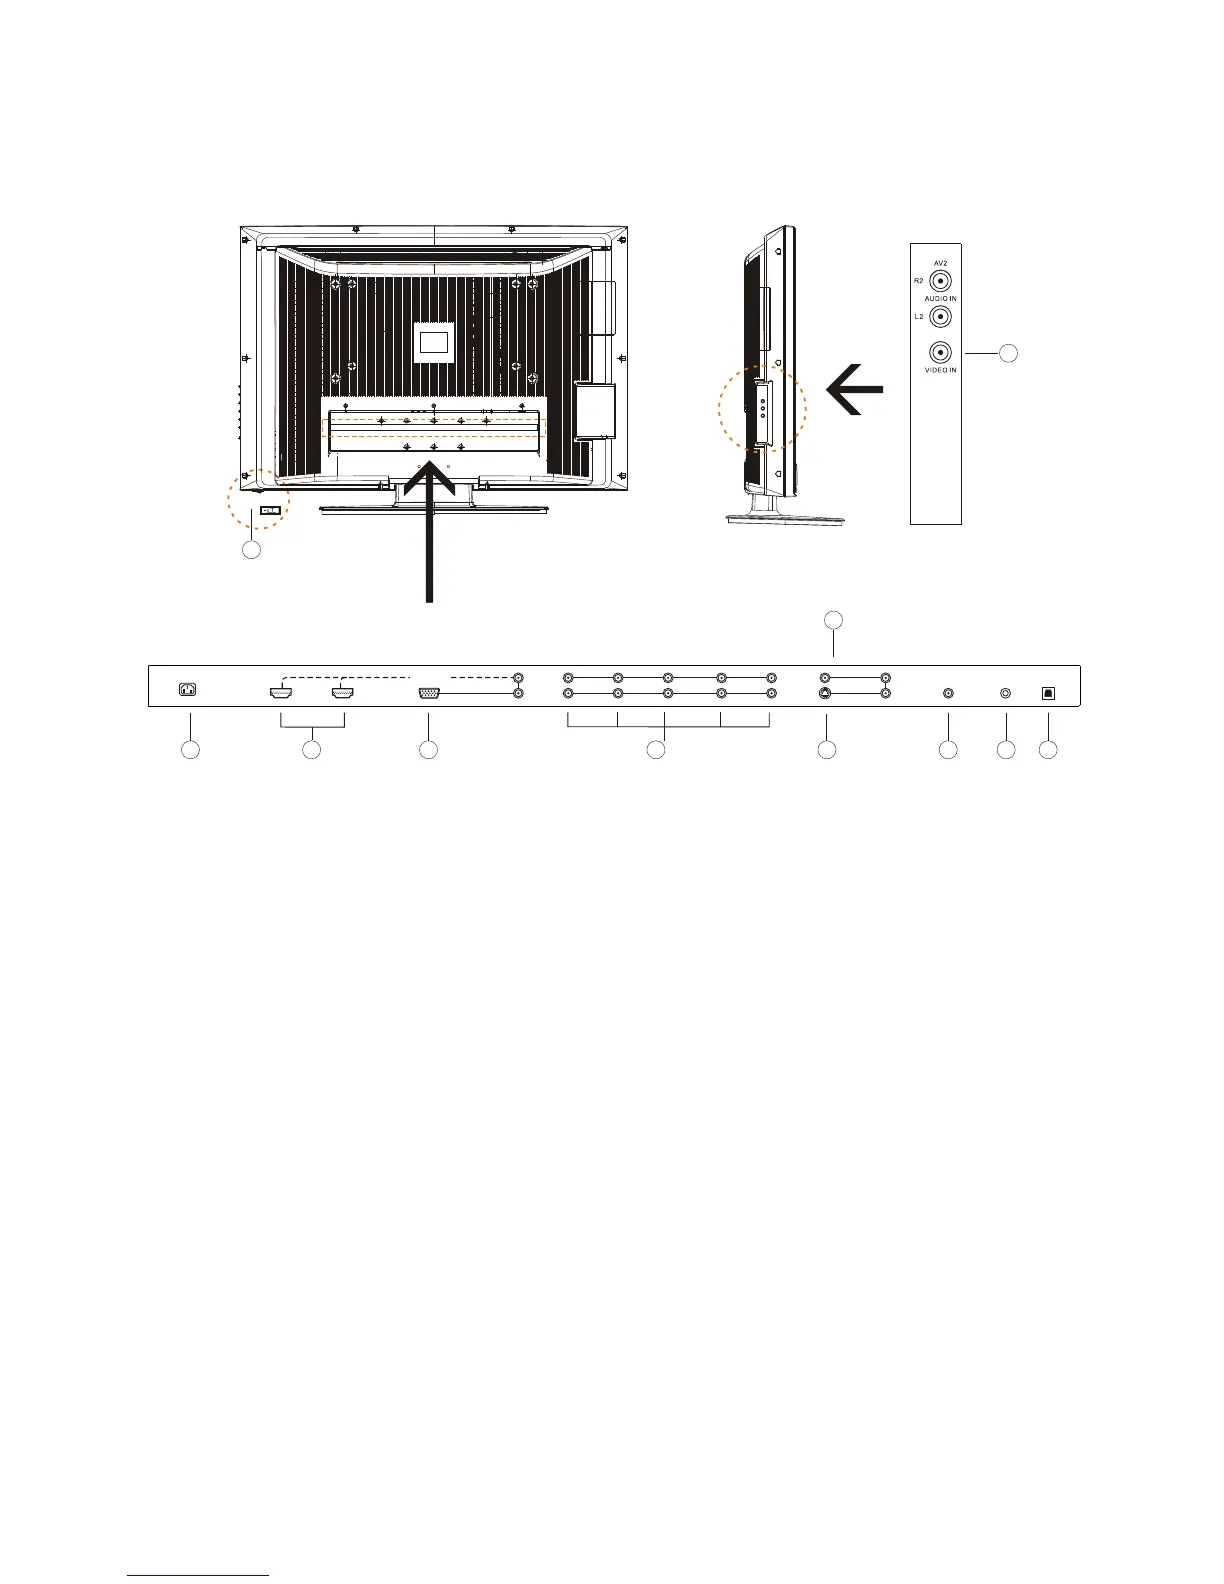
1.3 - Rear Panel Connections
7
1 3
5
10
11
1.AC IN - Power Input.
2.HDMI IN - Connect a DVD multimedia player, or set-top box and the audio through this connection.
For users who want to connect a DVI enabled device, use an HDMI-DVI cable
.VGA IN - Connect the video and the audio from a computer or set-top box here.
4.Y-Pb/Cb-Pr/Cr-with Audio L/R - Connect the primary source for component video, such as a DVD player
or set-top box here, From left to right, use the green for Y, blue for Pb(or Cb), red for Pr(or Cr), white for left
audio and red for right audio inputs.
5&10.VIDEO IN -Connect the primary source for composite devices, such as a VCR or video game console.
Use the white and red connectors to connect the external audio from the same source.
6.S-VIDEO IN - Connect the primary source for S-Video devices, such as a VCR or video game console. Use
the white and red connectors to connect the external audio from the same source.
7.CABLE /AIR IN - Connect to an antenna, or cable service.
8.SERVICE - This custom communication port is for factory service only.
9.DIGITAL AUDIO OUT - The digital audio will be available on this output for connection to your home theatre
system.
11.POWER SWITCH - When switch this off, please don't switch it back on within five seconds.
and use the Analog Audio
output of the device connected to the L+R Audio here.
3
8 9
2
4
6
AUDIO
IN
R-1
L-1
L-3
Pr/Cr-1Pb/Cb-1
Y-1
AV1
AUDIO
IN
DIGITAL HD
L-5
R-5
VGA IN
HDMI2-IN HDMI1-IN
S-VIDEO IN
VIDEO IN
AUDIO IN
R-3
R-4L-4Pr/Cr-2Pb/Cb-2Y-2
AUDIO IN
AC IN
DIGITAL
AUDIO OUT
75Ù ANT.
SERVICE