D
D
D
L
L
L
P
P
P
P
P
P
r
r
r
o
o
o
j
j
j
e
e
e
c
c
c
t
t
t
o
o
o
r
r
r
—
—
—
U
U
U
s
s
s
e
e
e
r
r
r
’
’
’
s
s
s
M
M
M
a
a
a
n
n
n
u
u
u
a
a
a
l
l
l
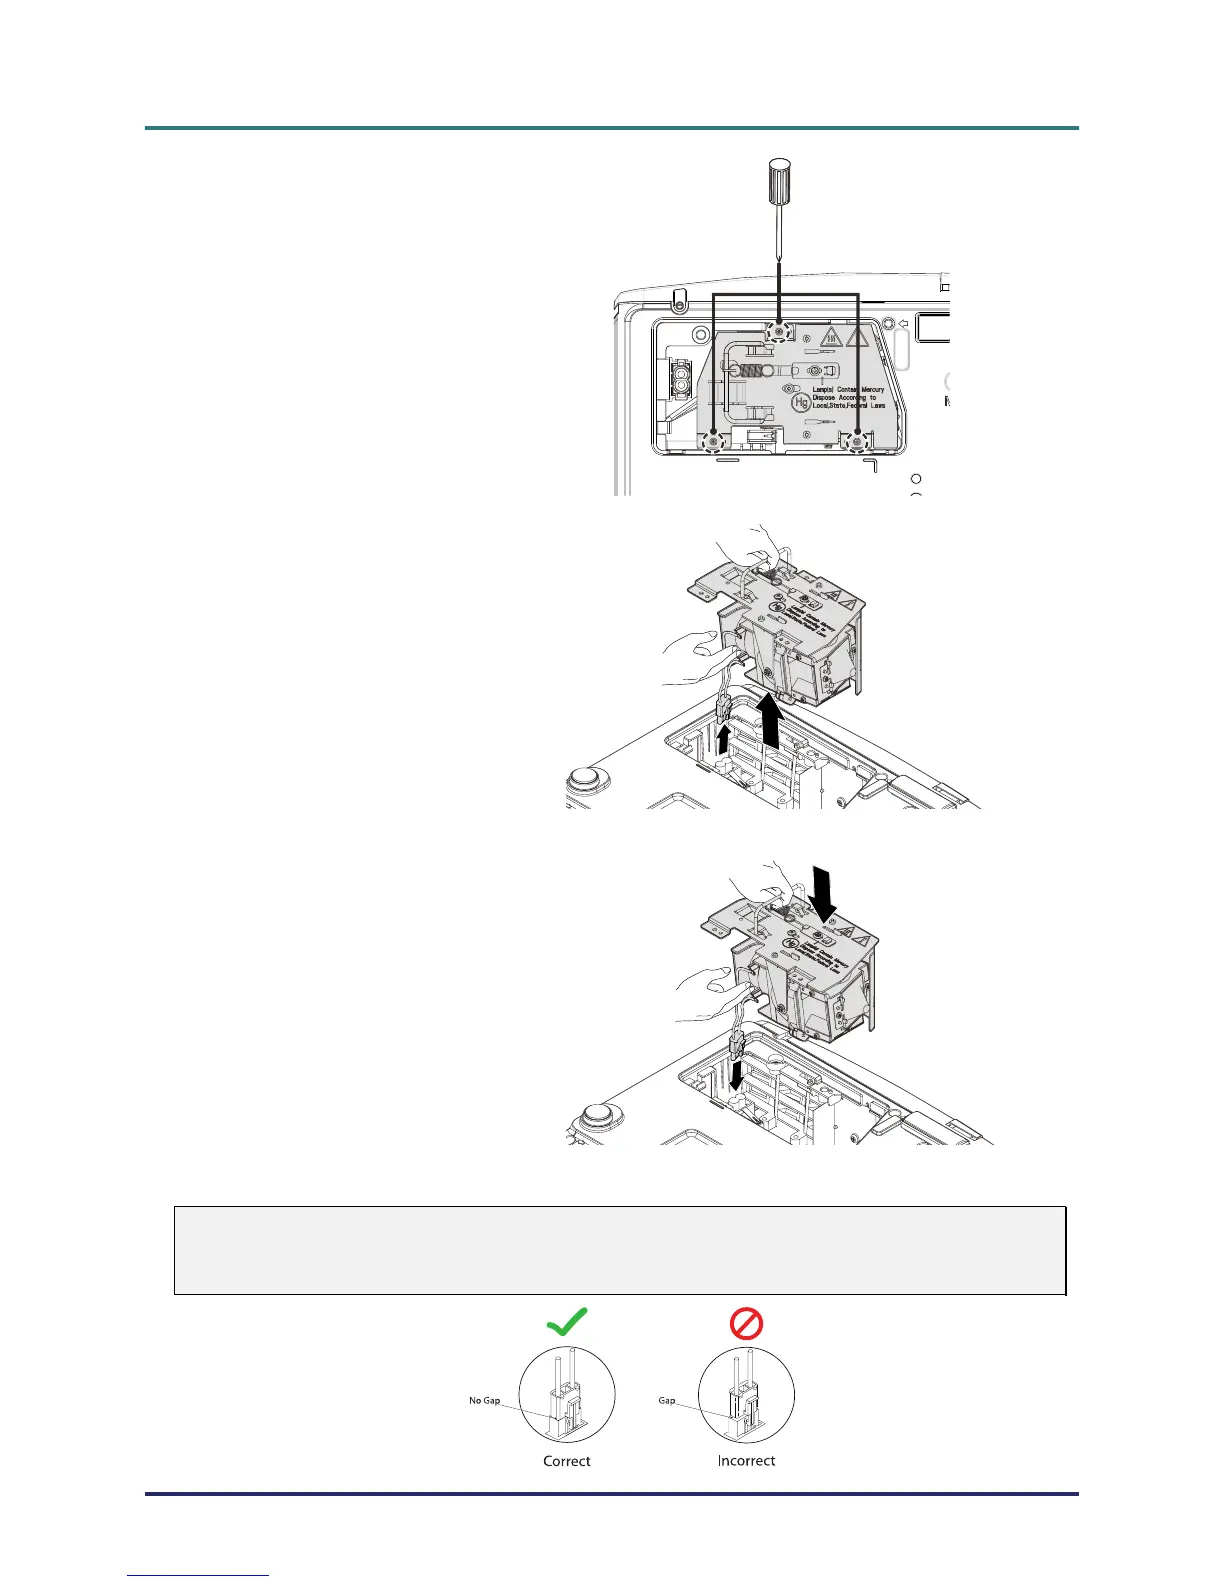
3.
Remove the three screws
from the lamp module.
4.
Lift the module handle up.
5.
Disconnect the lamp con-
nector.
6.
Pull firmly on the module
handle to remove the
lamp module.
7.
Reverse steps 1 to 6 to
install the new lamp mod-
ule.
While installing, align the
lamp module with the
connector and ensure it is
level to avoid damage.
Note: The lamp module
must sit securely in place
and the lamp connector
must be connected prop-
erly before tightening the
screws.
Warning:
Lamp Connector must be installed flush with the connector base as shown in the image below.
A gap between the Lamp Connector and the connector base will cause damage to the projector.
The following images illustrate correct and incorrect Lamp Connector installations.
– 36 –