P
r
o
t
e
c
t
e
d
b
y
c
o
p
y
r
i
g
h
t
.
C
o
p
y
i
n
g
f
o
r
p
r
i
v
a
t
e
o
r
c
o
m
m
e
r
c
i
a
l
p
u
r
p
o
s
e
s
,
i
n
p
a
r
t
o
r
i
n
w
h
o
l
e
,
i
s
n
o
t
p
e
r
m
i
t
t
e
d
u
n
l
e
s
s
a
u
t
h
o
r
i
s
e
d
b
y
V
o
l
k
s
w
a
g
e
n
A
G
.
V
o
l
k
s
w
a
g
e
n
A
G
d
o
e
s
n
o
t
g
u
a
r
a
n
t
e
e
o
r
a
c
c
e
p
t
a
n
y
l
i
a
b
i
l
i
t
y
w
i
t
h
r
e
s
p
e
c
t
t
o
t
h
e
c
o
r
r
e
c
t
n
e
s
s
o
f
i
n
f
o
r
m
a
t
i
o
n
i
n
t
h
i
s
d
o
c
u
m
e
n
t
.
C
o
p
y
r
i
g
h
t
b
y
V
o
l
k
s
w
a
g
e
n
A
G
.
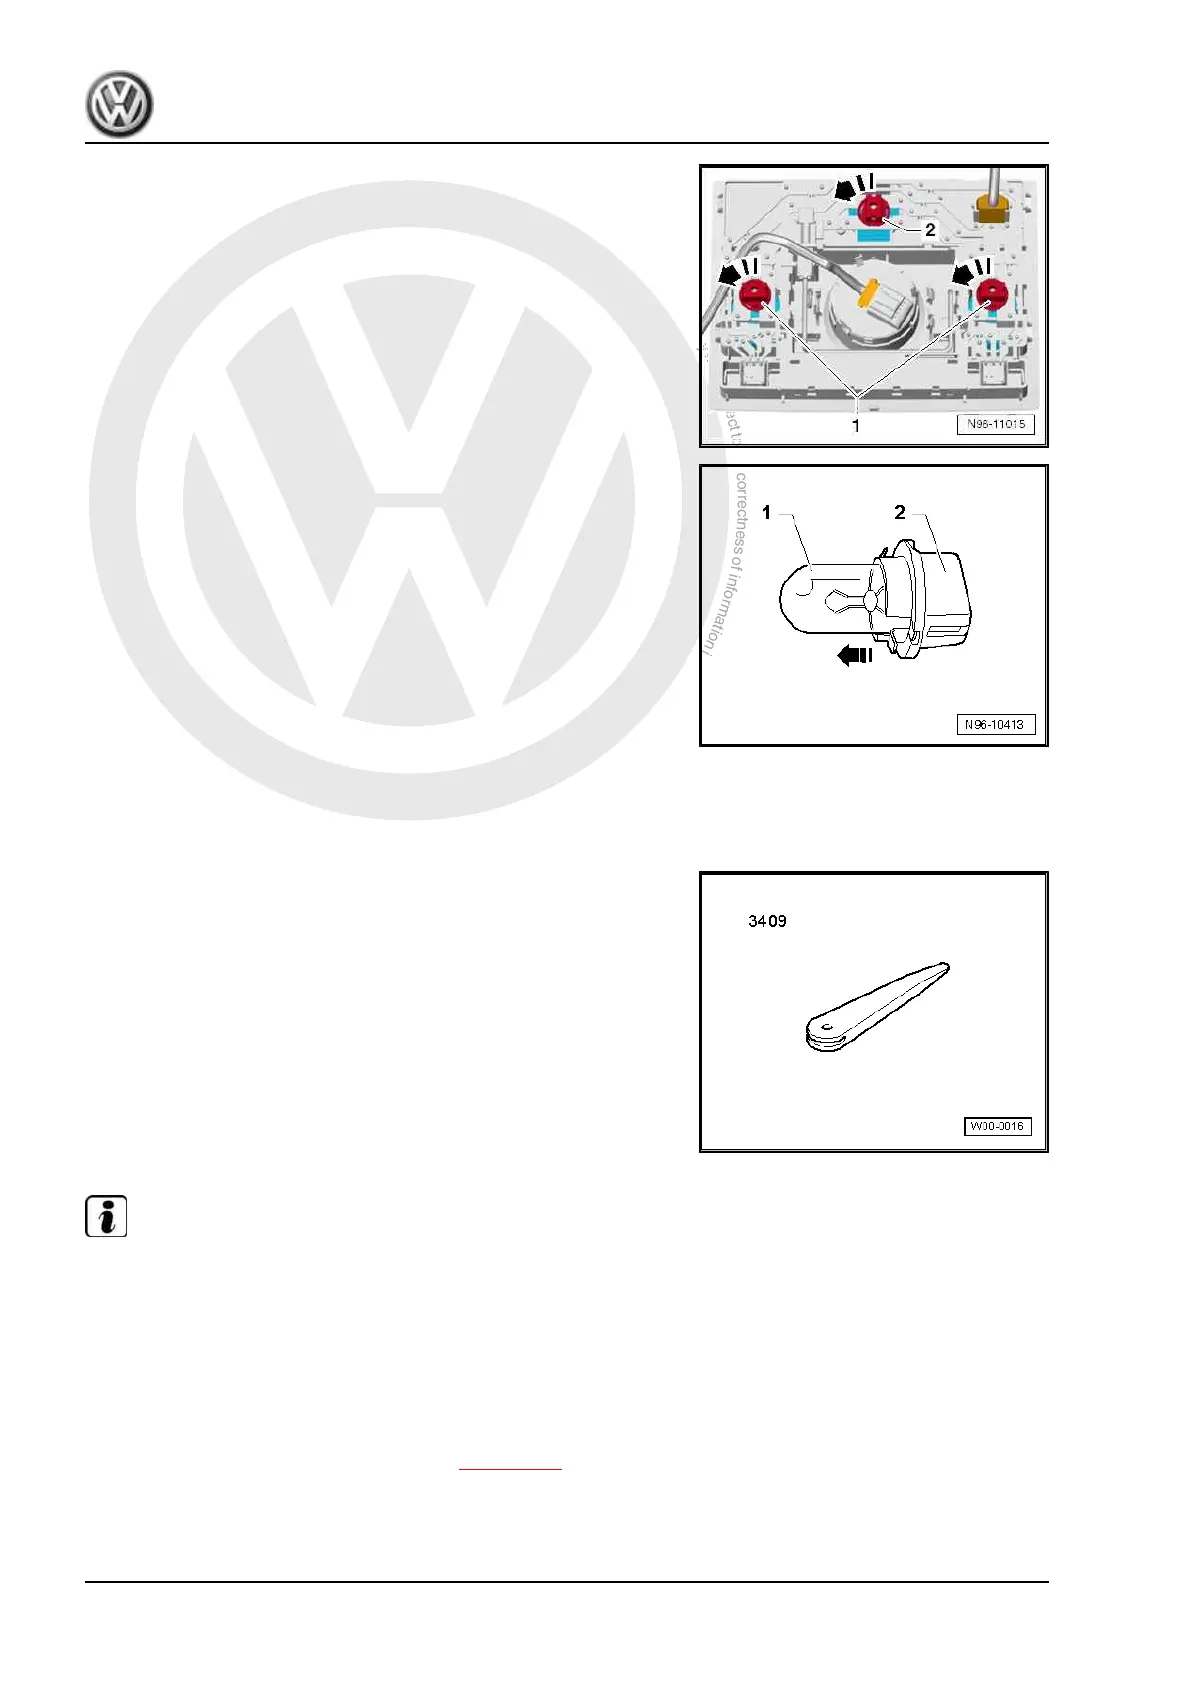
– Turn bulb holder -2- together with bulb of front interior light -
W1- in -direction of arrow- and then remove.
– Pull bulb -1- in -direction of arrow- out of bulb holder -2-.
Bulb for front interior light - W1- : glass base bulb 12V, 5W.
Installing
Installation is carried out in reverse order of removal.
1.6 Removing and installing front reading
lights
Special tools and workshop equipment required
♦ Removal wedge - VAS 3409-
Note
When removing and installing components that are in view
(switches, covers, trim and so on), mask off areas in which tools
( removal wedge - VAS 3409- , screwdriver) are used to lever out
those components using commercially available masking tape.
Removing
– Switch off ignition and all electrical consumers, and pull out
ignition key.
– Remove front interior and reading light ⇒ page 123 .
up! 2012 ➤
Electrical system - Edition 03.2017
128 Rep. gr.96 - Lights, bulbs, switches - interior

 Loading...