P
r
o
t
e
c
t
e
d
b
y
c
o
p
y
r
i
g
h
t
.
C
o
p
y
i
n
g
f
o
r
p
r
i
v
a
t
e
o
r
c
o
m
m
e
r
c
i
a
l
p
u
r
p
o
s
e
s
,
i
n
p
a
r
t
o
r
i
n
w
h
o
l
e
,
i
s
n
o
t
p
e
r
m
i
t
t
e
d
u
n
l
e
s
s
a
u
t
h
o
r
i
s
e
d
b
y
V
o
l
k
s
w
a
g
e
n
A
G
.
V
o
l
k
s
w
a
g
e
n
A
G
d
o
e
s
n
o
t
g
u
a
r
a
n
t
e
e
o
r
a
c
c
e
p
t
a
n
y
l
i
a
b
i
l
i
t
y
w
i
t
h
r
e
s
p
e
c
t
t
o
t
h
e
c
o
r
r
e
c
t
n
e
s
s
o
f
i
n
f
o
r
m
a
t
i
o
n
i
n
t
h
i
s
d
o
c
u
m
e
n
t
.
C
o
p
y
r
i
g
h
t
b
y
V
o
l
k
s
w
a
g
e
n
A
G
.
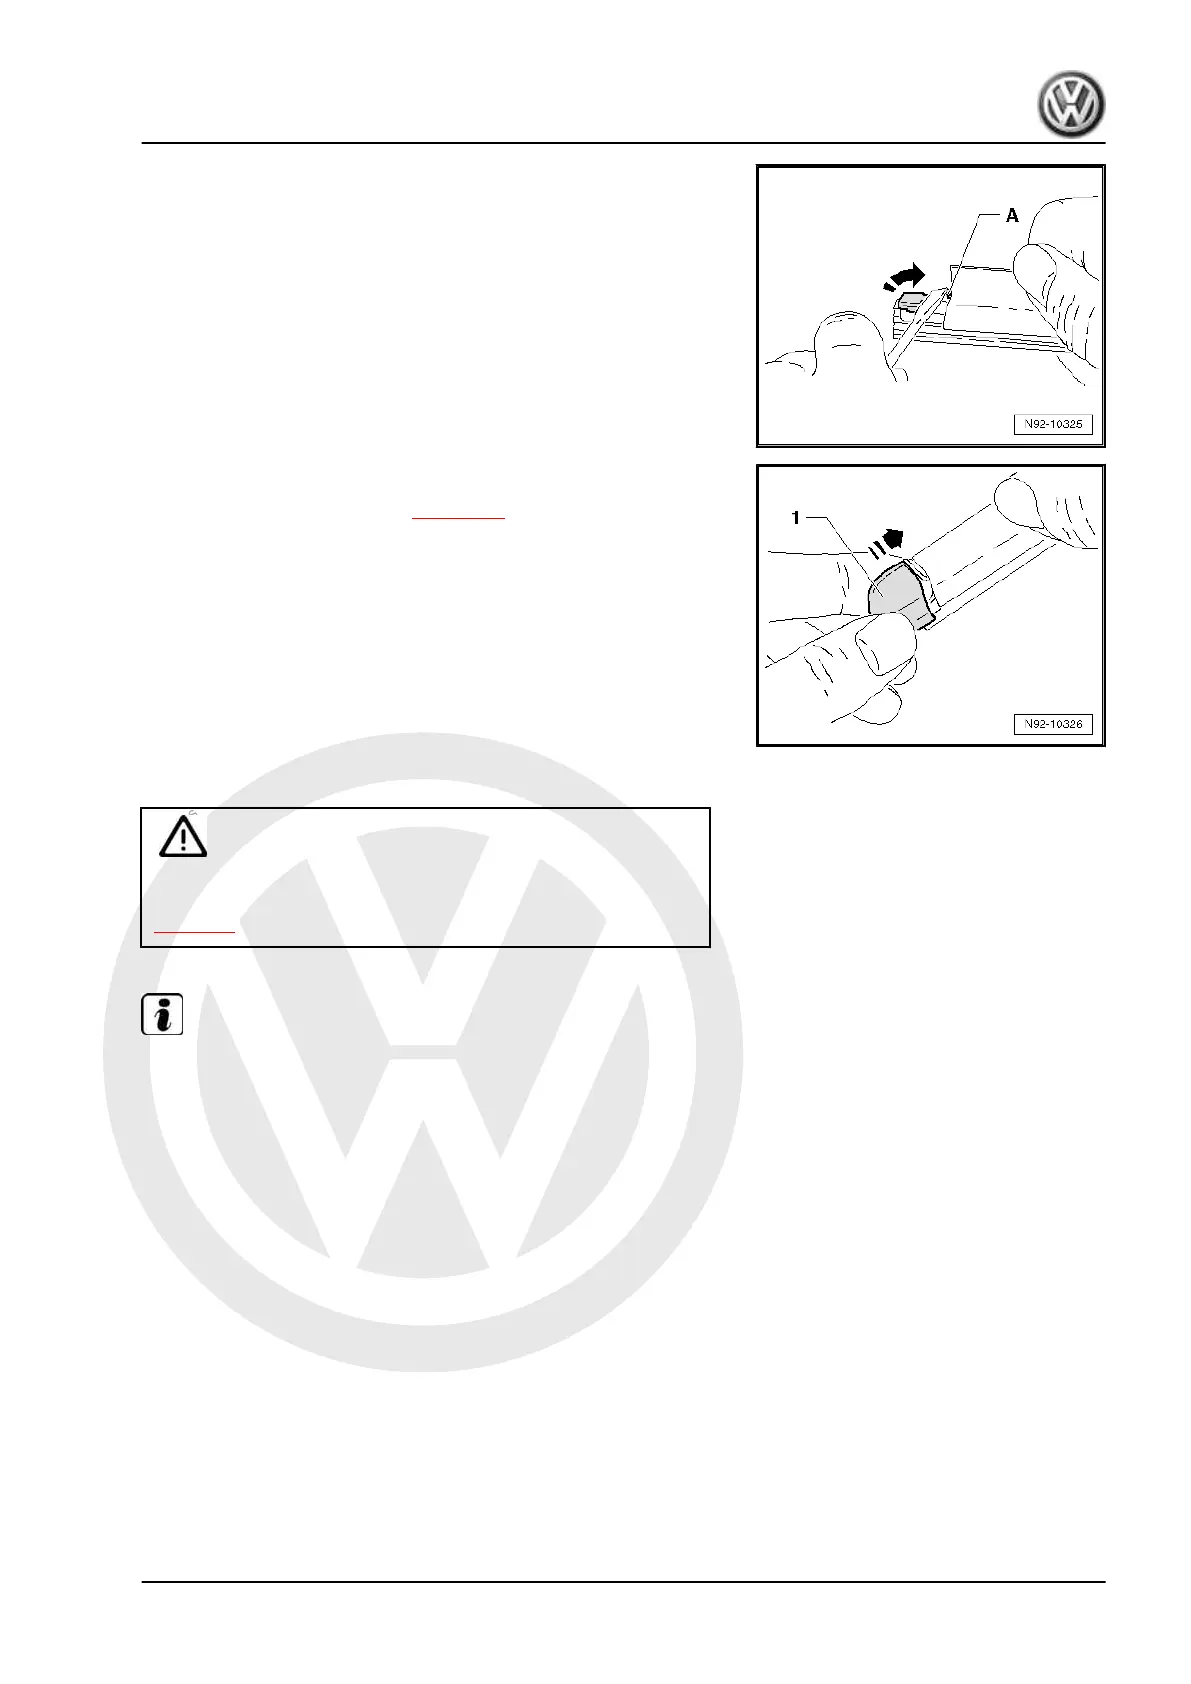
– Push wiper blade stop -A- back down using a suitable screw‐
driver until wiper rubber blade can no longer be moved in the
guide.
– Fit new cap -1- and check it is seated securely.
– Fit windscreen wiper blade ⇒ page 41 .
– Check wiper blade is working correctly.
1.7 Removing and installing wiper motor - V-
Caution
To disconnect and reconnect the battery, the procedure de‐
scribed in the workshop manual should be strictly adhered to
⇒ page 5 .
Note
♦
The wiper motor control unit - J400- and the wiper motor - -
are combined to form one unit. If the wiper motor control unit
- J400- is renewed, the coding must be read out first and the
new wiper motor control unit - J400- must be code with this
value.
♦
The illustrations show removal and installation of the wind‐
screen wiper system in an LHD vehicle.
♦
Removal and installation of the windscreen wiper system in an
RHD vehicle are analogous.
Special tools and workshop equipment required
up! 2012 ➤
Electrical system - Edition 03.2017
1. windscreen wiper system. 47

 Loading...