P
r
o
t
e
c
t
e
d
b
y
c
o
p
y
r
i
g
h
t
.
C
o
p
y
i
n
g
f
o
r
p
r
i
v
a
t
e
o
r
c
o
m
m
e
r
c
i
a
l
p
u
r
p
o
s
e
s
,
i
n
p
a
r
t
o
r
i
n
w
h
o
l
e
,
i
s
n
o
t
p
e
r
m
i
t
t
e
d
u
n
l
e
s
s
a
u
t
h
o
r
i
s
e
d
b
y
V
o
l
k
s
w
a
g
e
n
A
G
.
V
o
l
k
s
w
a
g
e
n
A
G
d
o
e
s
n
o
t
g
u
a
r
a
n
t
e
e
o
r
a
c
c
e
p
t
a
n
y
l
i
a
b
i
l
i
t
y
w
i
t
h
r
e
s
p
e
c
t
t
o
t
h
e
c
o
r
r
e
c
t
n
e
s
s
o
f
i
n
f
o
r
m
a
t
i
o
n
i
n
t
h
i
s
d
o
c
u
m
e
n
t
.
C
o
p
y
r
i
g
h
t
b
y
V
o
l
k
s
w
a
g
e
n
A
G
.
– To set the parking position, align the wiper blade tip with the
lowest heating wire of the heated rear window
– Adjust rear window wiper park position by moving wiper arm
if necessary ⇒ page 58 .
– Tighten nut.
Specified torques
♦ ⇒ “3.1 Assembly overview - rear window wiper system”, page
57
3.5 Removing and installing rear window
wiper motor - V12-
Special tools and workshop equipment required
♦ Torque wrench - V.A.G 1331-
Removing
– Remove wiper arm ⇒ page 58 .
– Remove rear lid trim ⇒ General body repairs, interior; Rep.
gr. 70 ; Luggage compartment trims; Fitting locations over‐
view – luggage compartment trims .
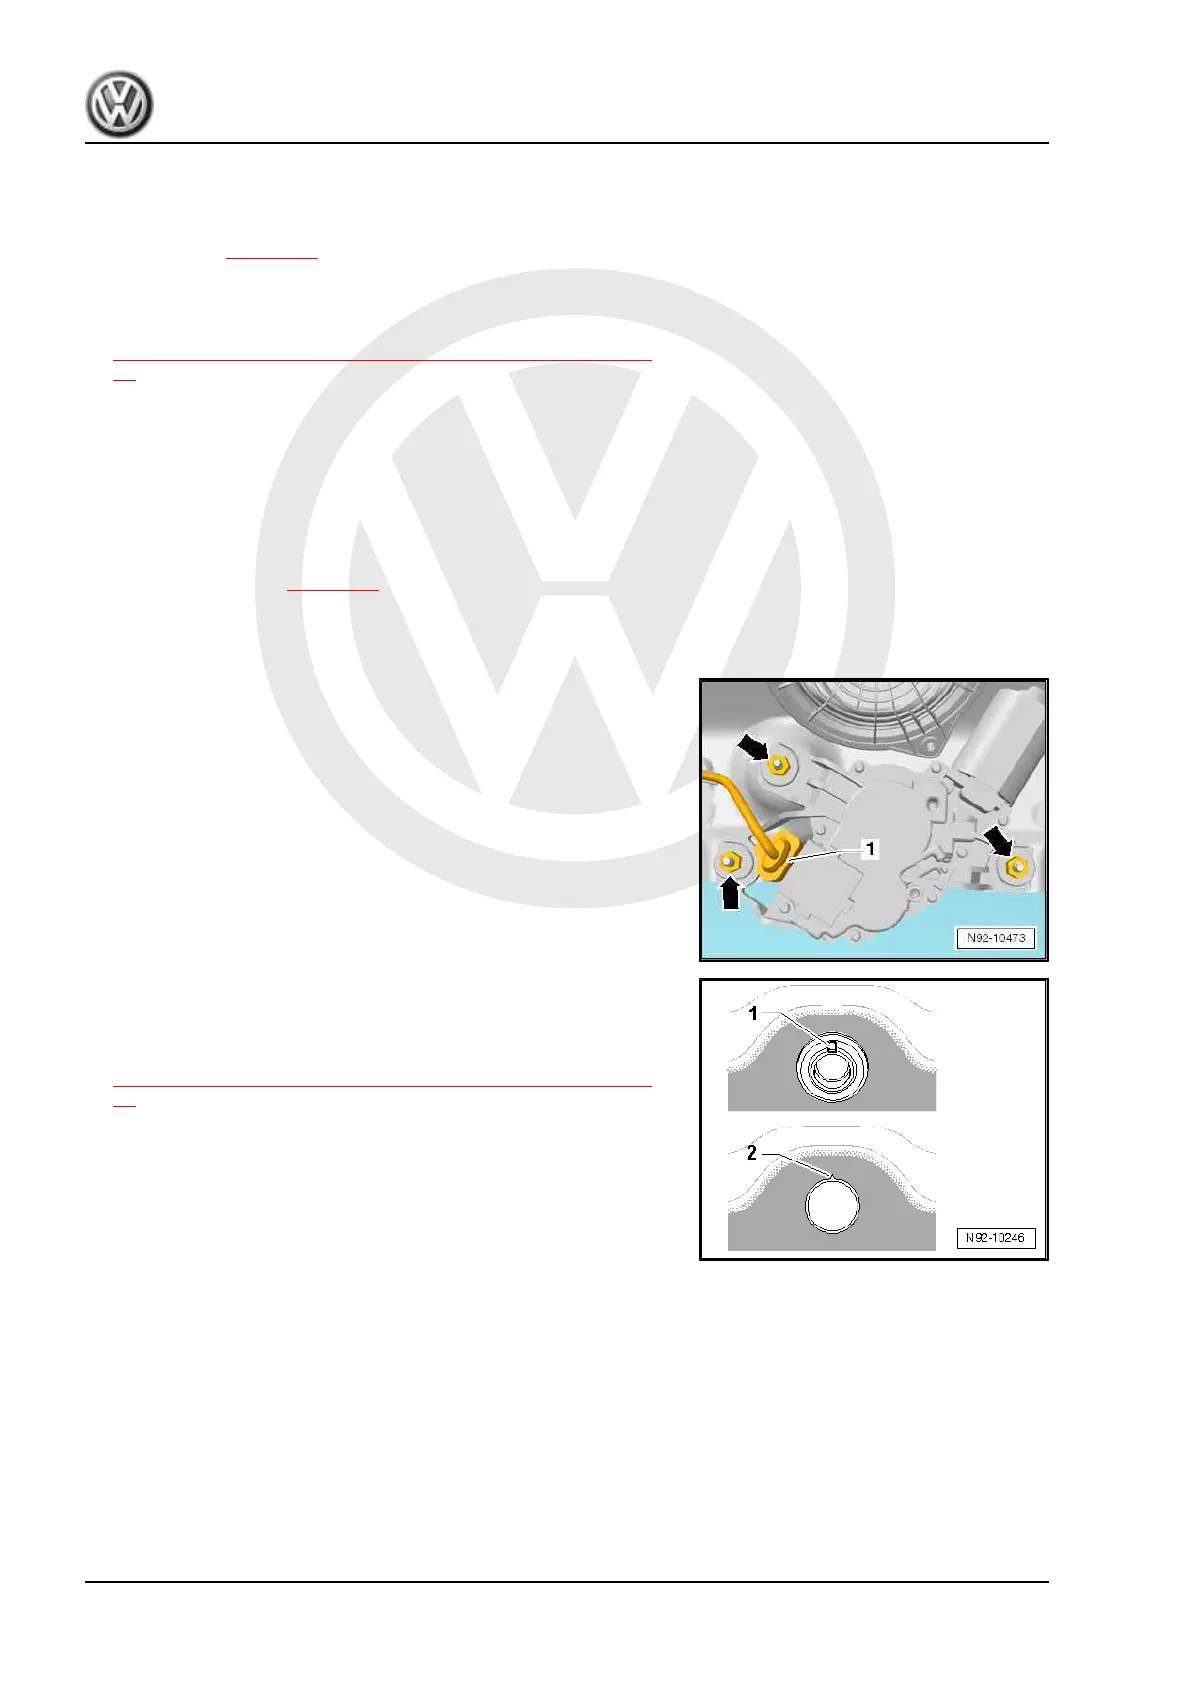
– Release and pull off connector -1-.
– Remove securing nuts -arrows-.
– Remove rear window wiper motor - V12- -4-.
Installing
Install in the reverse order of removal observing the following:
– If necessary, moisten inner side of rear window seal with rub‐
ber and plastic compatible lubricant (e.g. polyethylene glycol).
– Check seal is seated correctly in opening of rear window. Mark
-1- on seal must align with mark -2- on rear window.
Specified torques
♦ ⇒ “3.1 Assembly overview - rear window wiper system”, page
57
up! 2012 ➤
Electrical system - Edition 03.2017
60 Rep. gr.92 - Windscreen wash/wipe system

 Loading...