P
r
o
t
e
c
t
e
d
b
y
c
o
p
y
r
i
g
h
t
.
C
o
p
y
i
n
g
f
o
r
p
r
i
v
a
t
e
o
r
c
o
m
m
e
r
c
i
a
l
p
u
r
p
o
s
e
s
,
i
n
p
a
r
t
o
r
i
n
w
h
o
l
e
,
i
s
n
o
t
p
e
r
m
i
t
t
e
d
u
n
l
e
s
s
a
u
t
h
o
r
i
s
e
d
b
y
V
o
l
k
s
w
a
g
e
n
A
G
.
V
o
l
k
s
w
a
g
e
n
A
G
d
o
e
s
n
o
t
g
u
a
r
a
n
t
e
e
o
r
a
c
c
e
p
t
a
n
y
l
i
a
b
i
l
i
t
y
w
i
t
h
r
e
s
p
e
c
t
t
o
t
h
e
c
o
r
r
e
c
t
n
e
s
s
o
f
i
n
f
o
r
m
a
t
i
o
n
i
n
t
h
i
s
d
o
c
u
m
e
n
t
.
C
o
p
y
r
i
g
h
t
b
y
V
o
l
k
s
w
a
g
e
n
A
G
.
❑ Changing headlights over from driving on right to driving on left ⇒ page 73
❑ Changing headlights over from driving on left to driving on right ⇒ page 74
1.2 Removing and installing headlight
Special tools and workshop equipment required
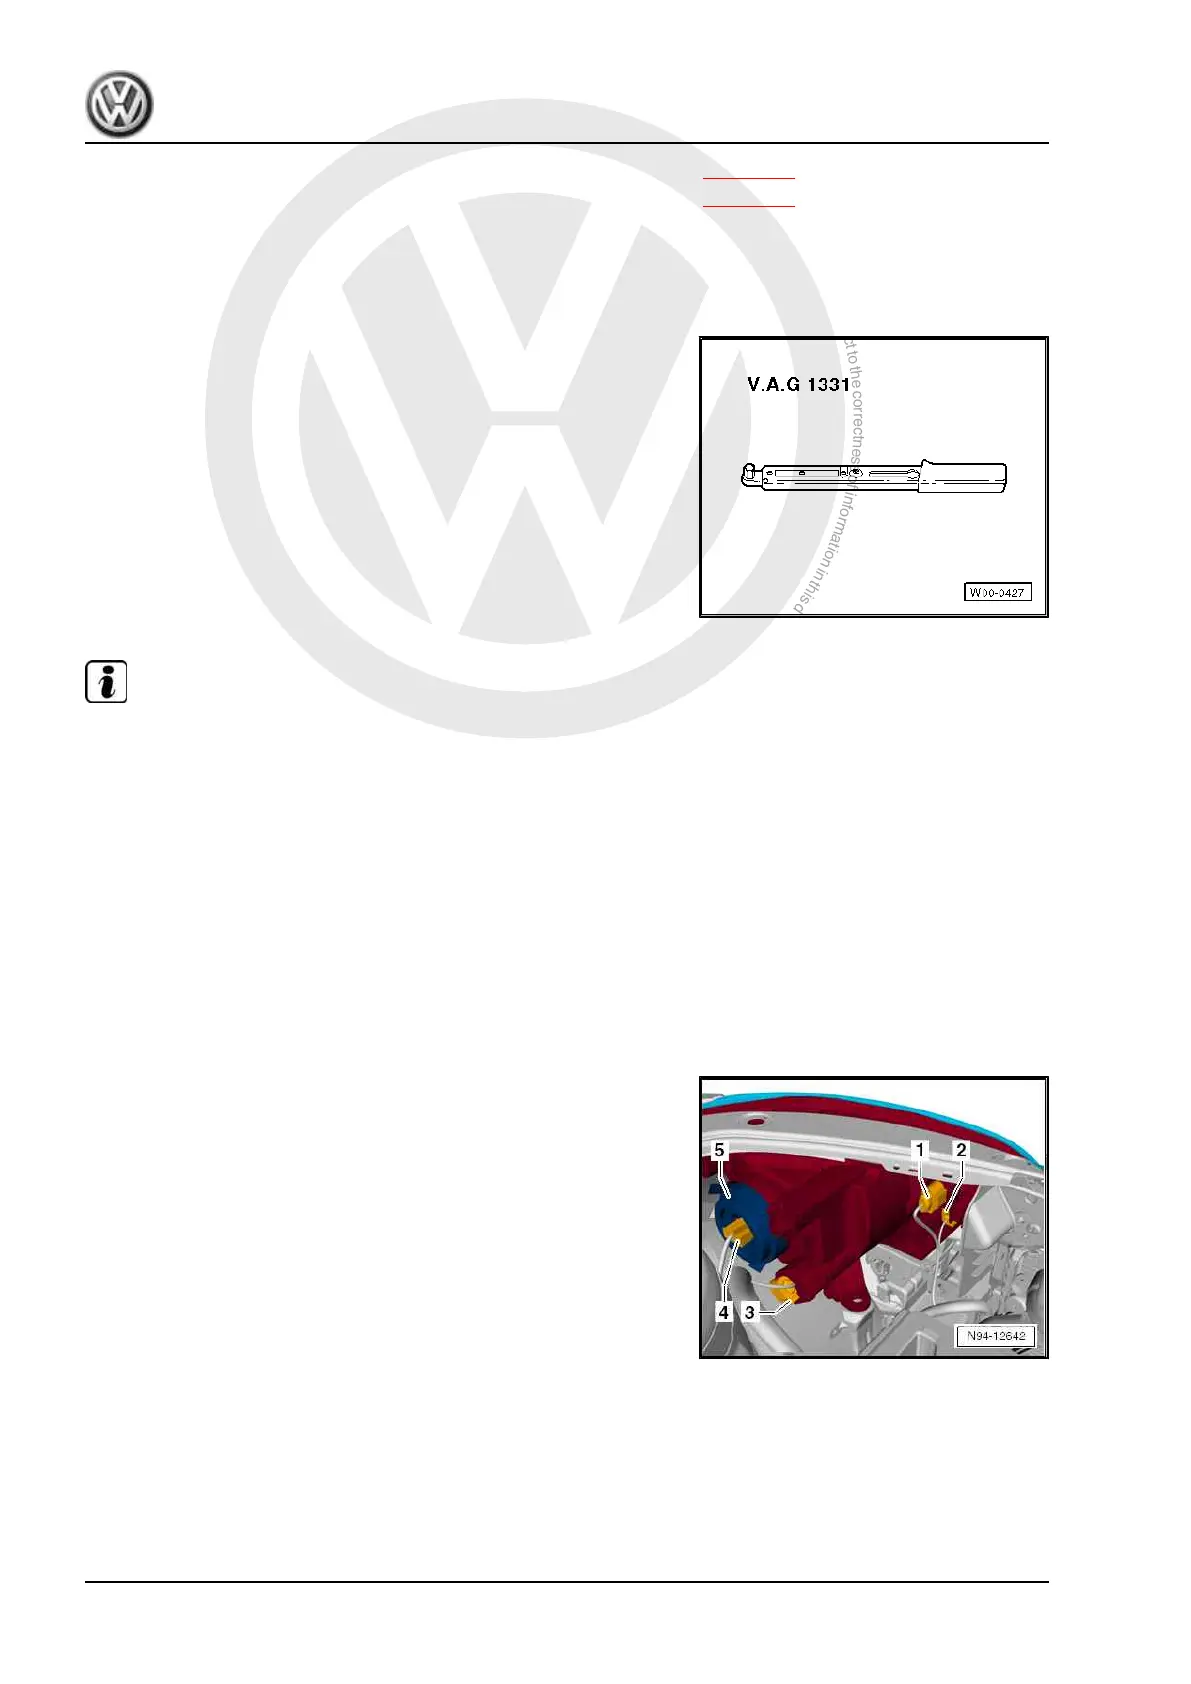
♦ Torque wrench - V.A.G 1331-
Note
♦
It is not necessary to disconnect the battery earth wire.
♦
The illustrations show removal and installation of the left head‐
light. The removal and installation of the right headlight follows
the same principle.
♦
If a headlight is removed, it should always be adjusted follow‐
ing installation ⇒ Maintenance ; Booklet 35.1 ; Description of
work .
Removing
– Switch off ignition and all electrical consumers, and withdraw
ignition key.
– Remove front bumper cover ⇒ General body repairs, exterior;
Rep. gr. 63 ; Front bumper; Assembly overview - front bumper
cover .
– Release connectors -1-, -2-, -3- and -4- and pull them off.
up! 2012 ➤
Electrical system - Edition 03.2017
66 Rep. gr.94 - Lights, bulbs, switches - exterior

 Loading...