g
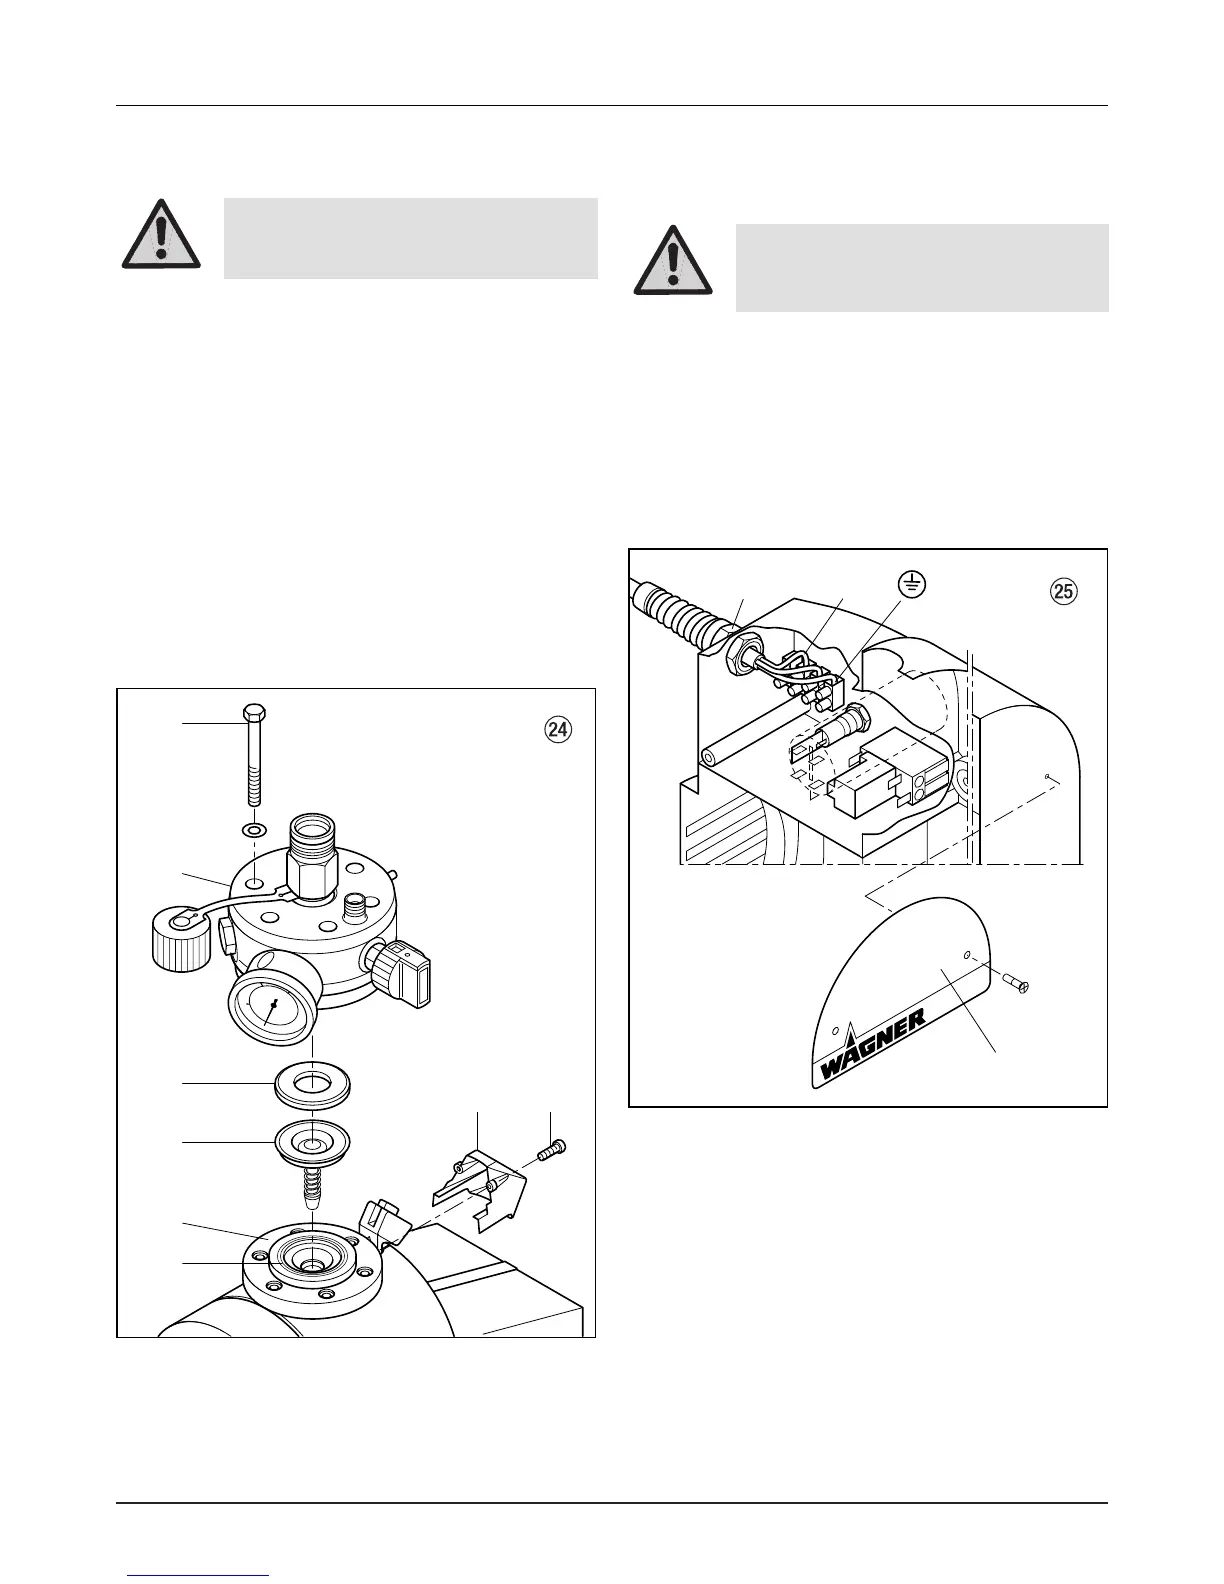
11.5 Exchanging diaphragm (fig. 24)
1. Unscrew both screws (1) from the hood (2).
2. Screw hexagonal screws (3) from the flange ring
(4) with spanner 19 mm.
3. Remove paint section (5).
4. Remove insert (6) and diaphragm (7).
5. The diaphragm can only be used once. Always
replace diaphragm.
– Before mounting, clean and dry diaphragm,
insert and built-in areas on screw flange (8) and
on paint section (5).
Mounting takes place in teh reverse oder
6. First of all tighten hexagonal screws (3) with 10
Nm, then crosswise with 70 Nm.
Repairs on the unit
11.6 Replace unit connection line
(fig. 25)
1. Dismount trolley or frame.
2. Unscrew nameplate (1) from the front of the
housing.
3. Screw off housing half with socket and remove.
4. Loosen cable connection (2).
5. Loosen cord in the mains connection terminal (3).
6. Replace unit connection line.