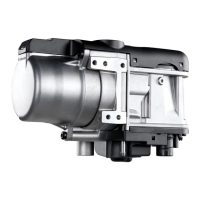
Thermo Top Evo 8Servicing work
803
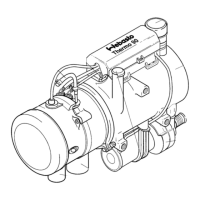
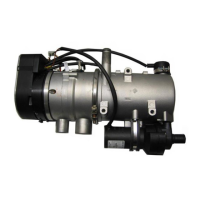
8.6.2 Installation
1 Move heater into specified installation position and
tighten heater screws to 8 Nm.
NOTE
The screw must be carefully inserted in the existing threads
and screwed in by hand.
2 Mount fuel line and secure with hose clamp.
3 Mount coolant hoses and secure with clamps.
4 Restore all electrical connections.
5 Connect combustion air pipe and exhaust pipe.
6 Connect vehicle battery.
7 Bleed coolant circuit.
8 Bleed vehicle fuel system if necessary.
IMPORTANT
A polarity reversal of the power supply can result in damage
to the control unit. The correct polarity of the connection
wires must be ensured. A direct connection to a power sup-
ply without an intermediate fuse is not permissible.
8.7 Recommissioning
To support bleeding of the coolant circuit, the circulating
pump must be put into operation via the Component test
function of the Webasto Thermo Test PC Diagnosis.
IMPORTANT
Before the heater is commissioned, the coolant temperature
should be < 30°C, as otherwise the heater may not go into
combustion operation.The heater must be put into opera-
tion with the Webasto Thermo Test PC Diagnosis.
With the fuel line completely drained, the line must be filled
with the Webasto Thermo Test PC Diagnosis: Press the fill
line button and prime line with fuel until fuel is present at
the heater. All coolant and fuel connections must be
checked for leaks and secure attachment during a trial run
of the heater.
Visit www.butlertechnik.com for more technical information and downloads.
 Loading...