14
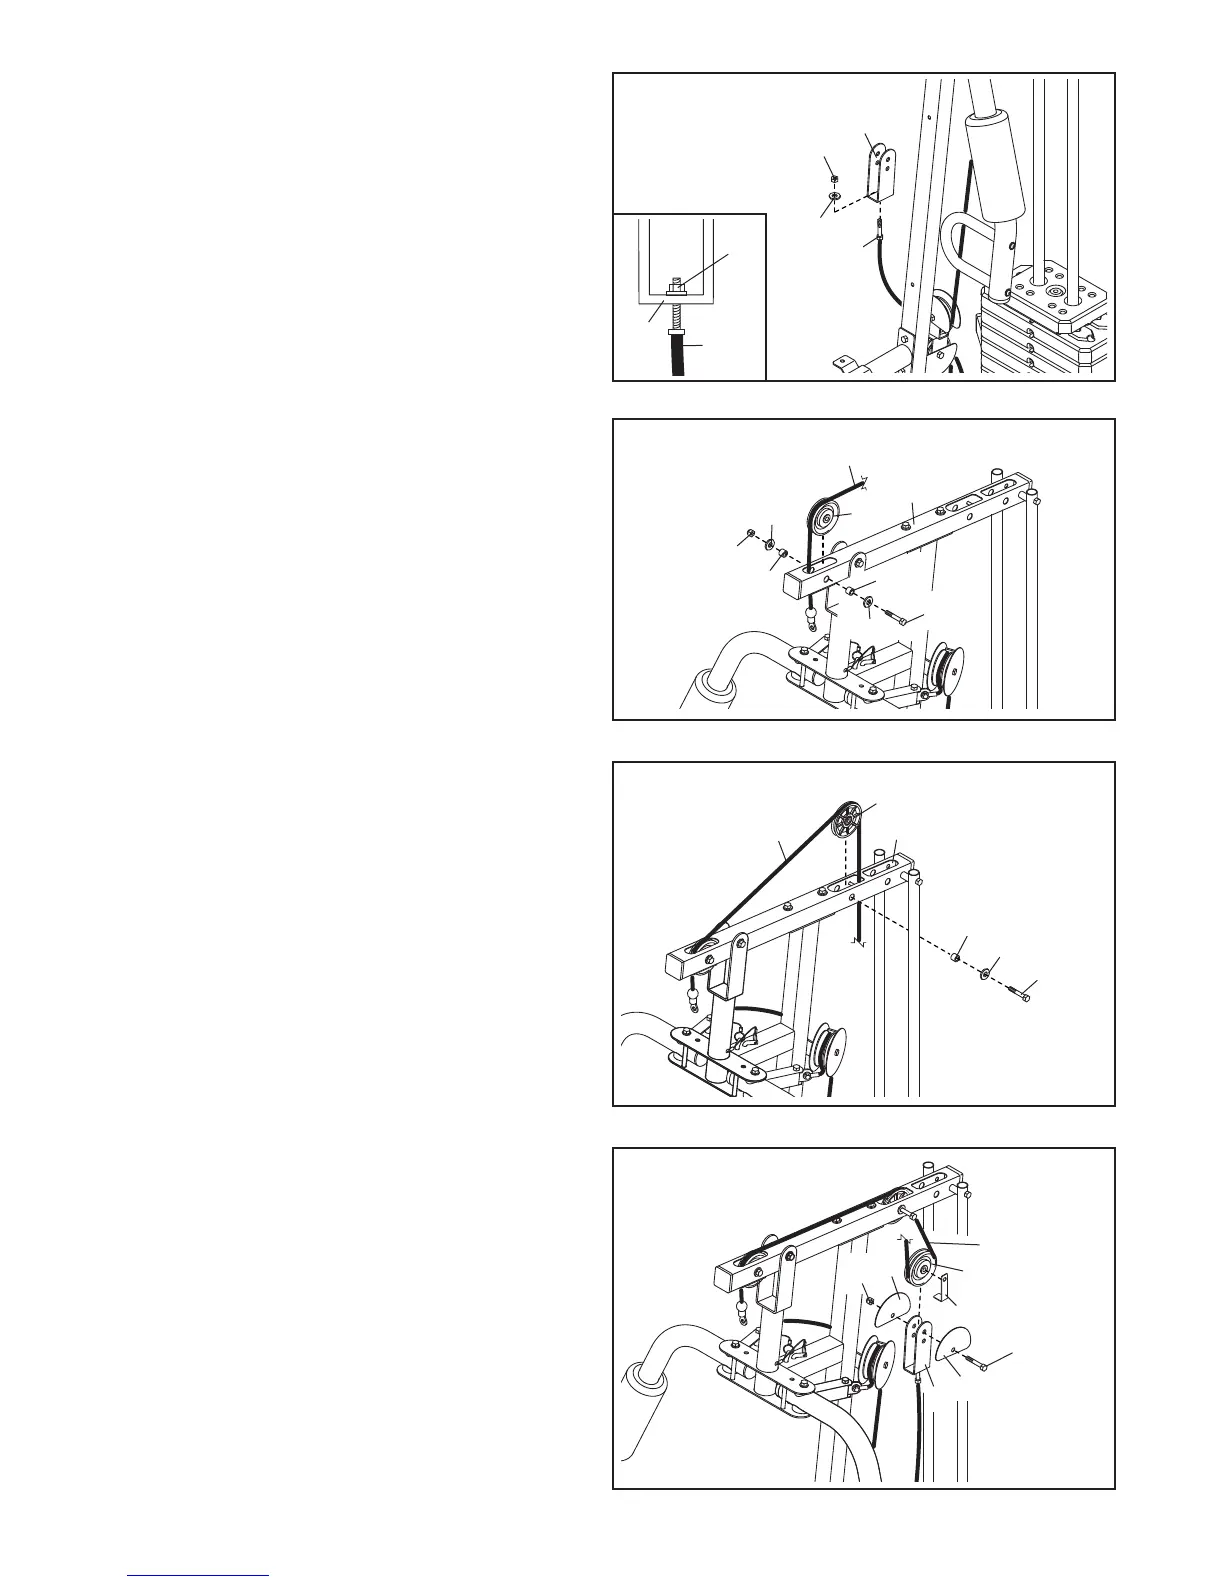
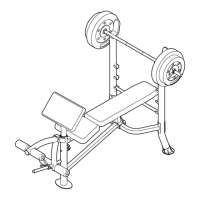
22. Identify the High Cable (55). Route the Cable
up through the Top Frame (4) and over a 90mm
Pulley (48). Attach the Pulley inside the Top
Frame with an M10 x 67mm Bolt (71), two M10
Washers (57), two 12mm Spacers (52), and an
M10 Nylon Locknut (56).
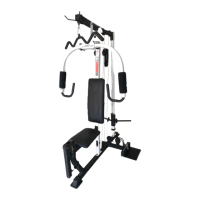
23. Route the High Cable (55) over a 90mm Thin
Pulley (47) and down through the Top Frame
(4). Attach the Thin Pulley inside the Top Frame
with an M10 x 67mm Bolt (71), an M10 Washer
(57), and an 11mm Spacer (49). Make sure
that the Thin Pulley does not fall out of the
Top Frame while you complete steps 24 and
26.
21. Attach the Low Cable (53) to the U-bracket (45)
with an M8 Washer (59) and an M8 Nylon
Locknut (58). See the inset drawing. Do not
o
vertighten the Nylon Locknut; it should be
threaded onto the end of the Cable so that
o
nly two threads are showing above the
Nylon Locknut.
4
55
49
57
47
71
23
56
4
55
52
52
57
57
48
22
58
45
59
53
21
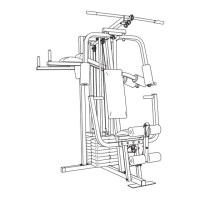
24. Wrap the High Cable (55) under a 90mm Pulley
(48). Attach the Pulley, a Cable Trap (51), and
two Half Guards (43) at the upper hole in the U-
bracket (45) with an M10 x 51mm Bolt (66) and
an M10 Nylon Locknut (56). Make sure that
the Cable Trap is oriented to hold the Cable
in the groove of the Pulley and that the Half
Guards are on the outside of the U-bracket.
66
51
56
48
55
43
43
45
24
71
53
45
58