i/:Z:
iiii!
ii i
iil'n _
iI,!,1
ii I,,IJ
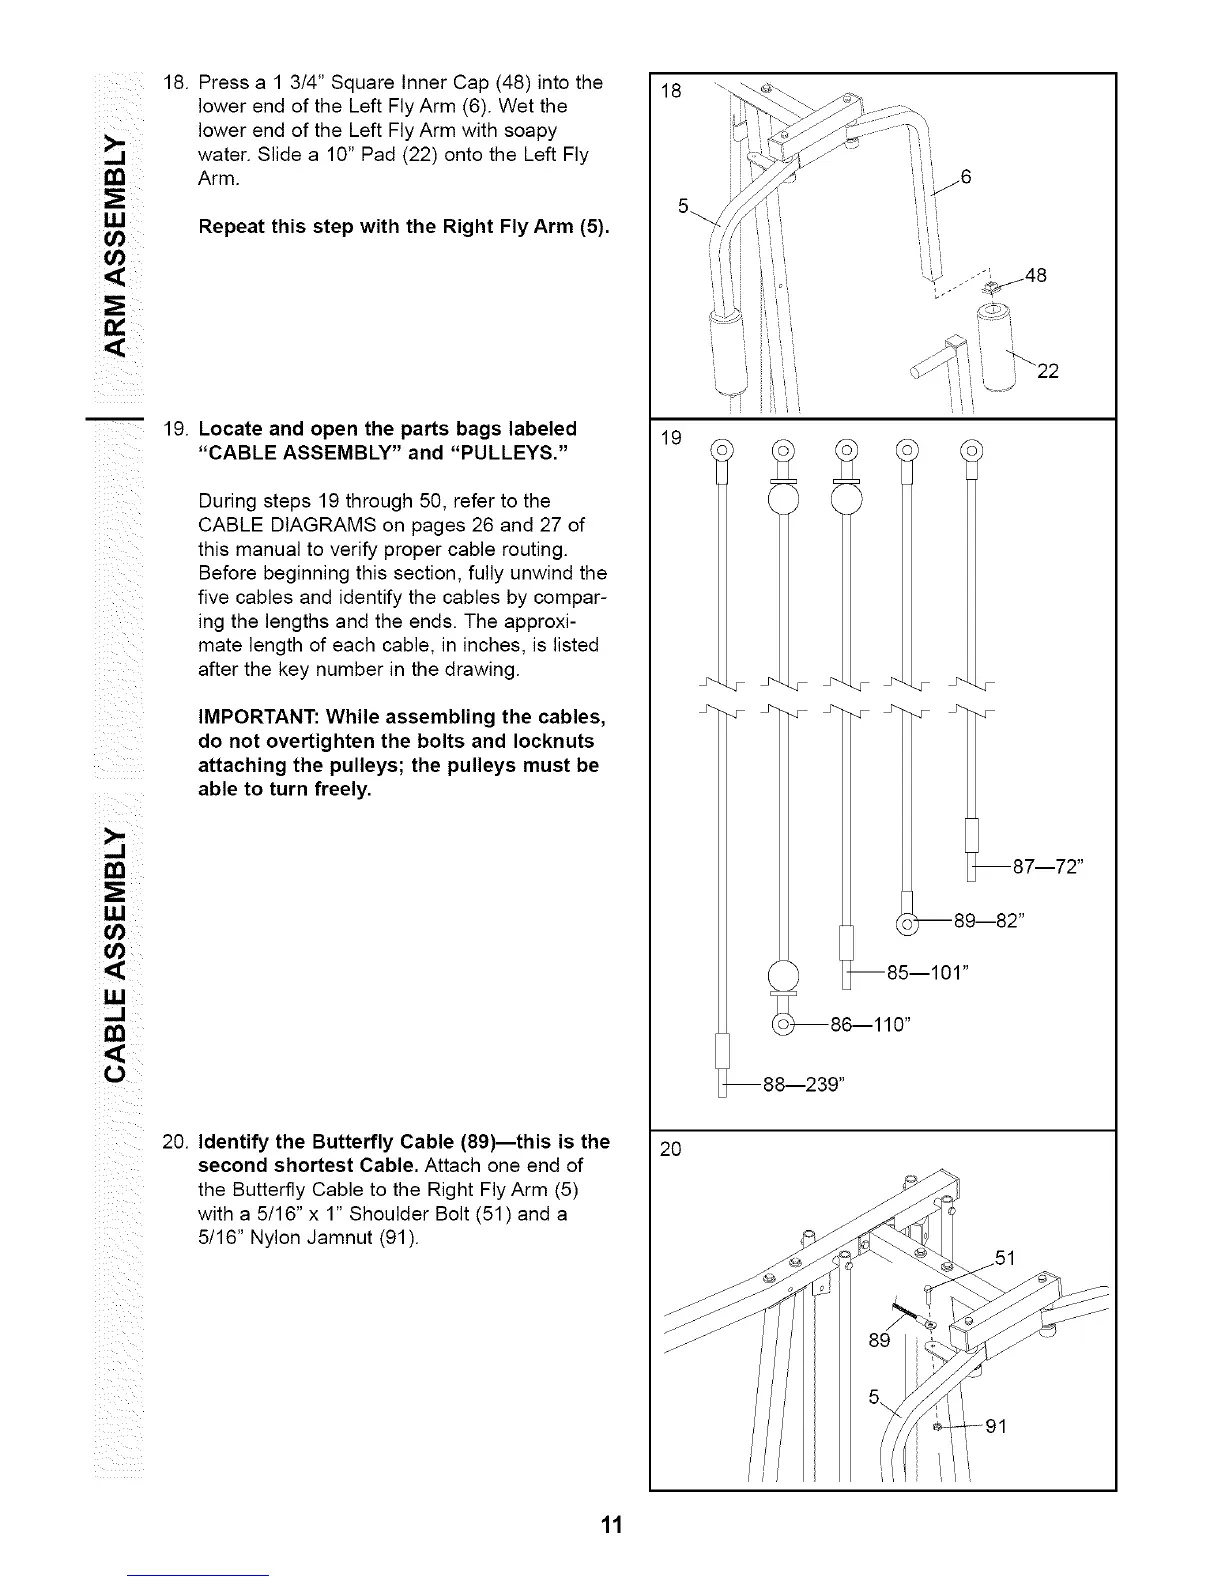
18. Press a 1 3/4" Square Inner Cap (48) into the
lower end of the Left Fly Arm (6). Wet the
lower end of the Left Fly Arm with soapy
water. Slide a 10" Pad (22) onto the Left Fly
Arm.
Repeat this step with the Right Fly Arm (5).
19.
Locate and open the parts bags labeled
"CABLE ASSEMBLY" and "PULLEYS."
During steps 19 through 50, refer to the
CABLE DIAGRAMS on pages 26 and 27 of
this manual to verify proper cable routing.
Before beginning this section, fully unwind the
five cables and identify the cables by compar-
ing the lengths and the ends. The approxi-
mate length of each cable, in inches, is listed
after the key number in the drawing.
IMPORTANT: While assembling the cables,
do not overtighten the bolts and Iocknuts
attaching the pulleys; the pulleys must be
able to turn freely.
20. Identify the Butterfly Cable (89)--this is the
second shortest Cable. Attach one end of
the Butterfly Cable to the Right Fly Arm (5)
with a 5/16" x 1" Shoulder Bolt (51) and a
5/16" Nylon Jamnut (91).
18
5_.
19
j,..
2O
i_ii
..v
--88--239"
11