¸l,Ll¸
iil,l,I _
i_iiiiii
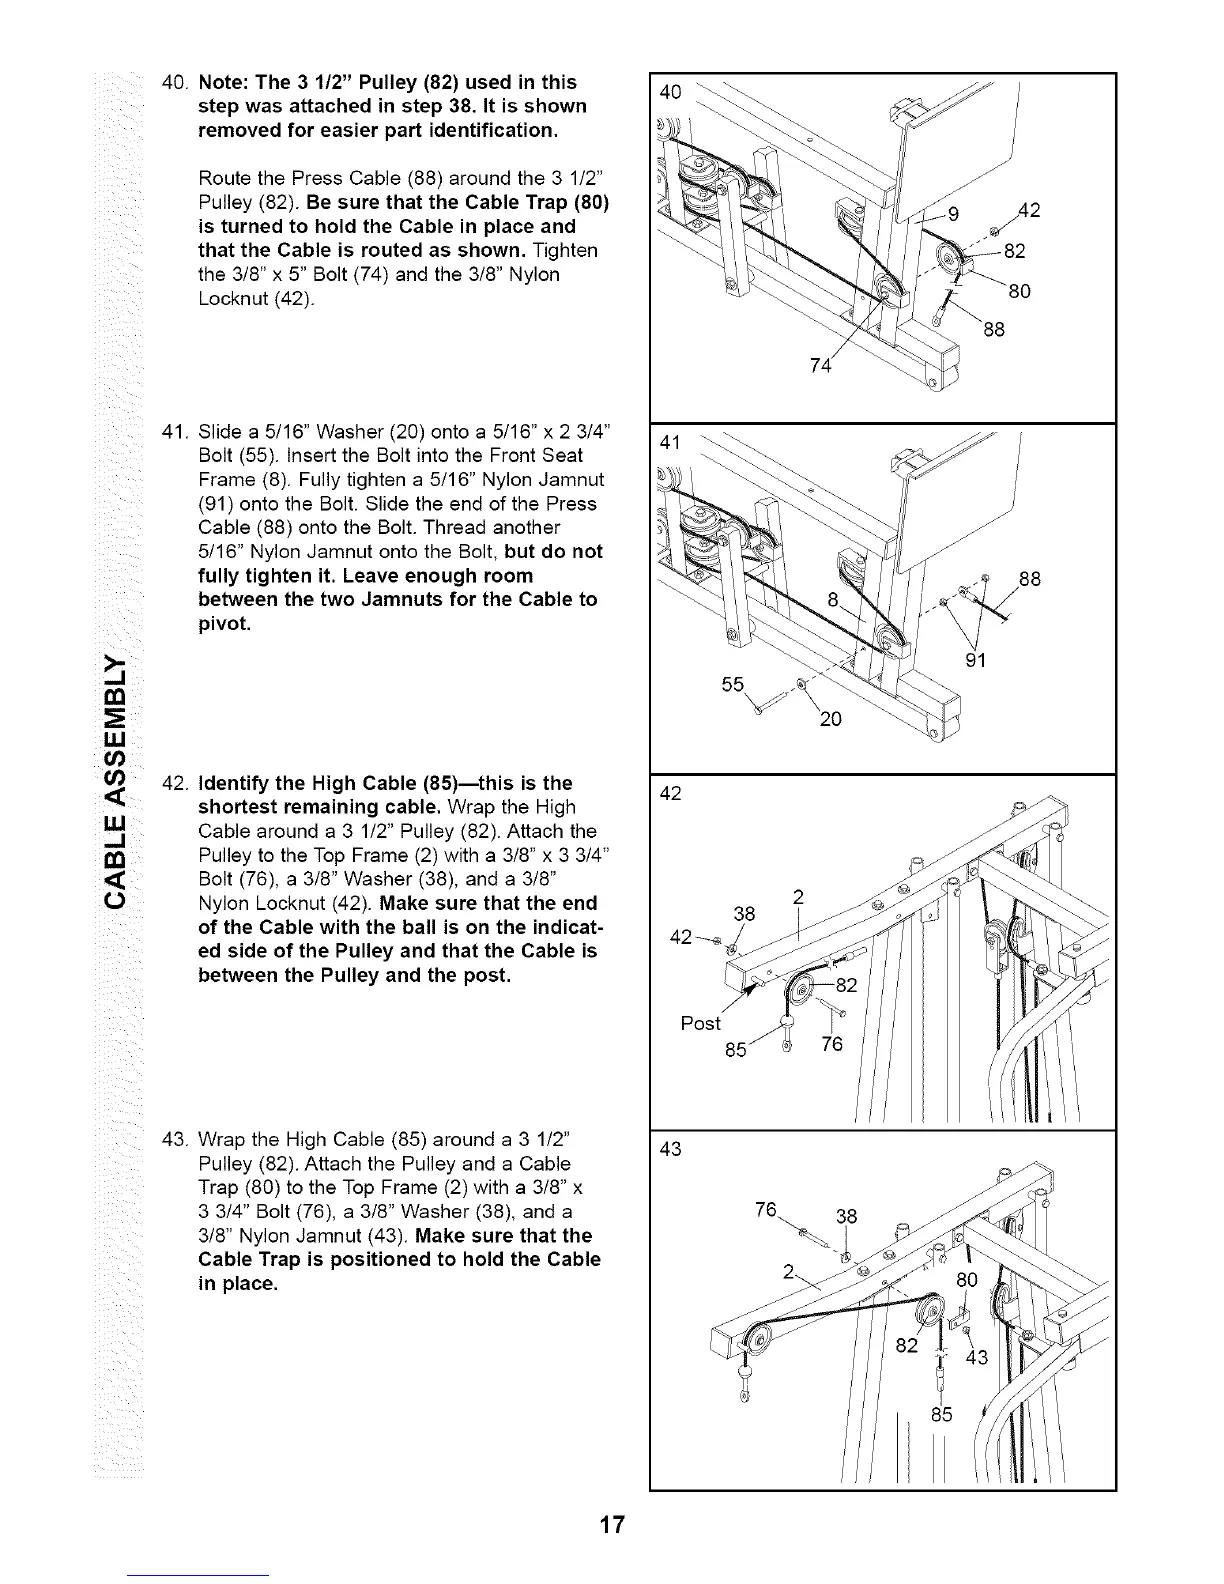
40.
Note: The 3 1/2" Pulley (82) used in this
step was attached in step 38. It is shown
removed for easier part identification.
Route the Press Cable (88) around the 3 1/2"
Pulley (82). Be sure that the Cable Trap (80)
is turned to hold the Cable in place and
that the Cable is routed as shown. Tighten
the 3/8" x 5" Bolt (74) and the 3/8" Nylon
Locknut (42).
41.
Slide a 5/16" Washer (20) onto a 5/16" x 2 3/4"
Bolt (55). Insert the Bolt into the Front Seat
Frame (8). Fully tighten a 5/16" Nylon Jamnut
(91) onto the Bolt. Slide the end of the Press
Cable (88) onto the Bolt. Thread another
5/16" Nylon Jamnut onto the Bolt, but do not
fully tighten it. Leave enough room
between the two Jamnuts for the Cable to
pivot.
42.
Identify the High Cable (85)--this is the
shortest remaining cable. Wrap the High
Cable around a 3 1/2" Pulley (82). Attach the
Pulley to the Top Frame (2) with a 3/8" x 3 3/4"
Bolt (76), a 3/8" Washer (38), and a 3/8"
Nylon Locknut (42). Make sure that the end
of the Cable with the ball is on the indicat-
ed side of the Pulley and that the Cable is
between the Pulley and the post.
43. Wrap the High Cable (85) around a 3 1/2"
Pulley (82). Attach the Pulley and a Cable
Trap (80) to the Top Frame (2) with a 3/8" x
3 3/4" Bolt (76), a 3/8" Washer (38), and a
3/8" Nylon Jamnut (43). Make sure that the
Cable Trap is positioned to hold the Cable
in place.
55
91
88
42
2
38
Post
85
43
85
17