¸l,Ll¸
iil,l,I _
t,J
i_iiiiii
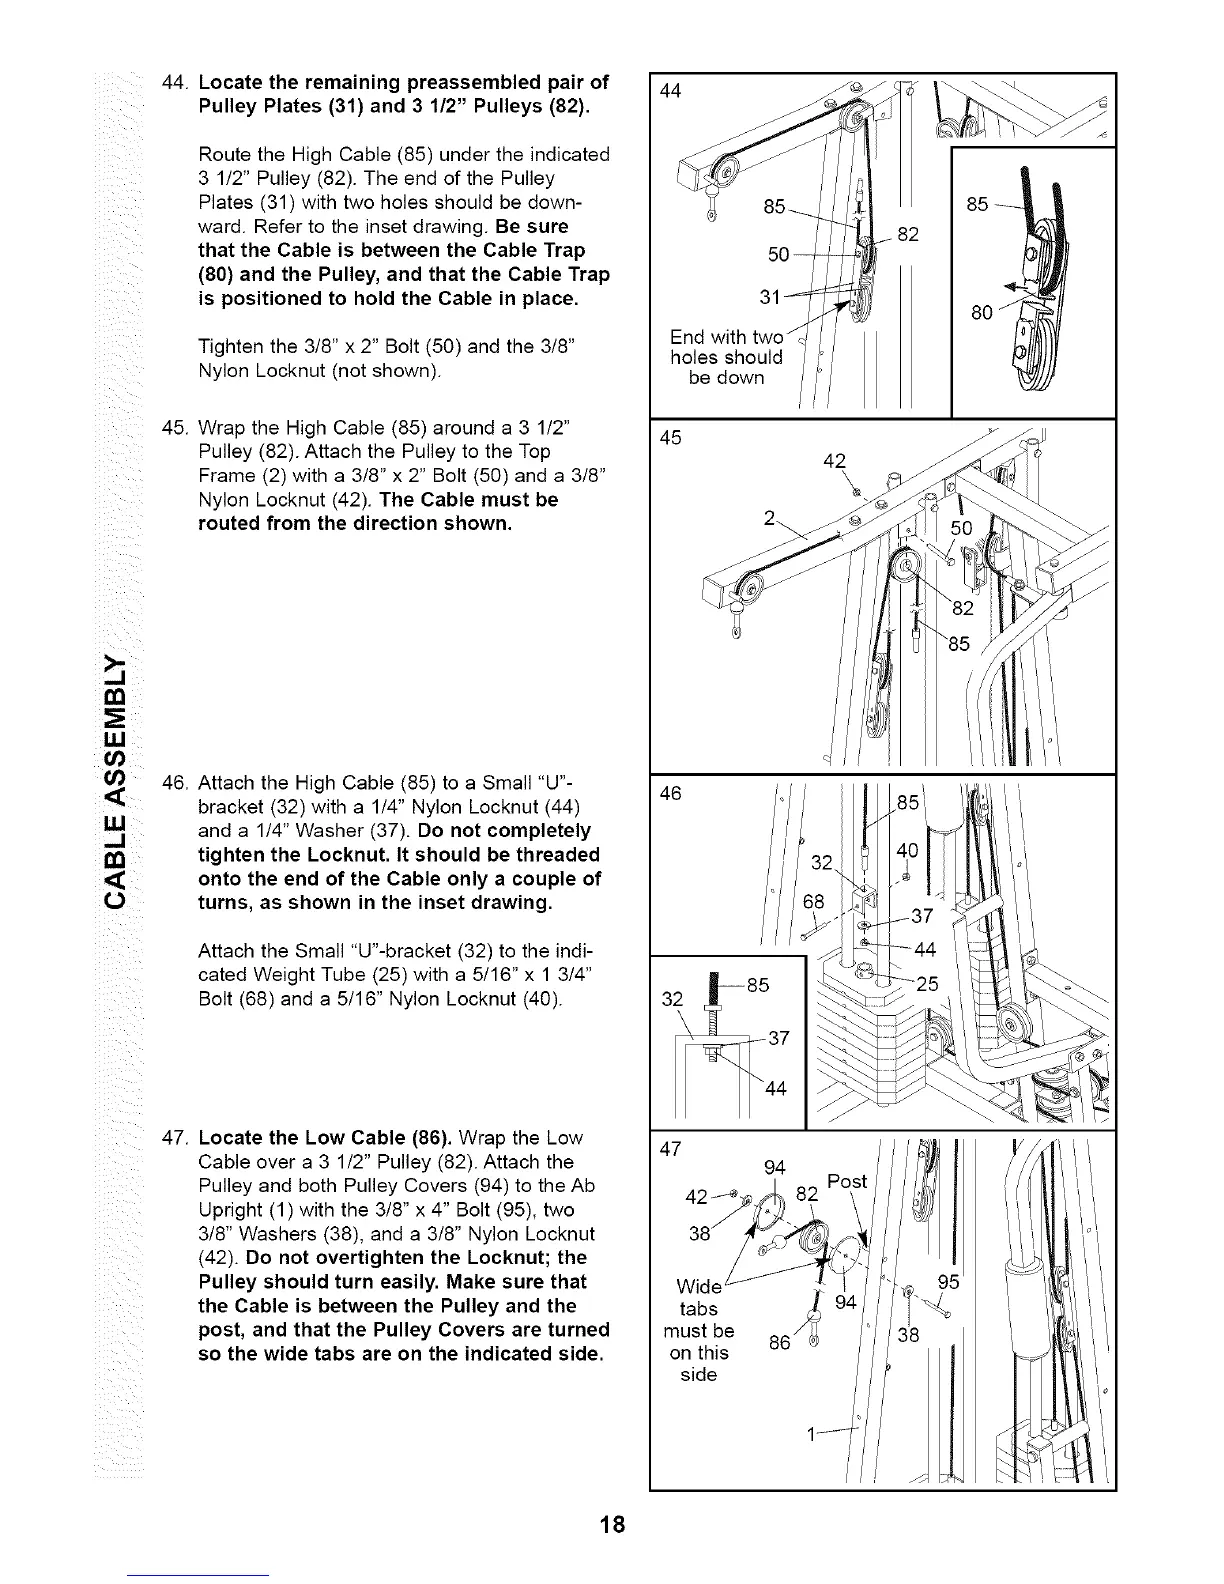
44.
45.
Locate the remaining preassembled pair of
Pulley Plates (31) and 3 1/2" Pulleys (82).
Route the High Cable (85) under the indicated
3 1/2" Pulley (82). The end of the Pulley
Plates (31) with two holes should be down-
ward. Refer to the inset drawing. Be sure
that the Cable is between the Cable Trap
(80) and the Pulley, and that the Cable Trap
is positioned to hold the Cable in place.
Tighten the 3/8" x 2" Bolt (50) and the 3/8"
Nylon Locknut (not shown).
Wrap the High Cable (85) around a 3 1/2"
Pulley (82). Attach the Pulley to the Top
Frame (2) with a 3/8" x 2" Bolt (50) and a 3/8"
Nylon Locknut (42). The Cable must be
routed from the direction shown.
46.
Attach the High Cable (85) to a Small "U"-
bracket (32) with a 1/4" Nylon Locknut (44)
and a 1/4" Washer (37). Do not completely
tighten the Locknut. It should be threaded
onto the end of the Cable only a couple of
turns, as shown in the inset drawing.
Attach the Small "U"-bracket (32) to the indi-
cated Weight Tube (25) with a 5/16" x 1 3/4"
Bolt (68) and a 5/16" Nylon Locknut (40).
47.
Locate the Low Cable (86). Wrap the Low
Cable over a 3 1/2" Pulley (82). Attach the
Pulley and both Pulley Covers (94) to the Ab
Upright (1) with the 3/8" x 4" Bolt (95), two
3/8" Washers (38), and a 3/8" Nylon Locknut
(42). Do not overtighten the Locknut; the
Pulley should turn easily. Make sure that
the Cable is between the Pulley and the
post, and that the Pulley Covers are turned
so the wide tabs are on the indicated side.
44
5O
31
End with
holes should
be down
Wide
tabs /_
must be 86
on this
side
18