6 Replacing components
Back to contents >
Merrychef conneX
®
service and repair manual 76
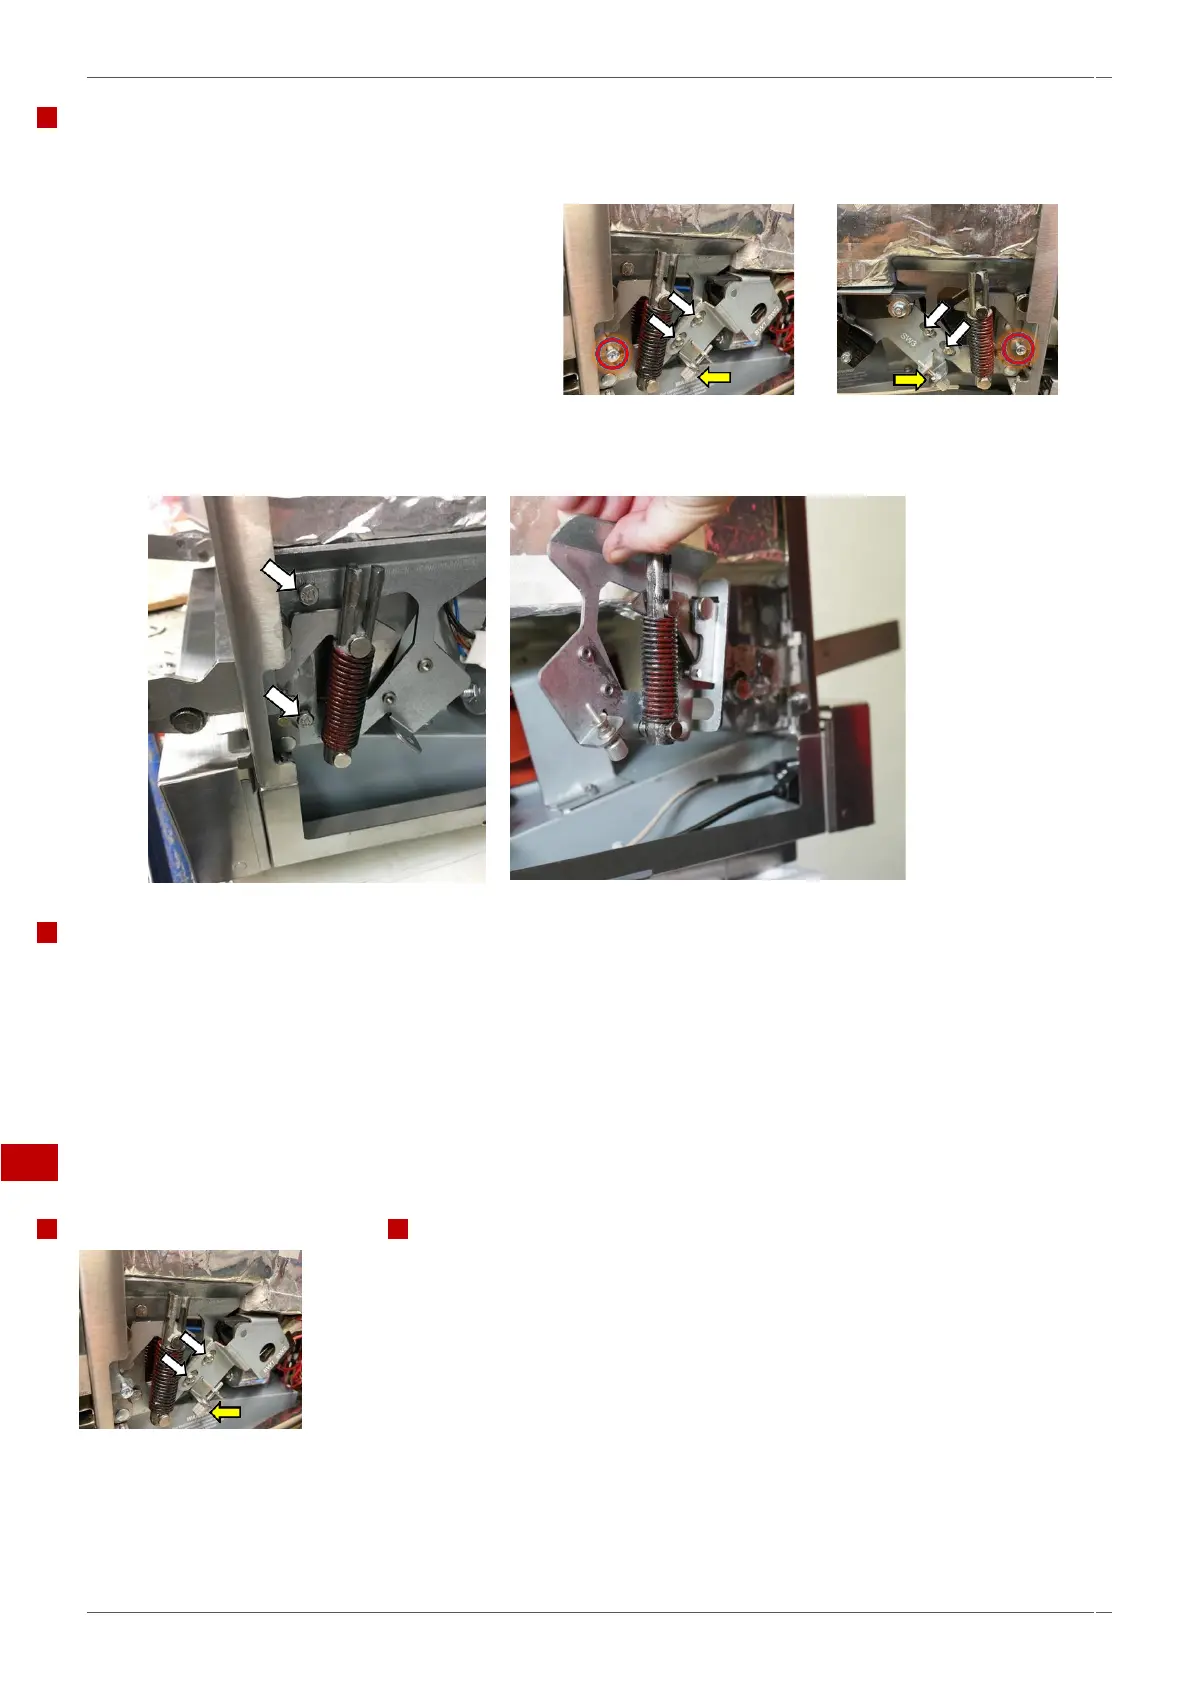
Removing the door hinge assemblies
Firstly, follow the steps to remove the door from the oven as detailed previously.
1. Slacken the flange nuts and unscrew the
interlock adjuster from the switch assembly
bracket.
2. Unfasten and remove the four M4 x10 hex Head
Flange Bolts (two each side) securing the switch
assemblies from both hinges.
3. Ensure the locking pins are fitted to both door
hinges.
4. Unfasten and remove the four M5 x 10 hex head bolts (two each side) securing the hinge assemblies to the cavity.
5. Slide the hinges out through the holes on the cavity front face.
Refitting the door hinge assemblies
Follow the steps in the reverse order to refit the door hinge assemblies to the oven.
The hinge assembly bolts should be torqued up to 3.5Nm.
The switch assembly adjuster and fixing bolts should be torqued up to 2.1Nm.
Refit the door as previously described.
Set the door switch adjustment and ensure the operation is correct.
6.5 Adjusting the door microswitches/interlocks
Component
Requirements
Check that the following requirements have been met:
The appliance has been disconnected from the power supply and protective
measures have been taken to ensure the power cannot be switched on again.
The appliance is cool.
The top and side panels of the casing of the appliance have been removed.
The high voltage capacitors are discharged before commencing work.
Adjust the microswitches after refitting or replacing old with new door hinges.
Adjust the microswitches after refitting the door or replacement of the door seal.
Adjust the microswitches after refitting or replacing old with new door switches.
Adjust the microswitches after determining incorrect operation during route service and maintenance.
 Loading...