6 Replacing components
Back to contents >
Merrychef conneX
®
service and repair manual 79
6.6 Replacing the door gasket
Tools required
Suitable gloves
Stanley / retractable knife
High temperature sealant
Cloth for wiping residue
Requirements
Check that the following requirements have been met:
The appliance has been disconnected from the power supply and protective
measures have been taken to ensure the power cannot be switched on again.
The appliance is cool.
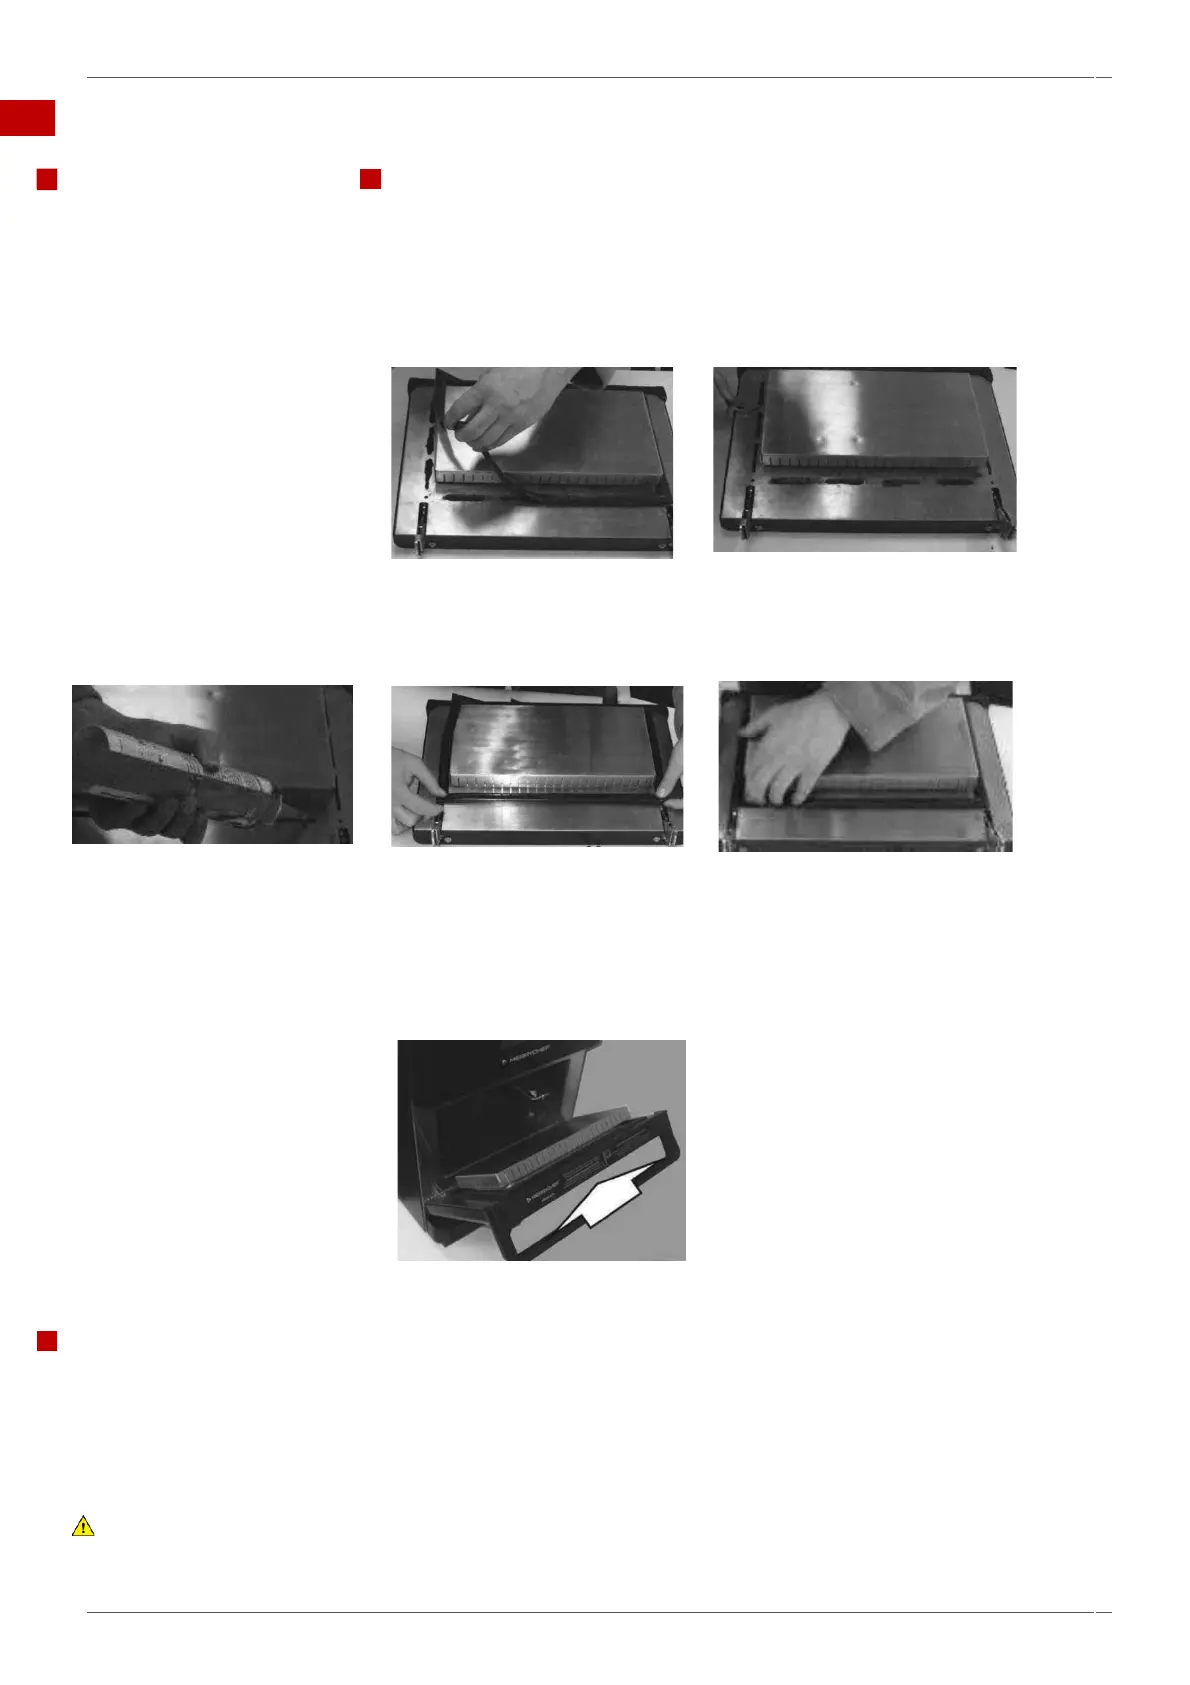
1. Place a Stanley / retractable
knife blade underneath the
door seal and go all the way to
break the seal.
Ensure you do all four sides
avoiding the metal clips on each
corner.
Please ensure all safety aspects
are adhered to while working
with a sharp knife
4. Apply a continuous thin bead
of Merrychef approved high
temperature sealant around the
existing door seal area. Ensure
you do all four sides.
2. Gently pull the metal clip out
of each corner and lift off the
door seal.
5. Place the new door seal over the
door in the same place as the old
one and insert the metal clips in
each corner.
3. Remove remaining residue sealant using the
knife or similar to make the surface is as flat
and clean as possible.
6. Press down firmly to tightly secure the
door seal onto the door. Ensure it is level
and square. Wipe off any excess sealant
protruding for the door seal.
7. Leave to dry naturally. It will
need 24 hours to dry but the
heat of the oven can also be
used to dry the sealant,
speeding up the process.
Note: The door seal can be replaced without removing the door skin
Heating up the oven to dry the seal
1. Switch the oven on and let it heat up to 250°C (482°F)
2. Keep the door shut for two hours.
The oven will be ready for usage again after 2 hours
Note: This is a generic procedure for the complete range of
Merrychef combination ovens.
WARNING
Never use the oven without the door seal attached properly.
8. Close the door, then open and close
again to check the operation and
ensure the seal does not move.
Leave the door closed and let the
sealant cure.

 Loading...