Maintenance
32 Operating Manual MXPC 303 Z/603 T
8.3.1 Disassembly
The glassware must be removed and the separators must be emptied (see
chapter 6.3 End of process) before dismantling.
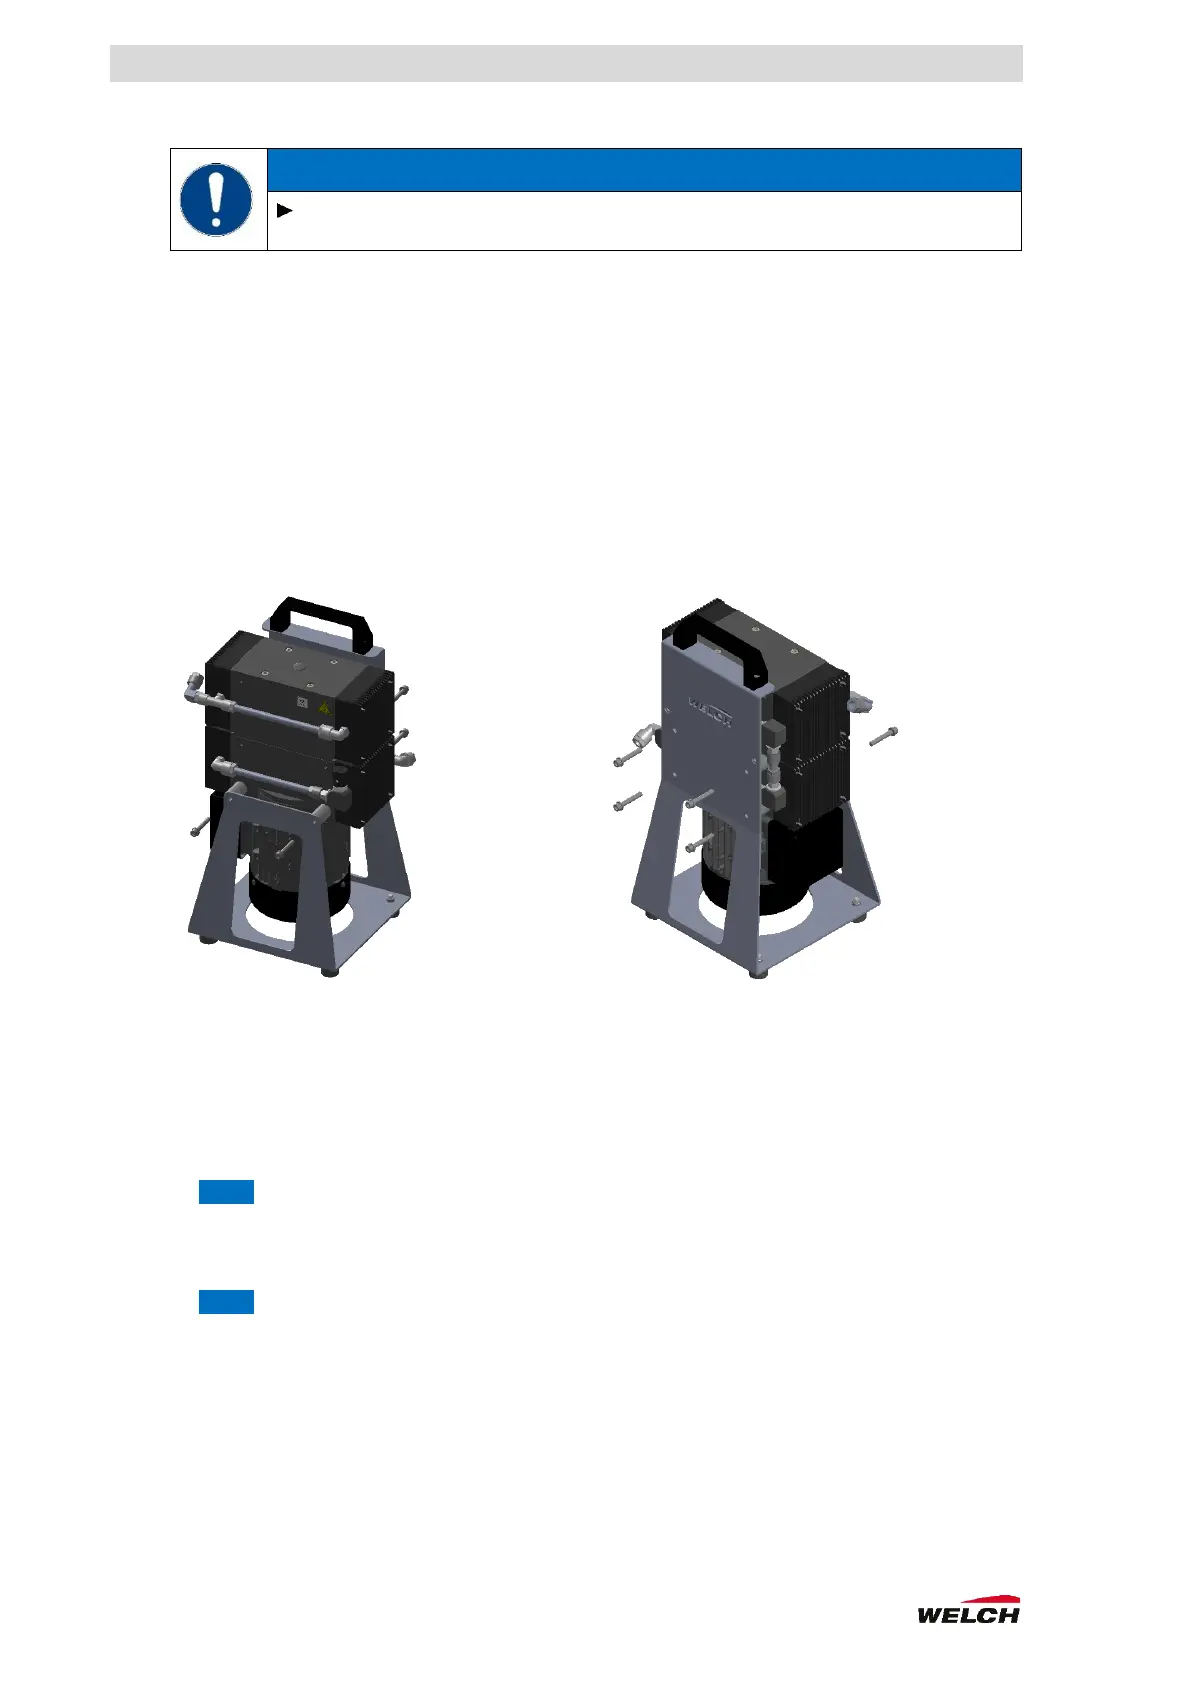
Removing the pump from the carrier (Fig. 8-1)
1. Loosen and disconnect the pneumatic connection to the pump.
2. Turn the rear of the device upwards to position horizontally:
a. Loosen the screws (2x) on the pump/carrier,
b. Remove spacers and screws.
3. Turn the front of the device upwards to position horizontally:
a. Loosen screws on pump/carrier
MXPC 303Z (2x)
MXPC 603T (4x)
b. Remove spacers and screws.
4. Separate pump and carrier.
Fig. 8-1. Loosening the screw connections: rear(left), front (right)
Pumping unit (Fig. 8-2)
1. Loosen the compression fittings (2) at the hoses (1).
2. Loosen the cap screws (7).
3. Remove the heat sink (8).
4. Pull the valve insert (6) out of the pump head (4).
NOTE M5 threaded insert.
5. Remove valves (5) and O-rings (9/10).
6. Remove the pump head (4).
7. Loosen the diaphragm (3).
NOTE counter clockwise
8. Clean the pump head (3) if necessary (see chapter 8.2 Maintaining by cleaning).
9. Drive function check.