,
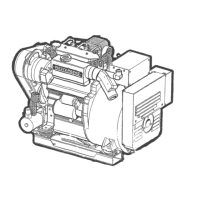
RAW
WATER
PUMP
IMPELLER
DESCRIPTION
Coolant (fresh water) cooled generators have dual water
pumps while the raw water cooled models use a single water
pump. The pumps are essentially the same. The upper pump
mounts to the top
of
the lower pump and has a tang on the
shaft that
fits
into the shaft
of
the lower pump. Both pumps
are driven simultaneously by the engines drive belt.
The following instructions apply to either pump.
PUMP
OVERHAUL
Disassembly
The pump, when removed from the engine will have the hose
attachment nipple threaded into the
inlet
and outlet ports
of
the pump along with a drive pulley attached to the shaft
of
the pump. Remove these attachments noting their positions
before starting the pump disassembly.
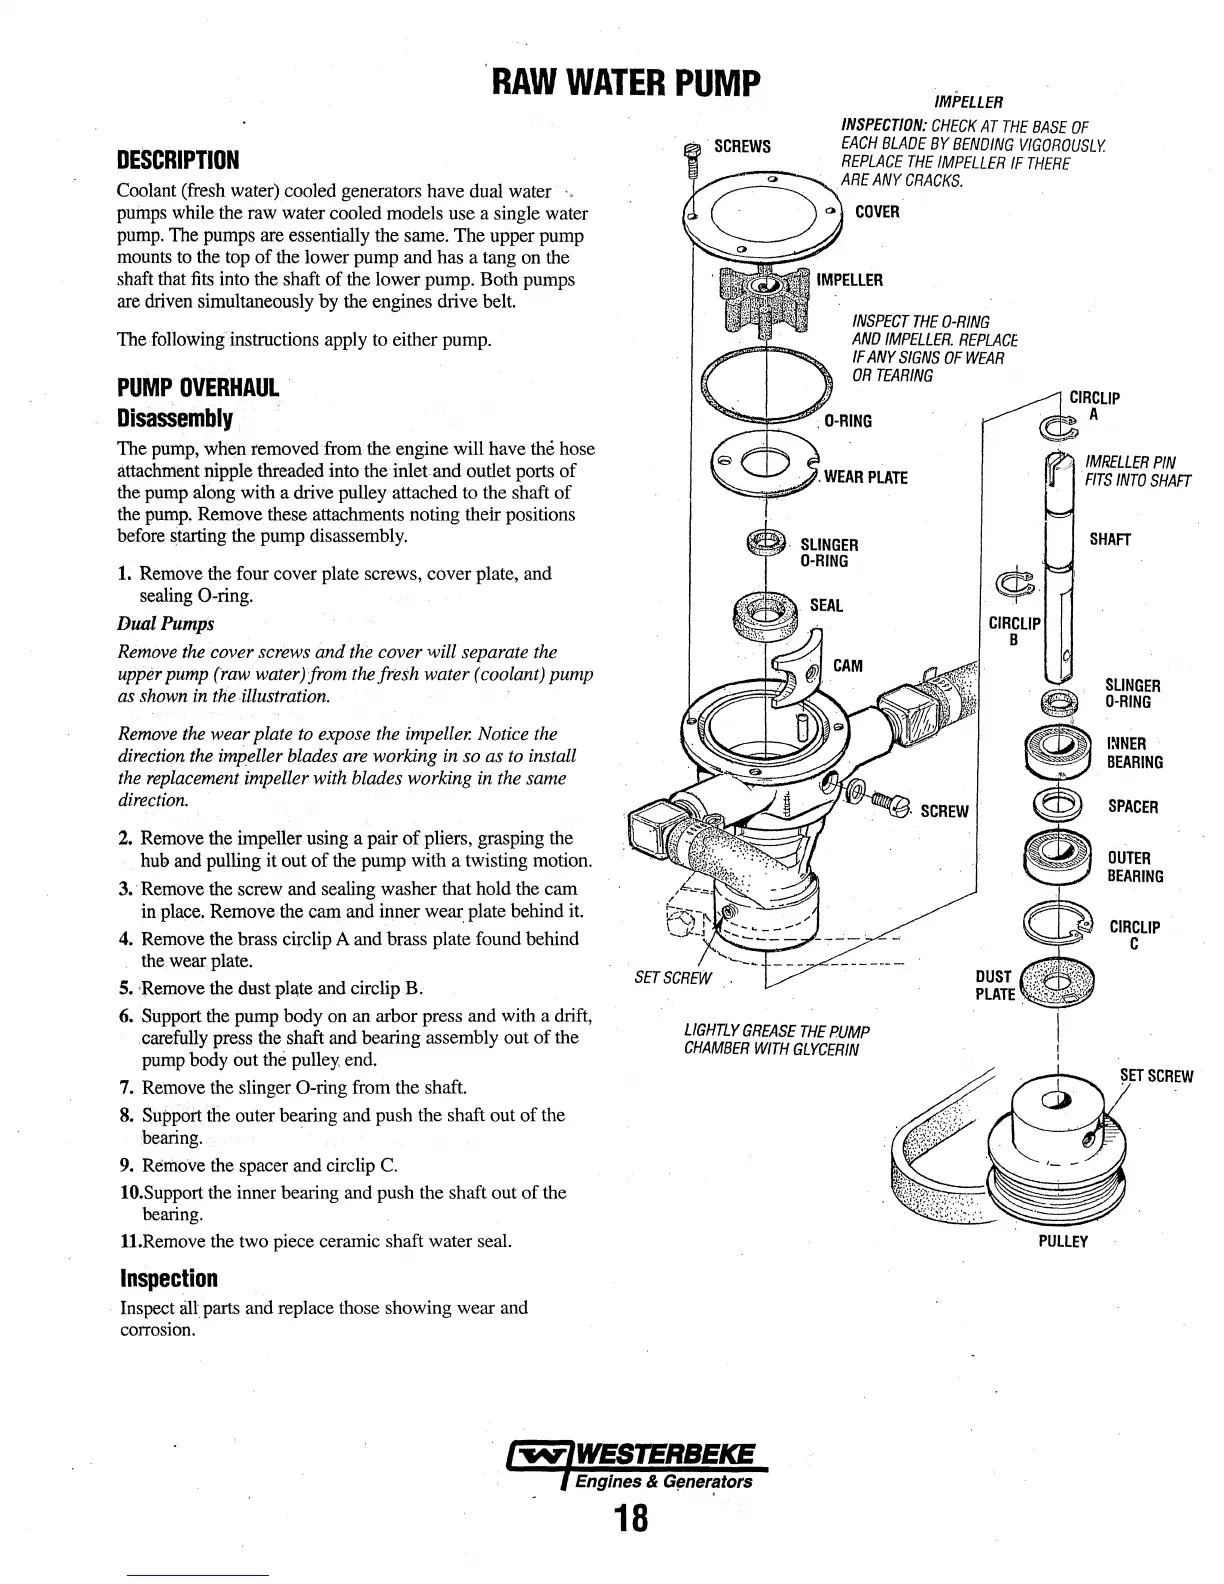
1.
Remove the four cover plate screws, cover plate, and
sealing 0-ring.
Dual
Pumps
Remove
the
cover
screws
and
the
cover will separate
the
upper
pump
(raw
water)
from
the
fresh water (coolant) pump
as
shown
in
the
illustration
Remove
the
wear plate
to
expose
the
impeller.
Notice
the
direction
the
impeller blades
are
working
in
so
as
to
install
the
replacement
impeller with blades working
in
the
same
direction.
2.
Remove the impeller using a pair
of
pliers, grasping the
hub and pulling it out
of
t11e
pump with a twisting motion.
3.
· Remove the screw and sealing washer that hold the cam
in place. Remove the cam and inner wear. plate behind
it.
4. Remove the brass circlip A and brass plate found behind
the wear plate.
5.
·Remove the dust
pla,te
and circlip B.
6.
Support the pump body on an arbor press and with a drift,
carefully press the shaft and bearing assembly out
of
fue
pump body out
fue
pulley end.
7.
Remove fue slinger
0-ring
from the shaft.
8.
Support fue outer bearing and push the shaft out
of
the
bearing.
·
9. Remove the spacer and circlip
C.
IO.Support the inner bearing and push the shaft out
of
the
bearing.
11.Remove the two piece ceramic shaft water seal.
Inspection
Inspect
all
parts and replace those showing wear and
corrosion.
INSPECTION:
CHECK
AT
THE
BASE
OF
EACH
BLADE
BY
BENDING
VIGOROUSLY.
REPLACE
THE
IMPELLER
IFTHERE
""
ARE
ANY
CRACKS.
~°'
COVER
INSPECT
THE
0-RING
ANO
IMPELLER.
REPLACE
IF
ANY
SIGNS
OF
WEAR
OR
TEARING
DUST
IMRELLER
PIN
FITS
INTO
SHAFT
SHAFT
SLINGER
0-RING
l~NER
BEARING
SPACER
OUTER
BEARING
°
CIRCLIP
c
PLATE
~.·
t'~~'cjf
LIGHTLY
GREASE
THE
PUMP
CHAMBER
WITH
GLYCERIN
PULLEY
Engines &
Gener~tors
18
 Loading...