67
WHILL Model C2/Ci2 User Manual
5
5. Assembly, adjustment, and disassembly
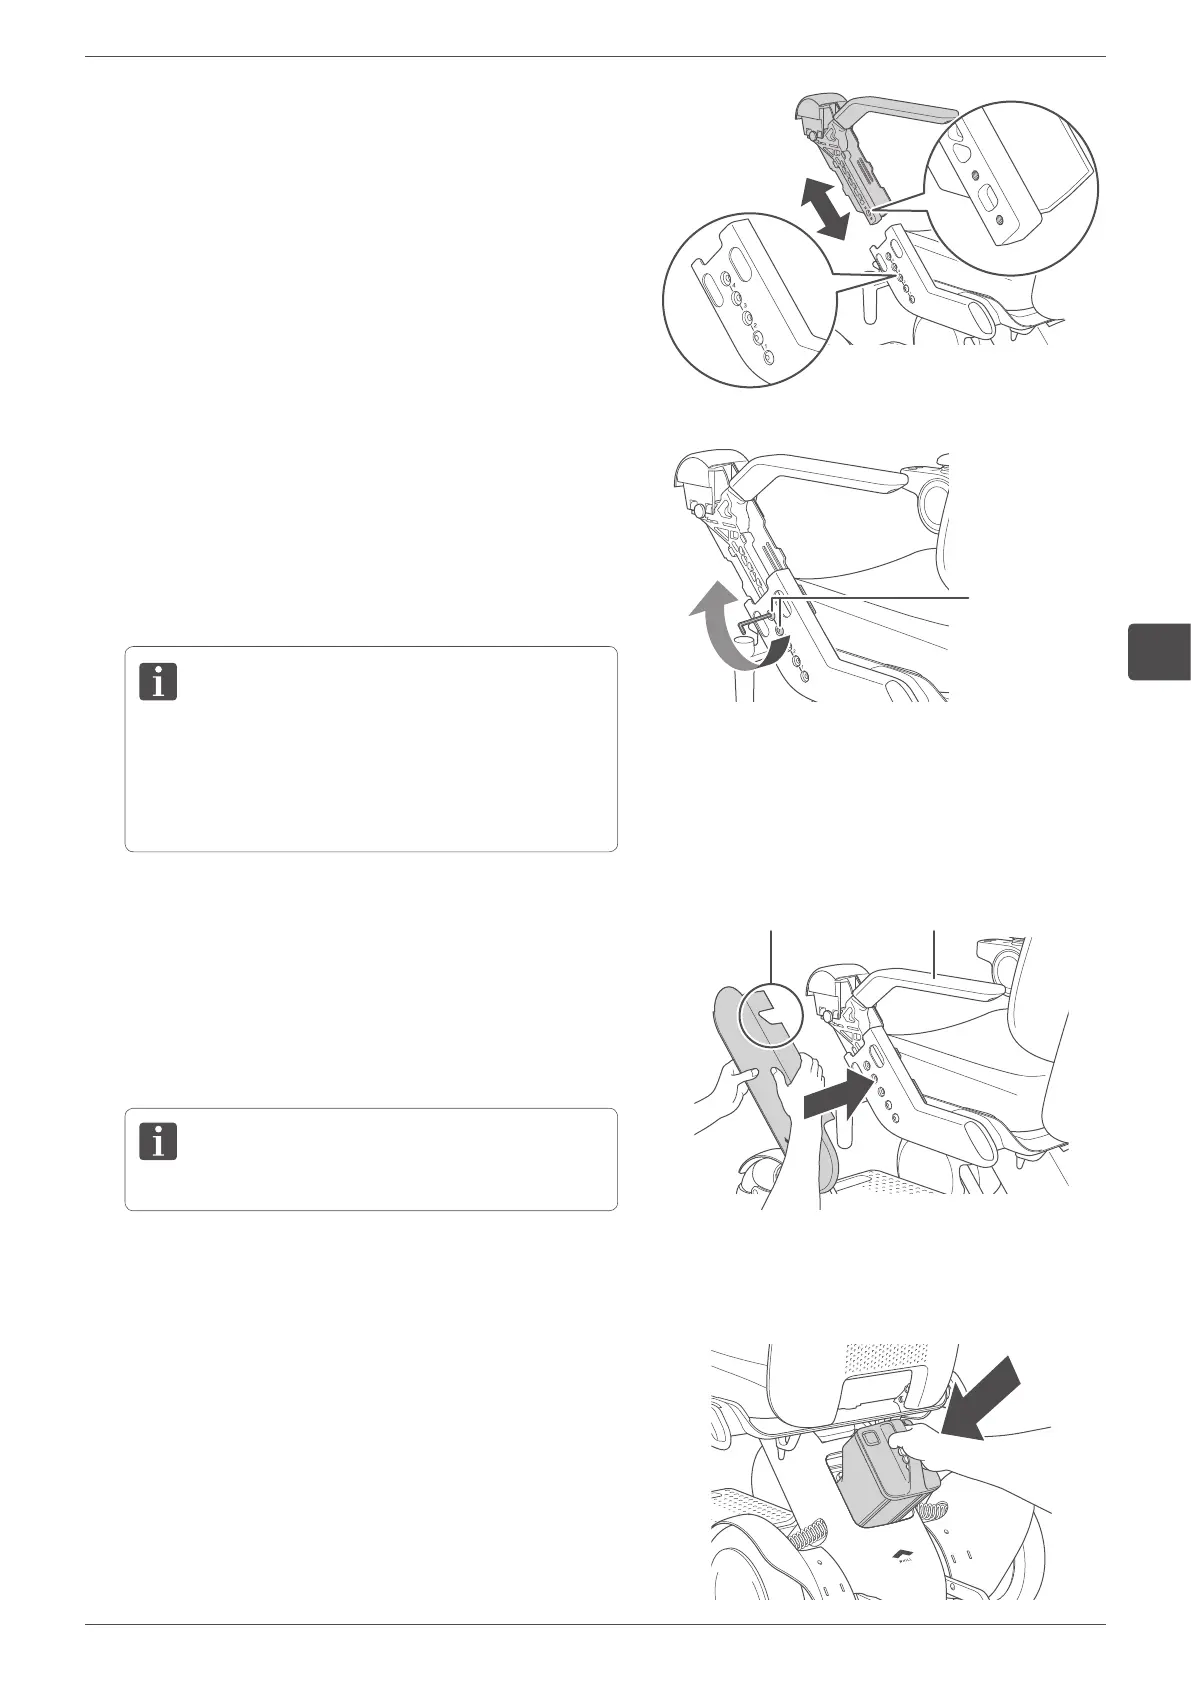
4.
Adjust the arm to the desired length.
Adjust the arm length so that each of the 2 holes in the
arm and device are aligned.
The arm length can be adjusted in 4 stages.
5.
Attach the arm by fastening the two arm adjustment
bolts that were removed in Step 3 with the specified tool.
Set the arm to the appropriate length and tighten the bolts
firmly with the specified tool. If a bolt is loose, tighten it.
Tool: hex wrench (or hex torque wrench) #5
Tightening torque: 10 Nm
• After adjustment is completed, try to slide the arm
up and down to confirm that it is locked in place
and does not slide.
• Do not touch the cable.
Arm adjustment
bolts
6.
Install the arm cover.
Align the tab on the center of the back side of the arm
cover so that it fits the arm rest. Gently bend the front-
facing and rear-facing sides of the arm cover outwards,
then press the arm cover into place with the cut out part
aligned.
Make certain the cable is not caught in the cover.
Arm restCut out
7.
Adjust the arm length on the opposite side in the same way.
8.
Install the battery.
For the installation procedure, refer to “5.2.4. Installing
the battery” on page 64.