PH 080718
Page 14 | 1-800-343-9463
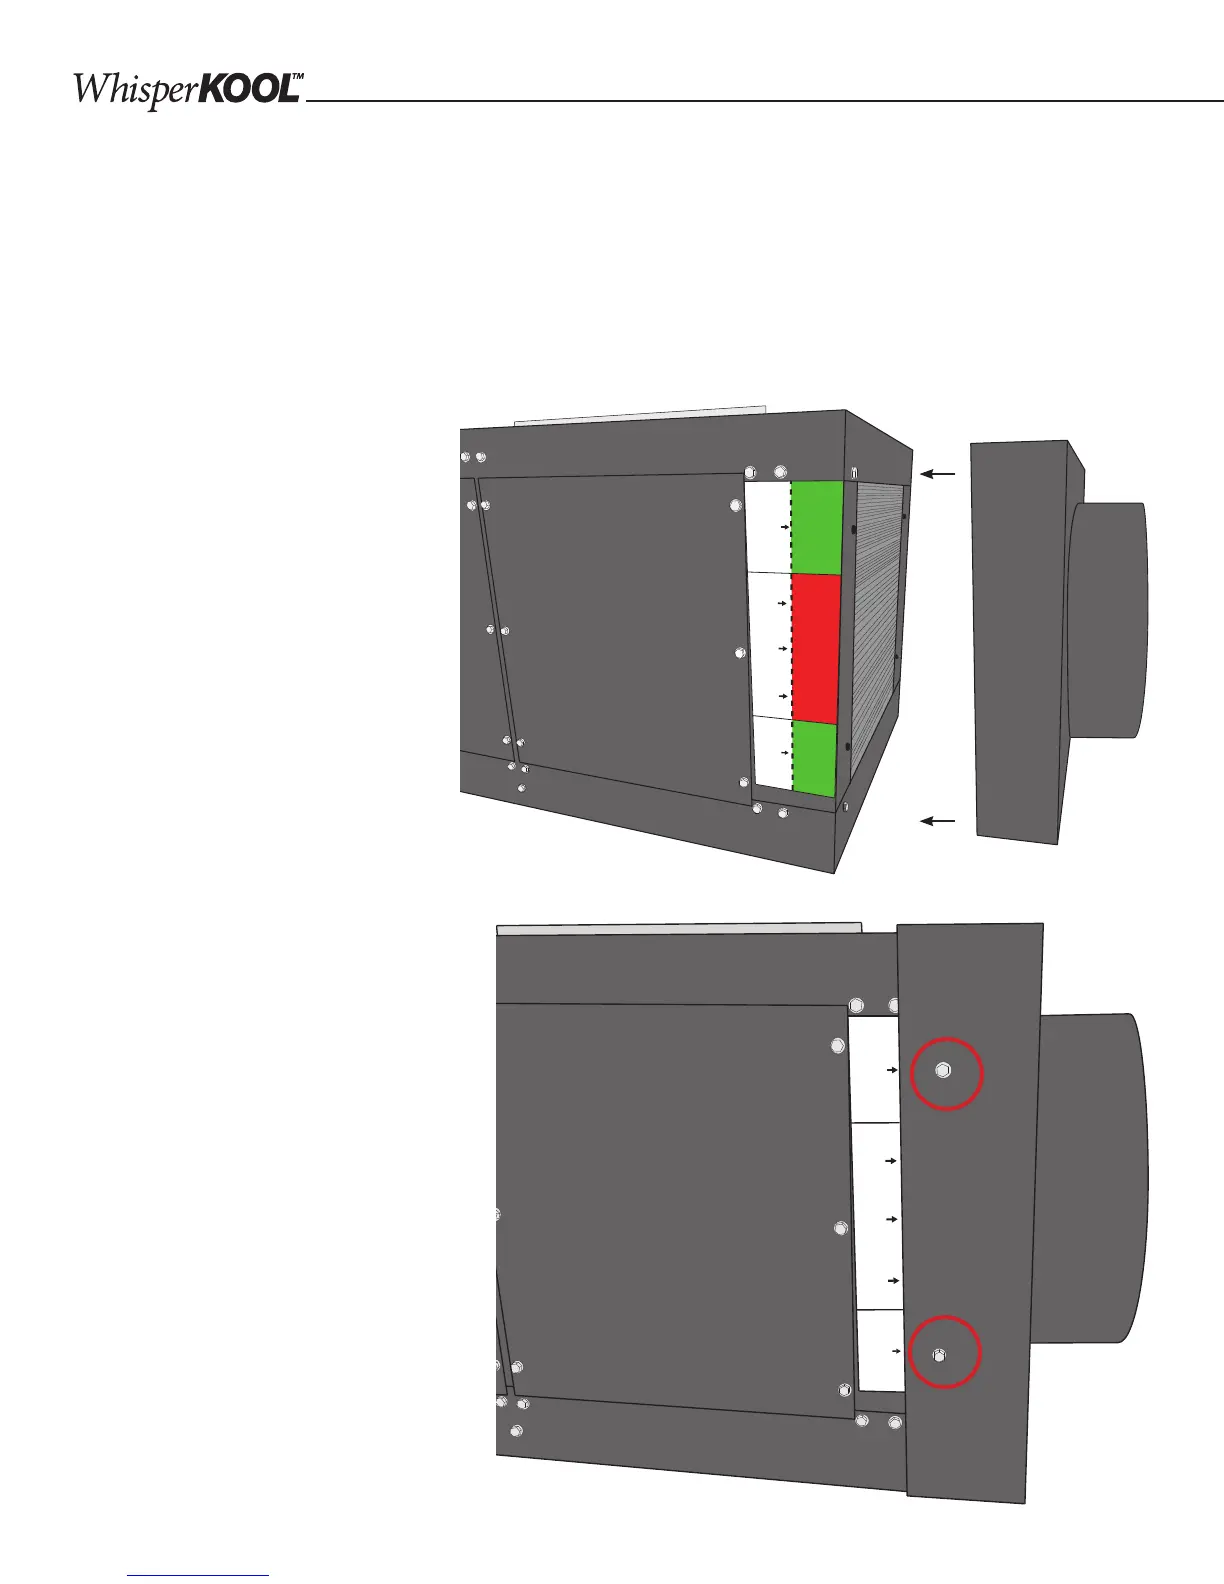
PLENUM INSTALLATION
Items needed: 16" x 16" x 10" return plenum, 12" x 12" x 8" supply plenum, supplied self-tapping screws, provided
insulation
NOTE: These instructions apply to both the evaporator and condenser sides of the unit. Insulating the evaporator sup-
ply and return plenums before installation is mandatory. Use spray glue to secure the insulation to the plenum. Use foil
tape to seal any seams.
2. Drill two (2) screws through the
plenum to secure it to the unit hous-
ing. Screws must be installed in the
locations indicated on the red, green,
and white installation sticker. Placing
screws inside the red area will void the
warranty.
Slide Plenum To This Dashed Line
SCREW IN GREEN AREA USING
THE PROVIDED SCREWS ONLY
Slide Plenum To This Dashed Line
DO NOT SCREW IN RED AREA
Slide Plenum To This Dashed Line
SCREW IN GREEN AREA USING
THE PROVIDED SCREWS ONLY
Slide Plenum To This Dashed Line
SCREW IN GREEN AREA USING
THE PROVIDED SCREWS ONLY
Slide Plenum To This Dashed Line
DO NOT SCREW IN RED AREA
Slide Plenum To This Dashed Line
SCREW IN GREEN AREA USING
THE PROVIDED SCREWS ONLY
NOTE: Use only the provided #10 ½"
self-tapping screws. Using any other
size screws may result in internal
damage to the unit and/or system
failure.
RETURN PLENUM:
1. Slide the return plenum over the
front (or rear) of the unit housing until
the plenum's leading edge is ush
with the dashed line printed on the
sticker.