24 / 47
11)*Set discharge depth (only for DEFAULT battery type)
Press “Up” or “Down” to change the 1
st
digit, press “OK” to switch to next digit. After changing the discharge depth
per your battery specification, press “Ok”, then “Set empty discharge voltage” will pop up.
12)*Set empty discharge voltage (only for DEFAULT battery type)
Press “Up” or “Down” to change the 1
st
digit, press “OK” to switch to next digit. After changing the empty discharge
voltage per your battery specification, press “Ok”, then “Set full charge voltage” will pop up.
13)*Set full charge voltage (only for DEFAULT battery type)
Press “Up” or “Down” to change the 1
st
digit, press “OK” to switch to next digit. After changing the full charge
voltage per your battery specification, press “Ok”.
Congratulations, WKS I3/I4/I5/I6 -ES’s first-time setup is complete. Please press “OK” to enter the main interface.
6
.3. Commissioning
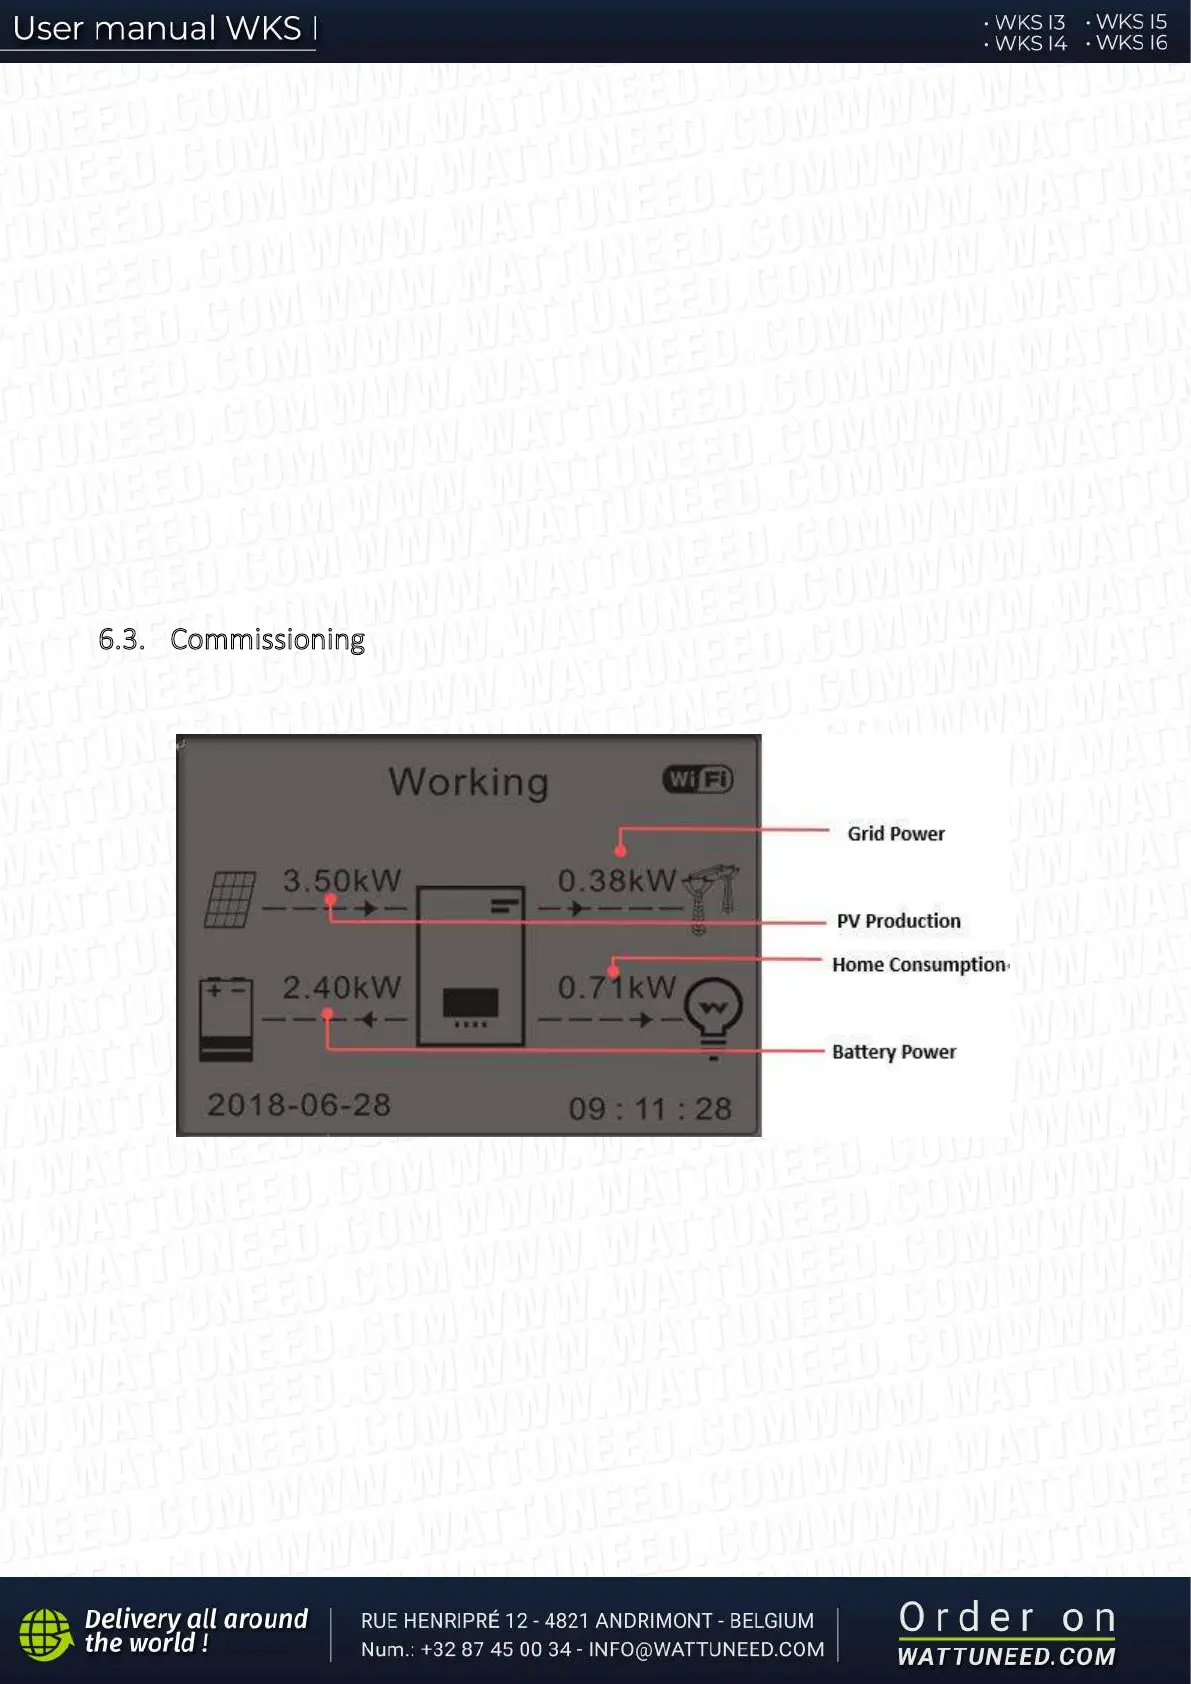
The main interface:
Fig 17. Main interface
If you didn’t change the work mode of WKS I inverter, which means WKS I inverter is working in “Auto Mode”:
While “PV Production” > “Home Consumption”
If the battery is not full. WKS I inverter will charge the battery.
While “PV Production” < “Home Consumption”