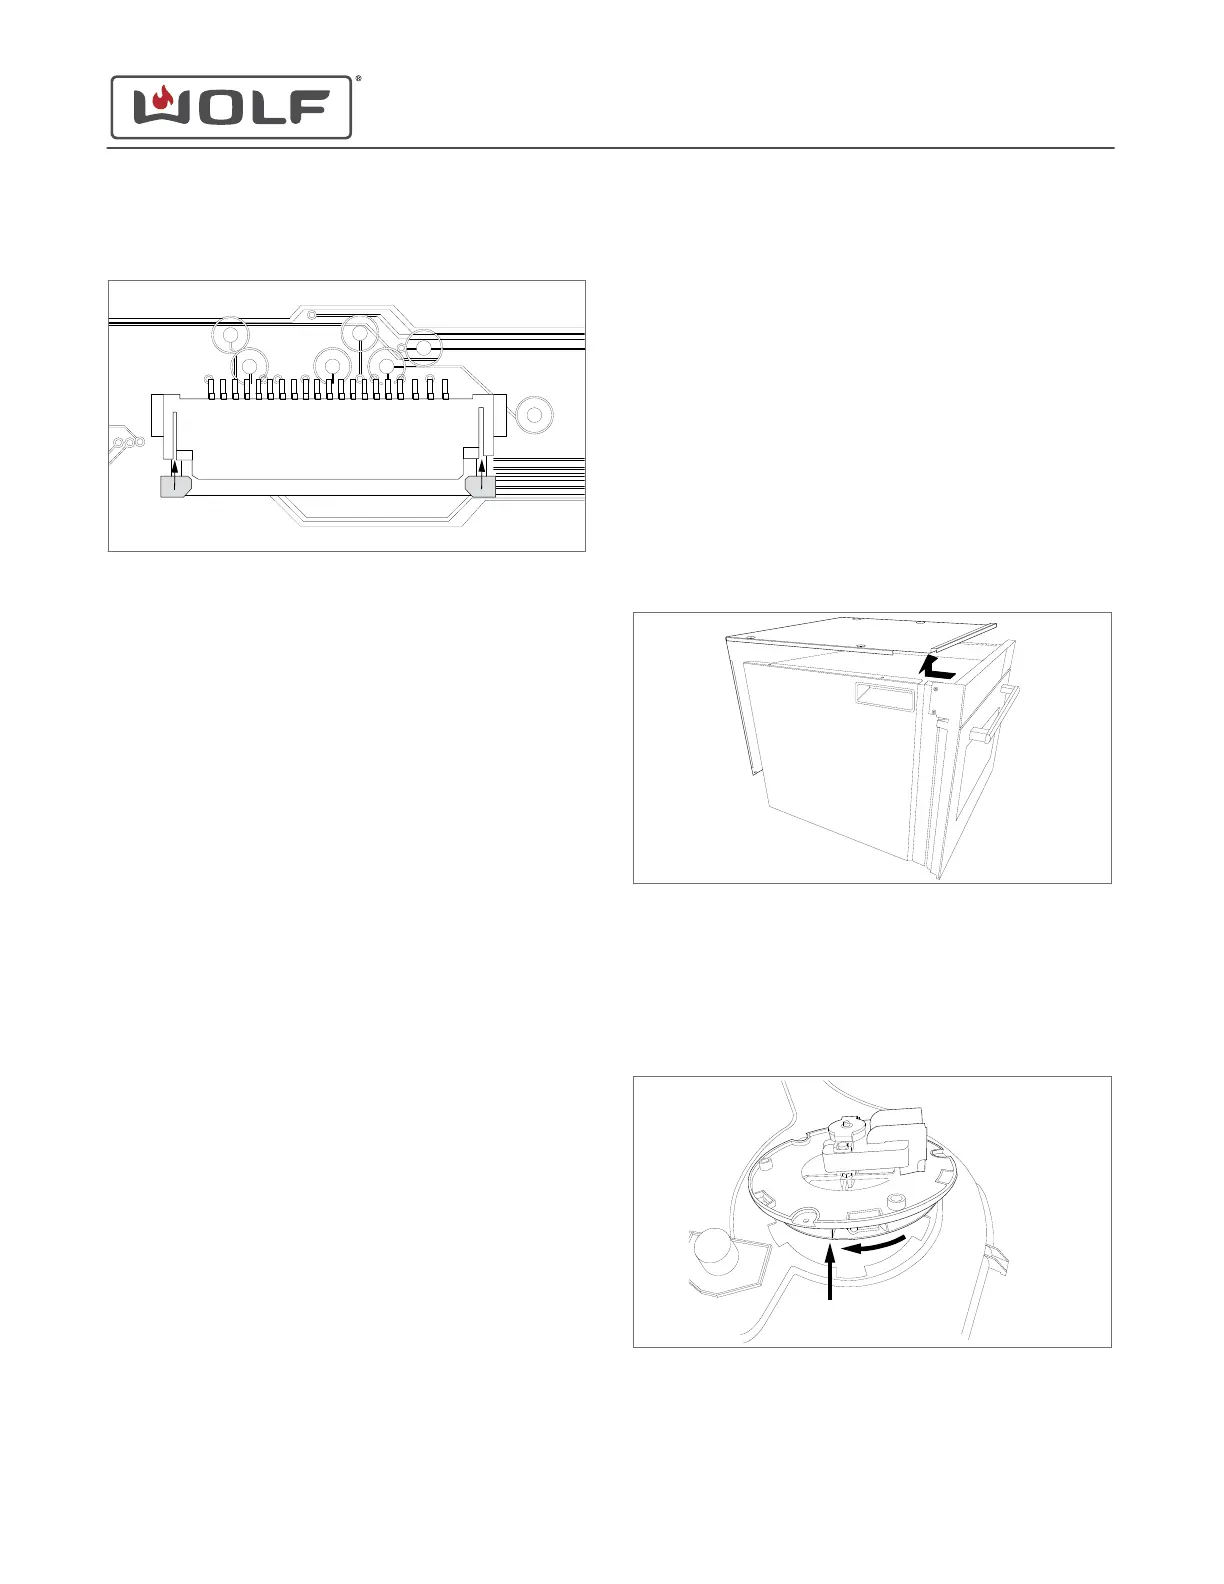
3 Insert the ribbon cable into the ribbon cable connector and
lock the ribbon cable connector.
4 Connect the wire connectors to the control board.
Install the Tank Housing Base
1 Insert the tank housing base into the control panel.
2 Use a T-20 Torx bit to install the screws into the tank
housing base.
Install the Valve Assembly
1 Place the valve assembly into the tank housing base.
2 Use a T-10 Torx bit to install the screws into the valve
assembly.
3 Install the drive motor tab into the notch in the tank housing
cover.
4 Connect the ground wires.
5 Connect the valve assembly wire connectors.
6 Connect the water tank microswitch wire connectors.
Install the Tank Housing Cover
1 Place the tank housing cover onto the tank housing base.
2 Use a T-10 Torx bit to install the screws into the tank
housing cover.
3 Install the wire harness clips onto the tank housing cover.
Install the Top Plate
1 Place the top plate on the unit.
2 Use a T-20 Torx bit to install the screws into the top plate.
Install the Water Tank Assembly
1 Install the water tank into the unit.
2 Push the water tank closed.
ROOM AIR FAN REMOVAL
To remove the room air fan, first remove the top plate.
Remove the Top Plate
1 Use a T-20 Torx bit to remove the screws from the top and
back of the unit.
2 Remove the top plate from the unit.
Remove the Room Air Fan
1 Disconnect the electrical connectors from the room air fan.
2 Rotate the room air fan clockwise.
3 Lift the room air fan up and remove it from the unit.
ROOM AIR FAN INSTALLATION
CSO (SWS #13543126)
Top Component Removal and Installation
INSTALL THE CONTROL BOARD (continued)
service.subzero.com
827703 REV B.1
64