2 Use a T-20 Torx bit to install the screws into the top plate.
POWER CORD REMOVAL
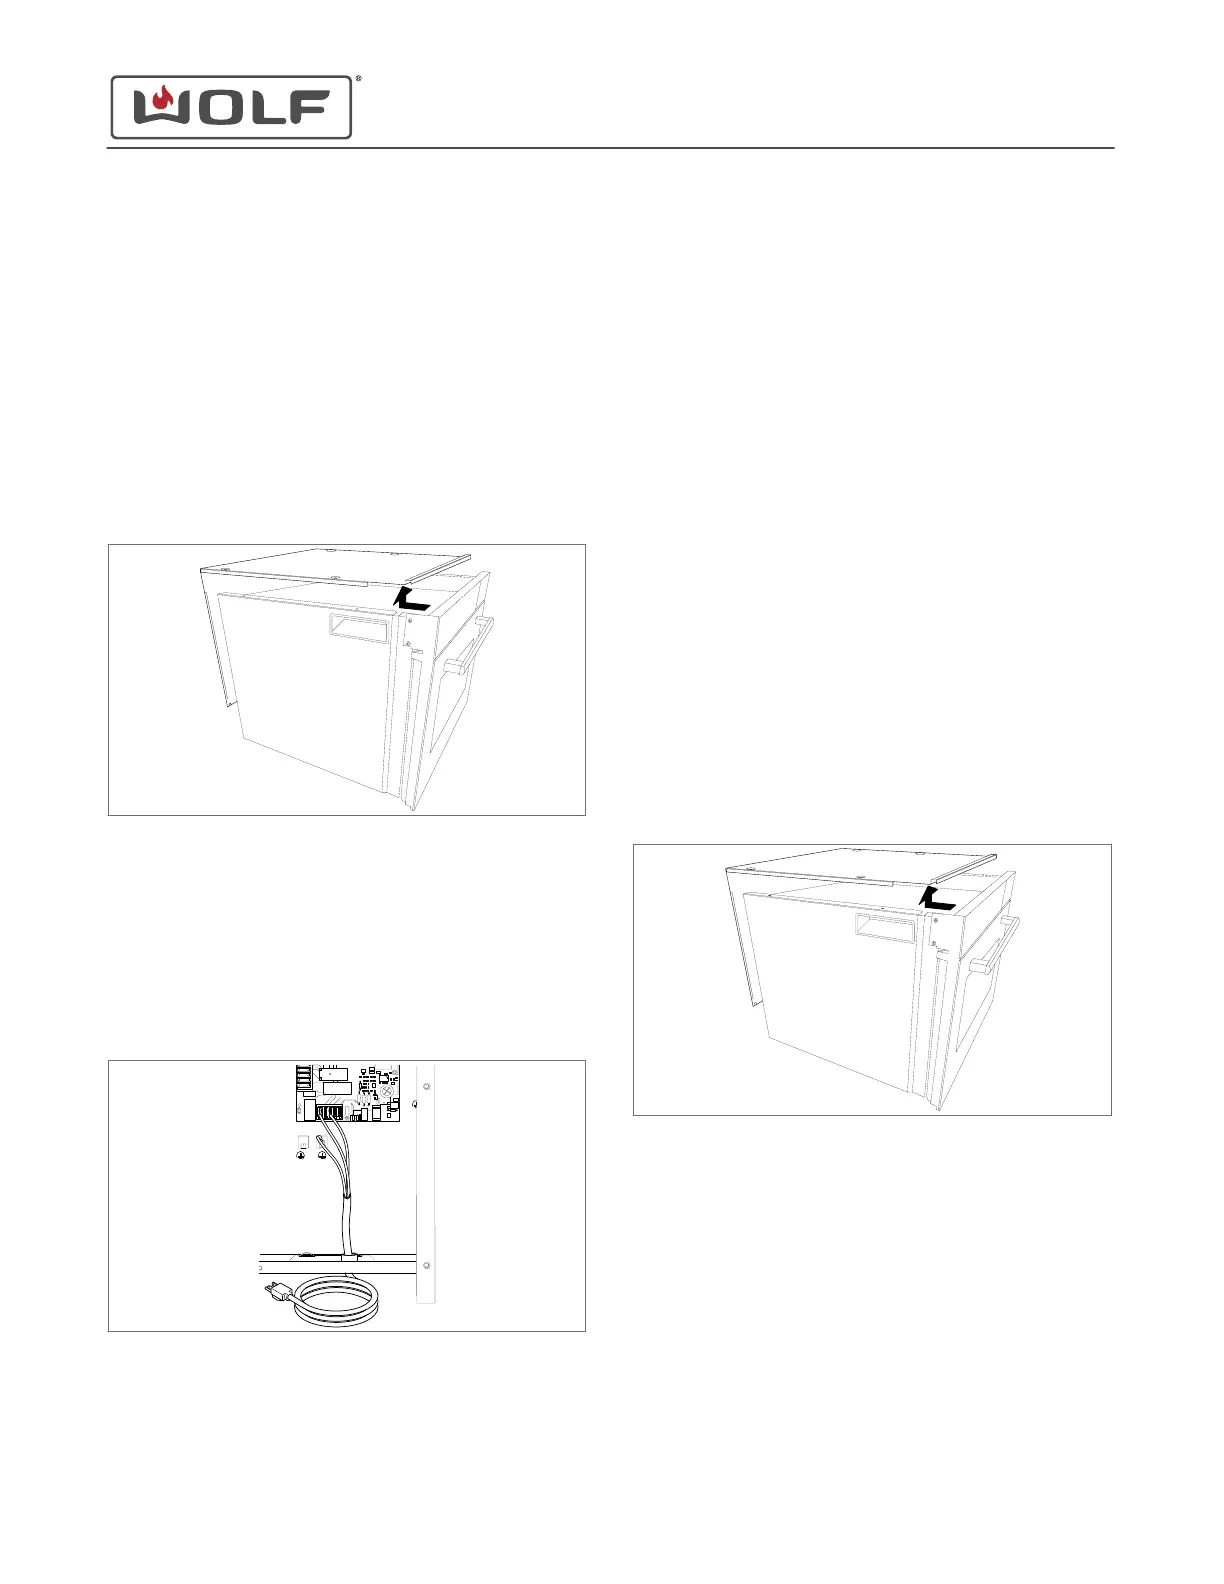
To remove the power cord, first remove the top plate.
Remove the Top Plate
1 Use a T-20 Torx bit to remove the screws from the top and
back of the unit.
2 Remove the top plate from the unit.
Remove the Power Cord
1 Disconnect the power cord electrical connectors from the
unit relay board and the back of the unit.
2 Remove the cable protector from the power cord.
3 Compress the cable clamp and push it down out of the unit.
4 Remove the power cord from the unit.
POWER CORD INSTALLATION
Install the Power Cord
1 Install the cable clamp onto the power cord.
2 Place the cable clamp and power cord in the unit.
3 Install the cable protector onto the power cord.
4 Connect the power cord electrical connectors to the unit
relay board and the back of the unit.
Install the Top Plate
1 Place the top plate on the unit.
2 Use a T-20 Torx bit to install the screws into the top plate.
UNIT RELAY BOARD REMOVAL
To remove the unit relay board, first remove the top plate.
Remove the Top Plate
1 Use a T-20 Torx bit to remove the screws from the top and
back of the unit.
2 Remove the top plate from the unit.
Remove the Unit Relay Board
1 Disconnect the electrical connectors from the unit relay
board.
2 Open the spacers one at a time, and pull the unit relay
board forward.
CSO (SWS #13543126)
Back Component Removal and Installation
INSTALL THE TOP PLATE (continued)
service.subzero.com
827703 REV B.1
74