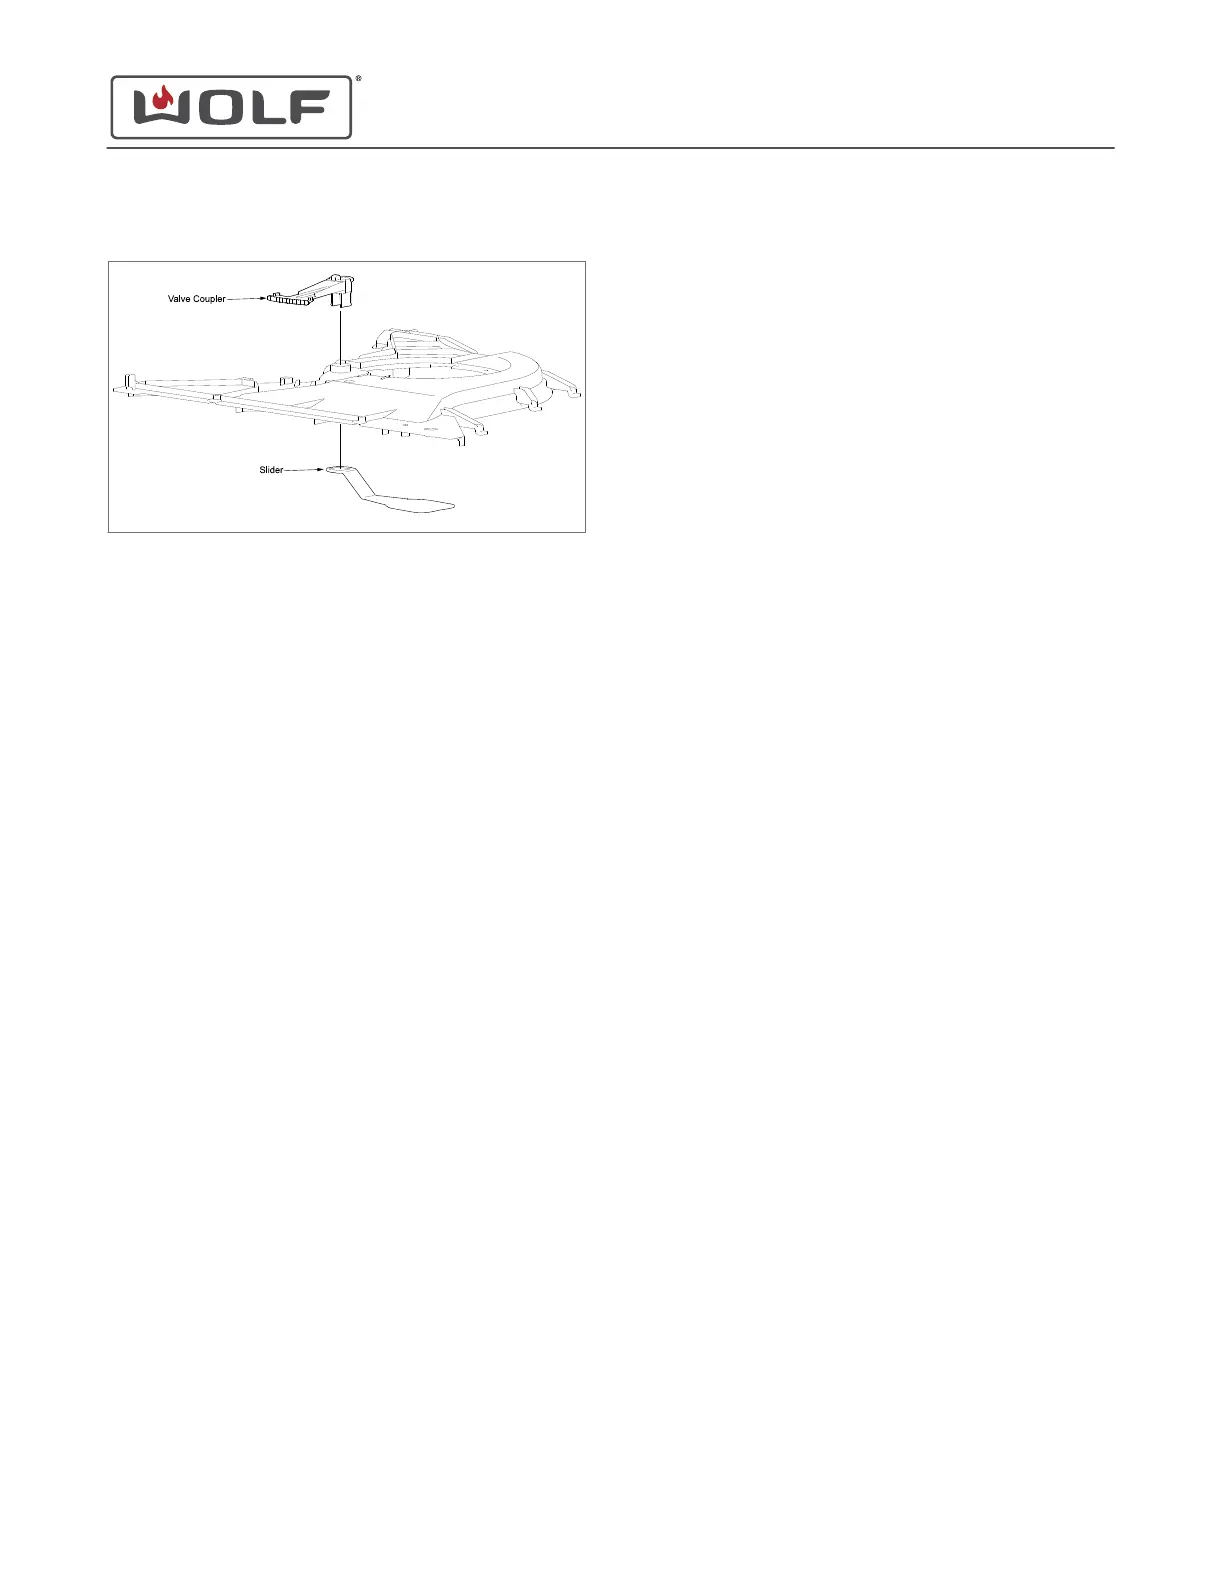
6 Pull the valve coupler down out of the top exhaust duct.
VALVE COUPLER ASSEMBLY INSTALLATION
Install the Valve Coupler Assembly
1 Install the notch in the valve coupler into the top exhaust
duct.
2 Use a T-15 Torx bit to install the screws into the stepping
motor retainer.
3 Install the slider onto the valve coupler.
Install the Top Exhaust Duct
1 Place the top exhaust duct tabs into the notches in the top
of the unit.
2 Pull the top exhaust duct toward the front of the unit to lock
the top exhaust duct tabs in place.
3 Use a T-20 Torx bit to install the screws into the top exhaust
duct.
Install the Stepper Motor
1 Slide the stepper motor backward over the stepper motor
retainer until the stepper motor tabs lock into place.
2 Connect the electrical connector to the stepper motor.
Install the Temperature Sensor 300C
1 Insert the temperature sensor 300C into the top exhaust
duct.
2 Use a T-15 Torx bit to install the screw into the temperature
sensor 300C.
3
Connect the temperature sensor 300C electrical connector
to the unit relay board.
Install the Room Air Fan
1 Align the arrow on the room air fan with the open arrow on
the top exhaust duct.
2 Rotate the room air fan counterclockwise until the arrow on
top of the room air fan is aligned to closed on the top
exhaust duct.
3 Connect the electrical connectors to the room air fan.
Install the Loudspeaker
1 Insert the tabs of the loudspeaker into the top exhaust duct.
2 Rotate the loudspeaker counterclockwise until the arrow on
top of the loudspeaker is pointing to the front of the unit.
3 Connect the loudspeaker electrical connector to the control
board.
Install the Top Plate
1 Place the top plate on the unit.
2 Use a T-20 Torx bit to install the screws into the top plate.
CSO (SWS #13543126)
Top Component Removal and Installation
REMOVE THE VALVE COUPLER ASSEMBLY (continued)
service.subzero.com
827703 REV B.1
71