INSPECTION & SERVICE
INSPECTION & SERVICE
4
G
B
C
D
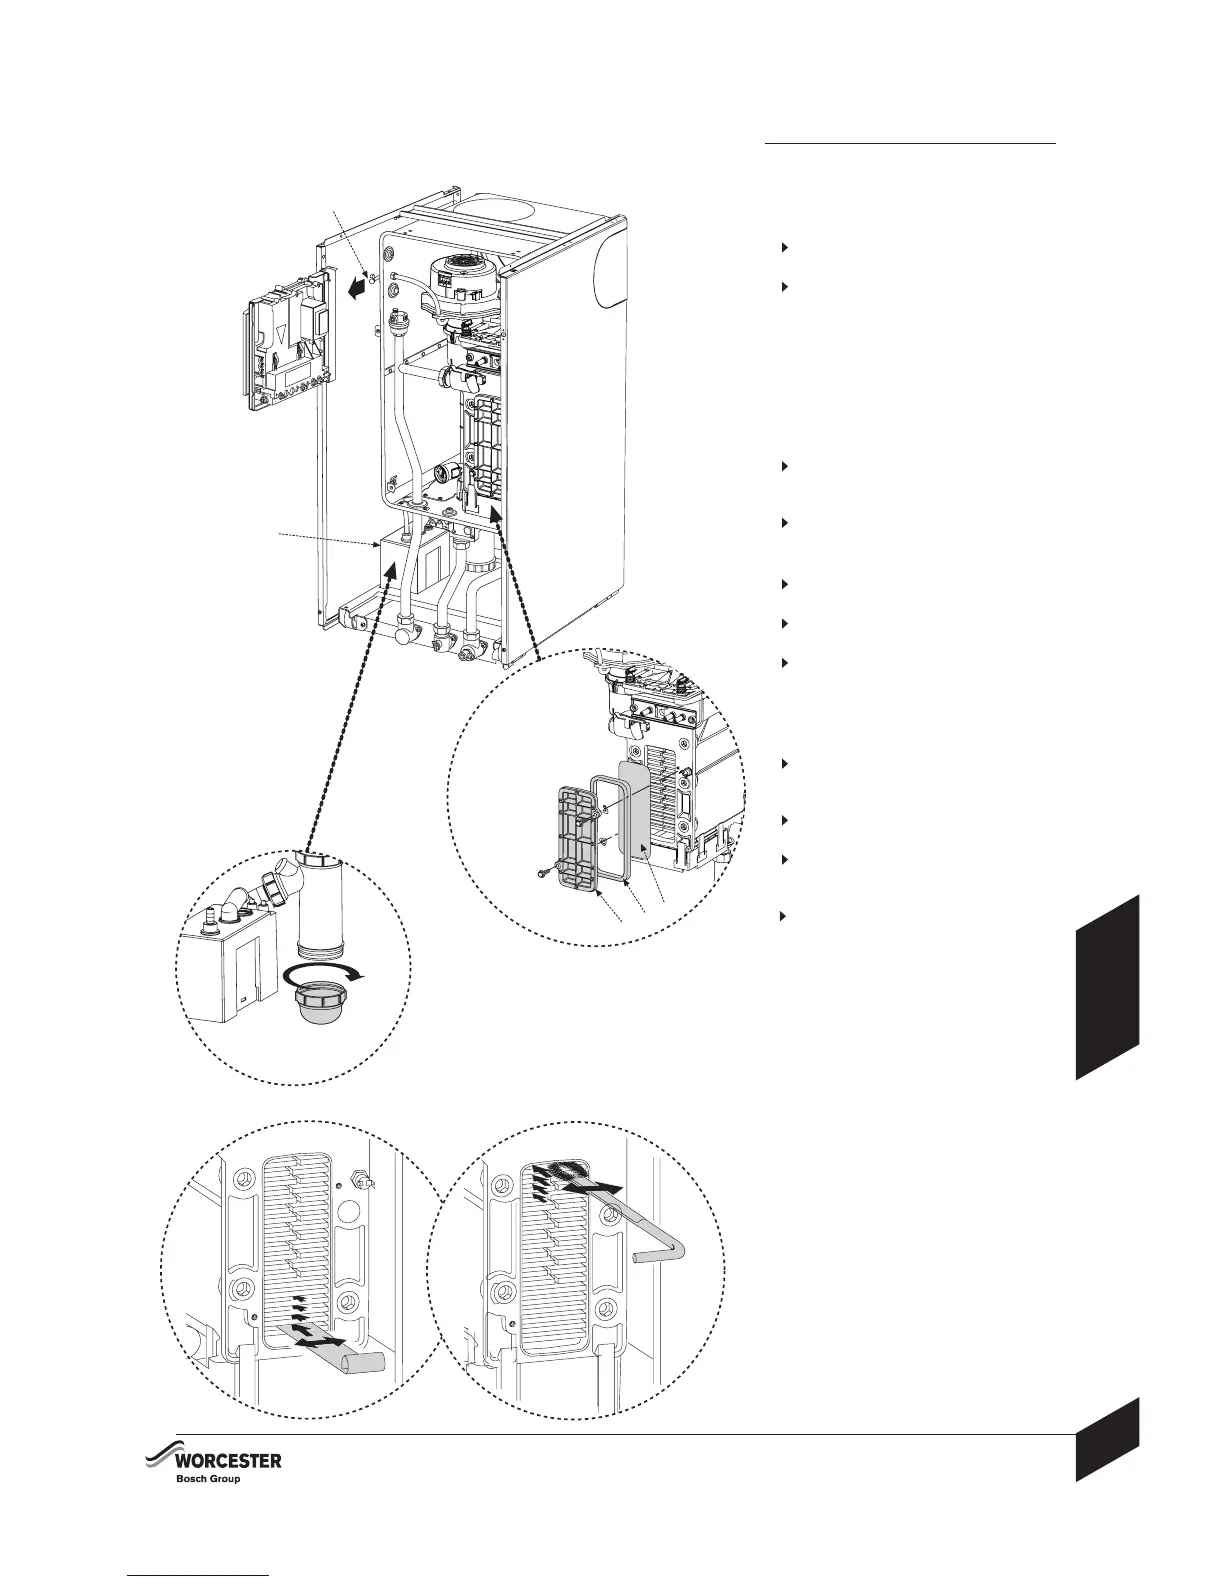
1
2
3
A
Primary Heat Exchanger:
There is a special accessory kit available (No.
840) specifically designed for cleaning the heat
exchanger. If required order 7 719 001 996.
1
Remove the cap (A) and connect a
manometer to the fan pressure test point.
After measurement replace test point
cap.
Pressure will read negative and be greater
than:
FS 30CDi - 4.1 mbar
FS 42CDi - 5.2 mbar
Pressures measured at less than these figures
will indicate that the heat exchanger will
require cleaning.
2
Remove the cleaning access cover (B),
seal (C) and metal plate (D) securing it, if
present.
3
Unscrew the condensation trap cap and
place a suitable container underneath.
To Remove Condensate pump:
Disengage condensate pipe from
condensate pump.
Remove condensate pump from base
panel.
After servicing the heat exchanger, fill
the condensate trap with approximately
1/4 litre of water and refit in reverse order.
To Clean the Heat Exchanger:
4
Loosen any deposits in the heat exchanger
from top to bottom using the cleaning
blade.
Clean the heat exchanger from top to
bottom using the brush.
Refit the “clean out” coverplates in
reverse order using a new seal (C) and
tighten screws to a torque of 5 Nm.
After re-assembly check CO/CO2 levels
as described in the section “Setting the
air/gas ratio”
IMPORTANT: AFTER COMPLETING THE APPLIANCE SERVICE THE CO/CO
2 MUST BE
CHECKED AND SET TO THE LIMITS IN THE SECTION “AIR/GAS RATIO”.
SERVICING
& SPARES
INSTALLATION & SERVICING INSTRUCTIONS
35
8 716 115 216b (09.2008)
 Loading...