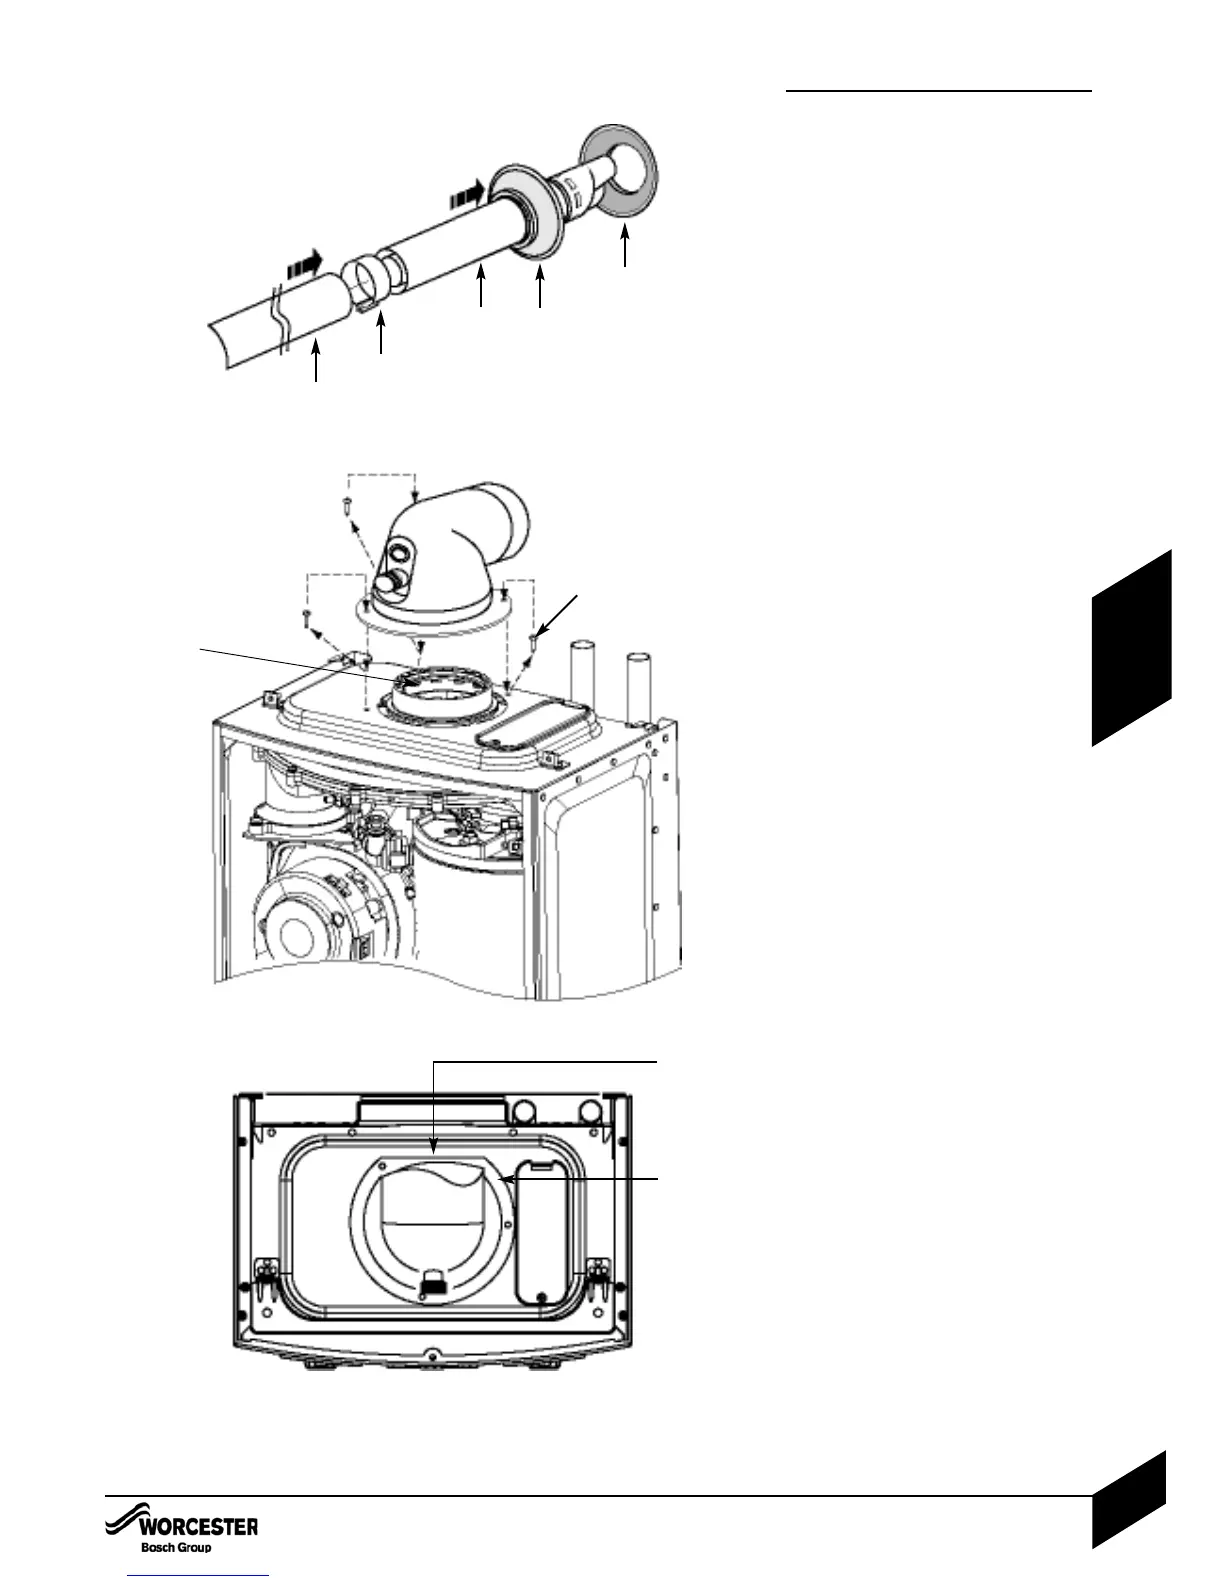
A
B
C
D
E
A - Standard Flue
B - Internal Wall Seal
C - External Wall Seal
D - Clamping Plate
E - Extension Duct
Flat at back
FLUE INSTALLATION
ASSEMBLING THE FLUE
1 Slide inner collar (B) onto terminal (A)
2 Additional extensions or bends:
Push fit all extensions/bends/terminal
together and secure connections with
clamps (D). The slope of the terminal outlet
must face downwards.
FITTING THE FLUE
3 Fit the terminal (A) through the flue opening
in the wall, exposing the plastic outlet
section to the outside and fit the outer
flue collar ( C ) over the notches to secure.
4 Assemble elbow to boiler using the three
screws (see below).
Note: Screws are in boiler not in flue kit.
FITTING THE ELBOW:
• Flue elbow should push directly down and
not be twisted into correct position.
Remove the 3 inner flue tube retaining
screws. The inner tube will be held in place
in the appliance.
Fit turret onto applliance and retain with the
three removed screws.
NOTE: The clamping plate flat should be at
the rear of the appliance.
ADDITIONAL NOTES AND REMINDERS:
• Ensure that all cut lengths are square and
free from burrs.
• The flue, when assembled, is fully sealed and
components are pushed home.
• The flue is set at an angle 3° or 52mm per
1m length.
FLUE INSTALLATION
INSTALLATION & SERVICING INSTRUCTIONS FOR WORCESTER BOSCH GREENSTAR Ri
8 716 109 699a (05/05)
22
INSTALLATION
This screw should
be fitted last for
easier installation
This screw should
be fitted last for
easier installation
Apply silicone
grease to
seal