EasyManuals Logo
Home>Xerox>Scanner>DocuMate 5460

Xerox DocuMate 5460 User Manual

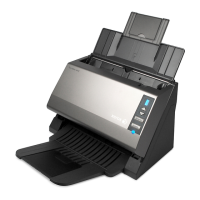
Xerox DocuMate 5460
241 pages
To Next Page IconTo Next Page
To Previous Page IconTo Previous Page
Page #77 background imageLoading...
Page #77 background image
Xerox
®
DocuMate
®
5445 / 5460
User’s Guide
77
2. Hover the mouse cursor over the Set as scan destination option and the sub-menu will open to the right. Click
on the setting you want the Storage location to be updated with.
For all configurations—select this option to have the storage location, in all scan configurations Storage
Options tabs, updated to use this location. Note that the storage Link Properties location will also update
to use this location.
For new and default configurations—select this option to have the OneTouch Link Properties storage
location updated. Any scan configurations that you have not previously updated, with custom storage
locations, will also use this location.
For configuration used by a button—when you select this option, another sub-menu will open to the
right. The sub-menu will contain a list scanner buttons that are currently set to scan to the Transfer to
Storage destination. Select the button you want updated to use this location. This option modifies only
the scan configuration that is assigned to the button you select. If you have multiple OneTouch 4.6
scanners installed, the first sub-menu will show a list of the currently connected scanners for you to select
which scanner to update.
Note that this option is disabled if there is no scanner plugged in and turned on.
Scanning to Multiple Folders
When archiving documents with Transfer to Storage option, you can scan the documents to different folders. For
example, one folder might be for “Business Receipts,” a second folder might be forPersonal Receipts, and a third
folder might be forAnnual Receipts.
To scan to multiple folders, you create multiple configurations, each with a different storage location for the
scanned documents. Scan one set of documents using the scan configuration with the appropriate storage location
for that set. Then switch to another scan configuration and scan the next set of documents to store them in their
folder.
Setting Up Multiple Folders for Transfer to Storage
1. Using Microsoft Windows, create the folders that you want to use for storing scanned items.
2. Open the OneTouch Properties window.
3. Select Transfer to Storage as the Destination Application.

Table of Contents

Questions and Answers:

Question and Answer IconNeed help?

Do you have a question about the Xerox DocuMate 5460 and is the answer not in the manual?

Xerox DocuMate 5460 Specifications

General IconGeneral
Film scanning-
Color scanningYes
Maximum scan size318 x 210 mm
Output color depth24 bit
ADF scan speed (b/w, A4)60 ppm
Optical scanning resolution600 x 600 DPI
Duplex ADF scan speed (b/w, A4)120 ipm
Scanner typeADF scanner
Product colorBlue, White
Scan toCloud, E-mail, File
Sensor typeCIS
Scan driversISIS, TWAIN, WIA
Daily duty cycle (max)6000 pages
Auto document feeder (ADF) input capacity75 sheets
Maximum scan area (ADF)216 x 4953 mm
Minimum scan area (ADF)48 x 71 mm
Auto Document Feeder (ADF) media weight19 - 206 g/m²
USB version2.0
Standard interfacesUSB 2.0
Input voltage110-240 V
Power supply typeAC
Power consumption (standby)1 W
Power consumption (typical)25 W
Minimum RAM2048 MB
Minimum processorPentium 4
Minimum storage drive space350 MB
Windows operating systems supportedWindows 10 Education, Windows 10 Education x64, Windows 10 Enterprise, Windows 10 Enterprise x64, Windows 10 Home, Windows 10 Home x64, Windows 10 Pro, Windows 10 Pro x64, Windows 2000 Professional, Windows 7 Enterprise, Windows 7 Enterprise x64, Windows 7 Home Basic, Windows 7 Home Basic x64, Windows 7 Home Premium, Windows 7 Home Premium x64, Windows 7 Professional, Windows 7 Professional x64, Windows 7 Starter, Windows 7 Starter x64, Windows 7 Ultimate, Windows 7 Ultimate x64, Windows 8, Windows 8 Enterprise, Windows 8 Enterprise x64, Windows 8 Pro, Windows 8 Pro x64, Windows 8 x64, Windows 8.1, Windows 8.1 Enterprise, Windows 8.1 Enterprise x64, Windows 8.1 Pro, Windows 8.1 Pro x64, Windows 8.1 x64, Windows Vista Business, Windows Vista Business x64, Windows Vista Enterprise, Windows Vista Enterprise x64, Windows Vista Home Basic, Windows Vista Home Basic x64, Windows Vista Home Premium, Windows Vista Home Premium x64, Windows Vista Ultimate, Windows Vista Ultimate x64, Windows XP Home, Windows XP Home x64, Windows XP Professional, Windows XP Professional x64
Cables includedAC, USB
Weight and Dimensions IconWeight and Dimensions
Depth208 mm
Width318 mm
Height196 mm
Weight4000 g

Related product manuals