88 A Appendix
9. Connect the power cord to the printer.
Press the <|> side of the printer's power
switch to turn on the power.
10. Print the [Configuration Report] and confirm
that [Hard Disk] is included for the [Machine
Configuration] item in the [System Settings]
section.
Refer to
• List printing procedure: “Printing a Report/List” (P. 36)
Hard disk installation is now complete.
Note
• After installing the hard disk, use the properties dialog
box of the print driver to change the printer
configuration. For details, refer to the online help for the
print driver.
Installing the Feature
Enhance Kit
This section following describes how to install the
Feature Enhance Kit.
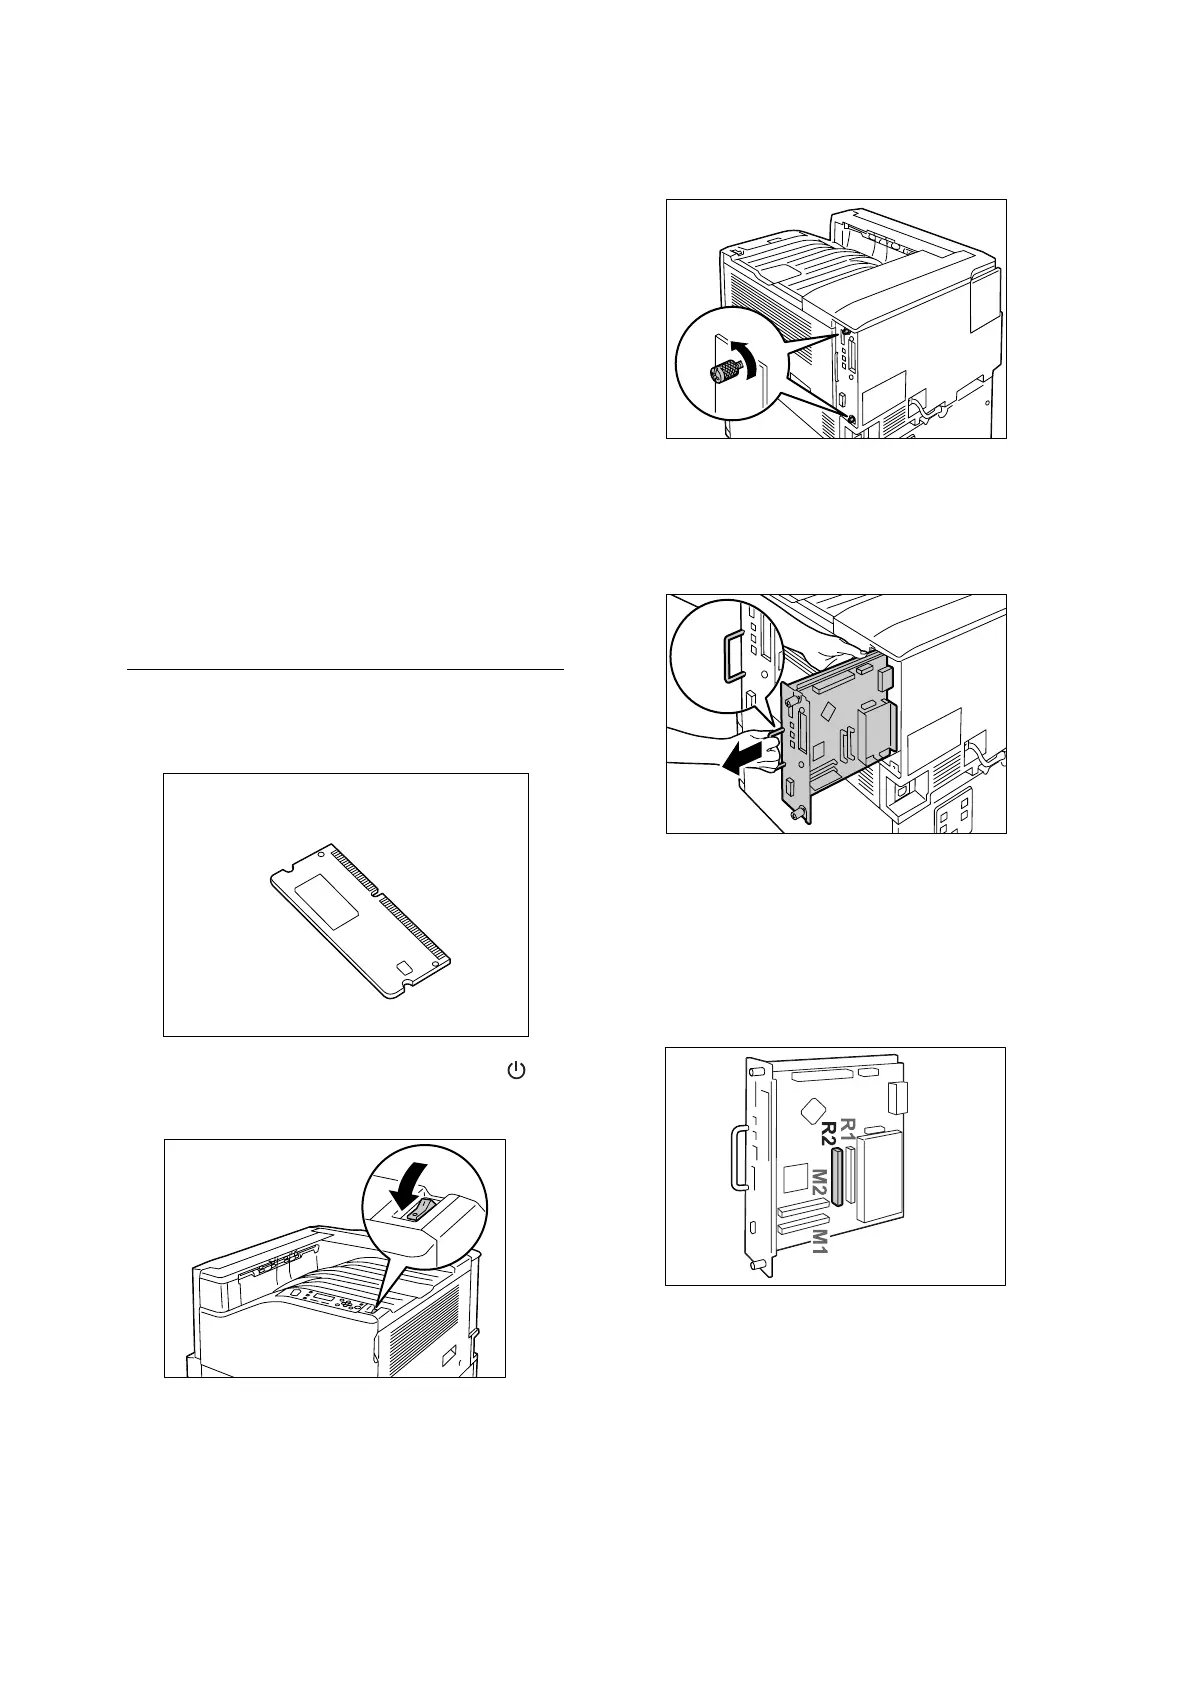
1. Switch the power off by pressing the < >
side of the power switch.
2. Unplug the power cord from the power outlet
and the printer.
3. Loosen the two screws on the back right side
of the printer.
4. Pull out the handle on the control board and
then carefully pull the control board out of the
printer. Place the control board on a table top
or some other flat surface.
Important
• When pulling out the control board, hold it with both
hands so you do not drop it.
5. Insert the Feature Enhance Kit ROM card
into slot R2 as shown in the illustration to the
right.
Feature Enhance Kit ROM

 Loading...


