June 2014
4-3
Xerox® Phaser® 3020 Printer Service Manual
REP 1.1, REP 1.2
Repairs
REP 1.1 Front Cover
Parts List on PL 1.1
Removal
1. Switch Off the Printer and disconnect the Power Cord.
2. Remove the Left and Right Side Covers (REP 1.2).
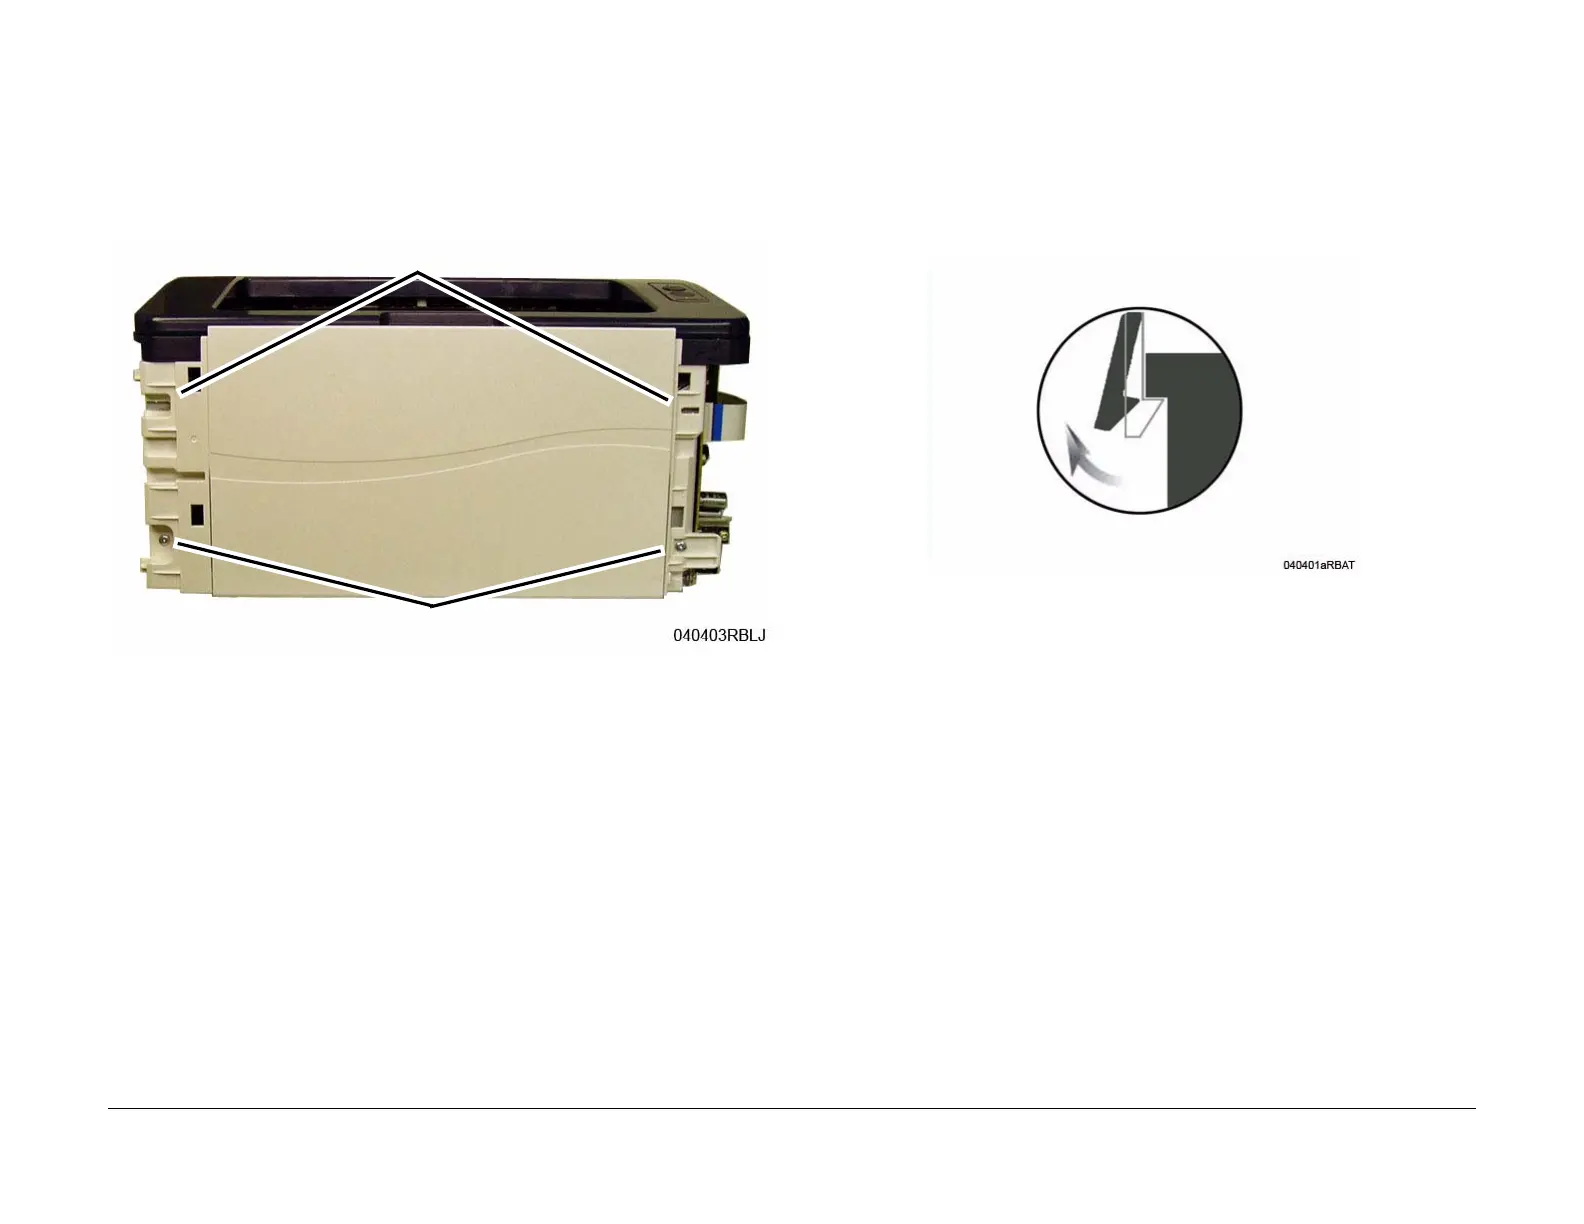
3. Remove the Front Cover screws (2) (Figure 1).
Figure 1 Front Cover Screws and latches (Front View)
4. Release the latches (2) at the sides of the cover, and remove the Front Cover (Figure 1).
Replacement
NOTE: Tapered Plastic Screws and Round Machine Screws are used to hold the PWB to the
frame. Make sure that the Plastic Screws go into plastic components and Machine Screws go
into the metal frame.
Install the components in the reverse of removal.
REP 1.2 Left and Right Side Covers
Parts List on PL 1.1
Removal
1. Switch Off the Printer and disconnect the Power Cord.
2. The side covers are held in place with Plastic Latches, release them carefully to avoid
breakage. To release the Latches press the hook end of the latch away from the part (Fig-
ure 1).
Figure 1 Plastic Latches
3. Left Cover removal:
a. Release the upper rear latch.
b. Release the bottom latches and lower the rear latch.
c. Release the front latches and remove the cover.
Screws
Latches