290
2. 2. Pry up the decorative cover of the battery.Pry up the decorative cover of the battery.
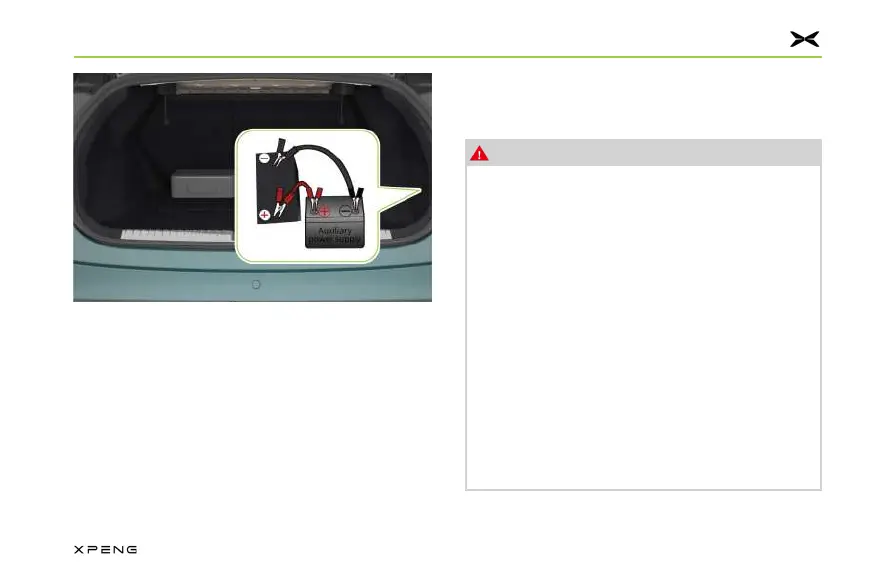
3. 3. Connect one end of the red cable to the Connect one end of the red cable to the
positive (+) terminal of the vehicle's 12 V positive (+) terminal of the vehicle's 12 V
battery and the other end to the positive battery and the other end to the positive
(+) terminal of the auxiliary external power (+) terminal of the auxiliary external power
supply.supply.
4. 4. Connect one end of the black cable to the Connect one end of the black cable to the
negative (-) terminal of the vehicle's 12 V negative (-) terminal of the vehicle's 12 V
battery and the other end to the negative battery and the other end to the negative
(-) terminal of the auxiliary external power (-) terminal of the auxiliary external power
supply.supply.
5. 5. Start the vehicle. After it started successfully, Start the vehicle. After it started successfully,
remove the connected cables in reverse remove the connected cables in reverse
order.order.
Warning
●
Improper use of connecting cables may
lead to the explosion of a 12V battery,
causing severe personnel injury.
●
The voltage and capacity of the auxiliary
power supply must be the same as those
of the vehicle's 12V battery; otherwise, it
may cause an explosion.
●
The 12V battery shall not be exposed to
open flame or static electricity; otherwise,
the flammable gas produced by the 12V
battery may be ignited by a spark and
cause an explosion.
●
Do not touch high-voltage parts during
operation to prevent injury from high-
voltage electric shock.