pg | 98
Dissolved Oxygen Sensor
Sensor Cap Replacement
Follow these instructions to replace the sensor cap on an EXO optical dissolved oxygen sensor once the
previous cap has exhausted its usable life (typically about one year). is cap is shipped in a humidied
container, and should be stored in a 100% humid environment. If the sensor cap dries completely, follow
instructions to rehydrate it.
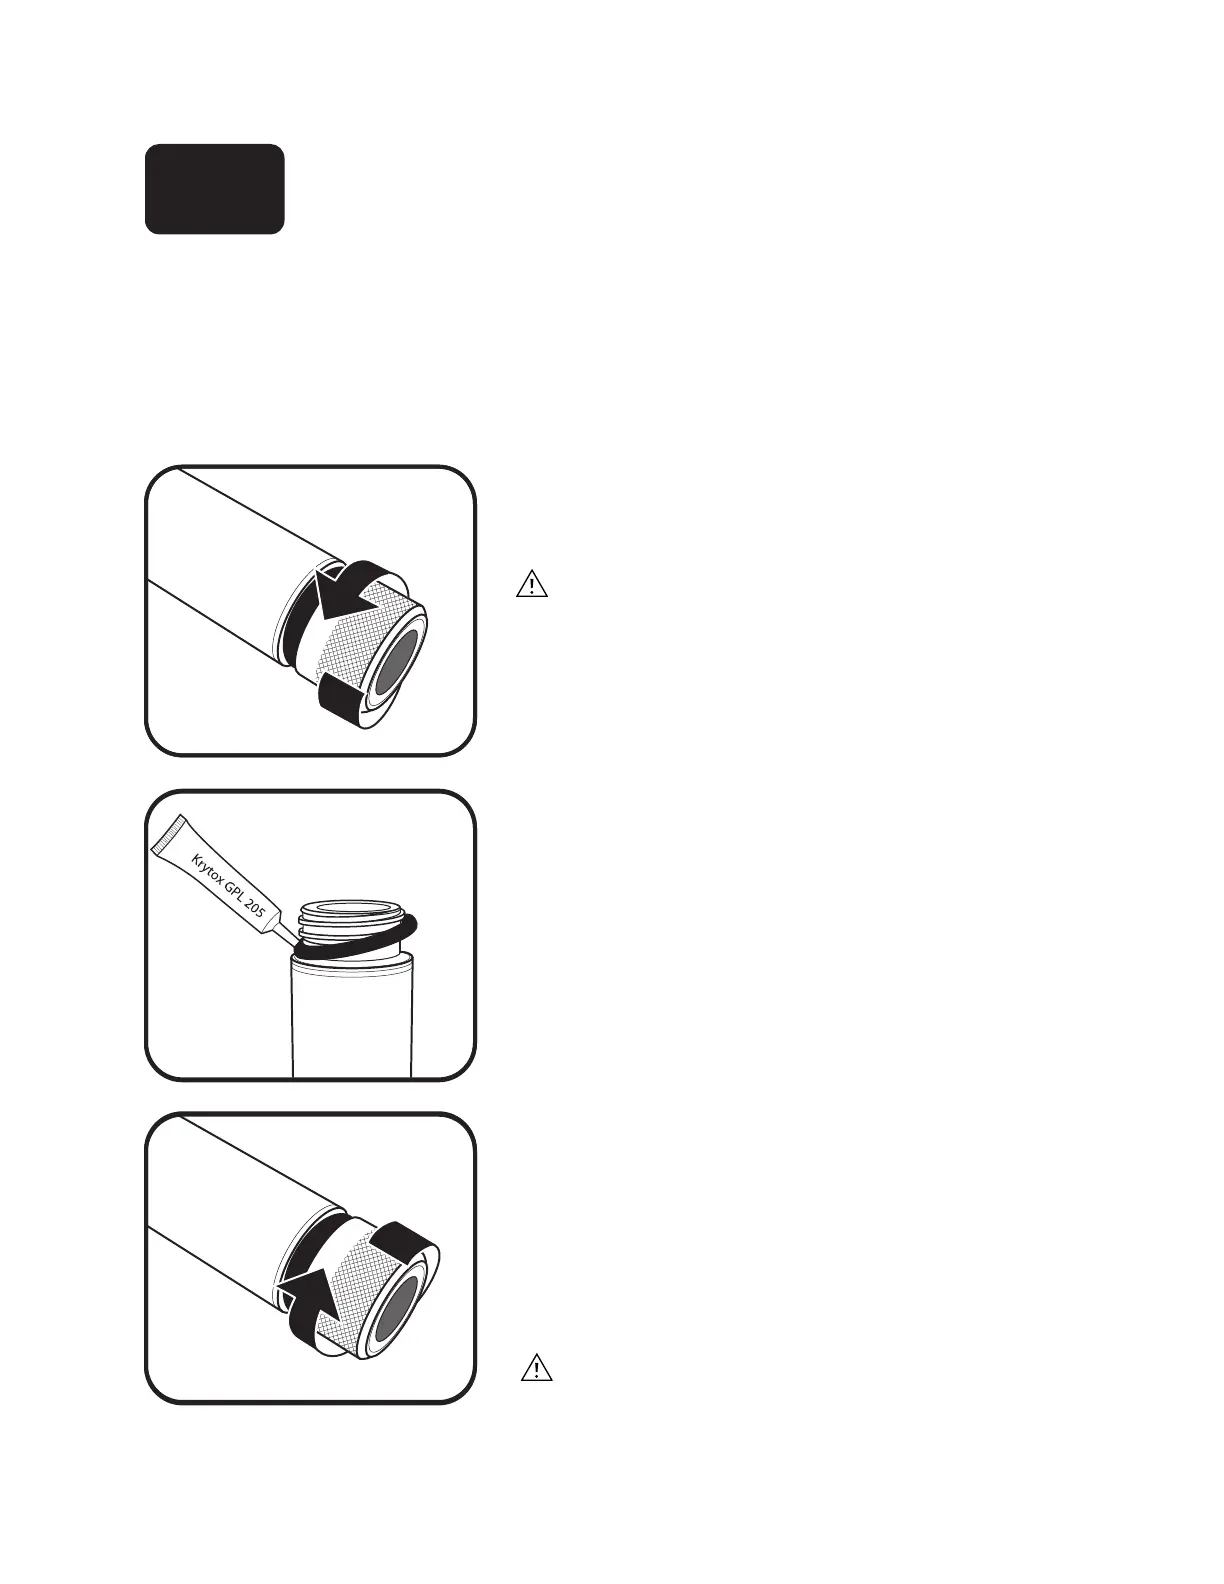
1 Remove current sensor cap.
Rotate the sensor cap with your ngers counterclockwise
until free.
If possible, do not use any tools during this process.
However, should the cap be immovable aer use, carefully
twist the sensor cap with pliers until it breaks loose. Do not
use pliers on the sensor body, and take great care not to
damage the sensor threads
2 Replace o-ring.
Remove the o-ring (pinch the o-ring out, then roll it
upwards over the threads) and discard it. Visually inspect
the new o-ring for nicks, tears, contaminants, or particles;
discard damaged o-rings. Without twisting it, carefully
install the new o-ring over the threads and into its groove,
then apply a thin coat of Krytox lubricant to the o-ring
only. Ensure the sensor cap’s cavity is completely dry before
installing the new cap.
3 Install new sensor cap.
Aer the o-ring is installed and lubricated, wipe the clear
window at end of sensor with a lint-free cloth until clean.
en dry the inside cavity of the sensor cap with a lint-free
cloth. With a clockwise motion, thread the new sensor
cap onto the sensor until it is nger-tight. e o-ring
should now be completely under the cap and not pinched.
If pinched, remove and discard the o-ring and repeat
procedure.
Do not over-tighten the sensor cap. Do not use any tools
for the installation process.
6.12
 Loading...