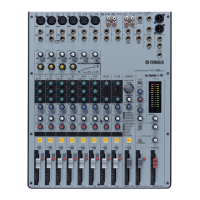
MG82CX/MG102C
18
[160]
[160]
[160]
Knob
(ノブ)
Knob
(ノブ)
Knob
(ノブ)
[160]
[160]
[A]
[163A]
Knob
(ノブ)
Top cover
(トップカバー)
Window level
(ウインドLEVEL)
Window level
(ウインドLEVEL)
Bottom case assembly
(ボトムケースAssy)
Screw tighten (1st)
(ネジ締め(1番))
Screw tighten (2nd)
(ネジ締め(2番))
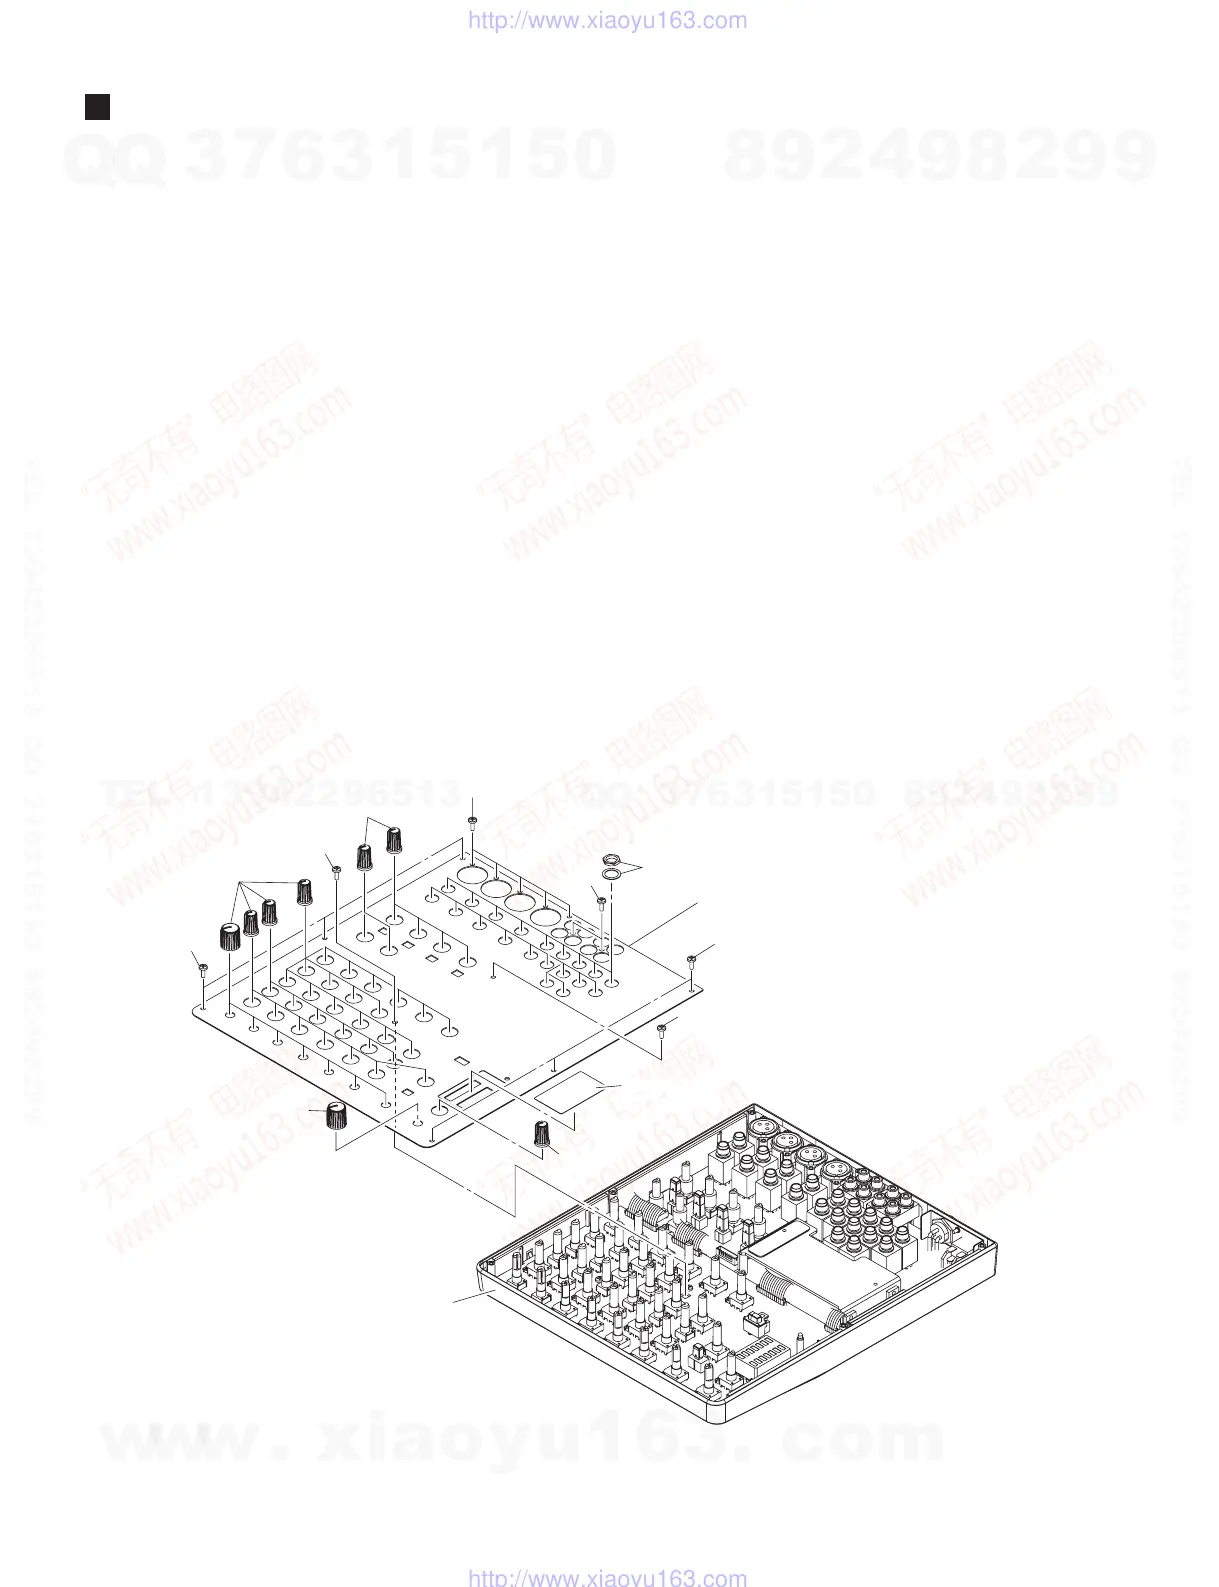
DISASSEMBLY PROCEDURE(分解手順)
1. トップカバー(所要時間:約 7 分)
1-1 本体からすべてのノブを外します。(図 1)
1-2 [160] のネジ 14 本と [163A] のネジ 1 本、[A] の六
角ナットとワッシャー 20 個ずつを外して、トッ
プカバーを外します。(図 1)
※ ウインド LEVEL はトップカバーの構成部品では
ありません。トップカバーを交換する場合は、ウ
インド LEVEL を取り外して新しいトップカバー
に取り付けてください。(図 1)
※ トップカバーをボトムケース Ass'y へ取り付ける
ときは、図 1 で示した順序でネジ締めしてくださ
い。(図 1)
2. MAIN10 シート(所要時間:約 8 分)
2-1 トップカバーを外します。(1 項参照)
2-2 [100] のネジ 2 本と [163B] のネジ 1 本を外して、
MAIN10 シートを外します。(図 2)
Fig.1( 図 1)
• MG102C
[160]:BindHeadTappingScrew-B(B タイト+ BIND)3.0X8MFZN2B3(WE774400)
[163]:BindHeadTappingScrew-B(B タイト+ BIND)3.0X8MFZN2B3(WE774400)
1. Top Cover (Time required: About 7 minutes)
1-1 Remove all knobs. (Fig. 1)
1-2 Remove the fourteen (14) screws marked [160],
the screw marked [163A], and twenty (20) each
hexagonal nuts and washers marked [A]. The top
cover can then be removed. (Fig. 1)
* The window level is not a component of the
top cover. When replacing the top cover, re-
move the window level and install it to the new
top cover. (Fig. 1)
* When installing the top cover on the bottom
case assembly, tighten the screws in the order
shown in Fig. 1. (Fig. 1)
2. MAIN10 Circuit Board
(Time required: About 8 minutes)
2-1 Remove the top cover. (See procedure 1)
2-2 Remove the two (2) screws marked [100] and the
screw marked [163B]. The MAIN10 circuit board
can then be removed. (Fig. 2)
w
w
w
.
x
i
a
o
y
u
1
6
3
.
c
o
m
Q
Q
3
7
6
3
1
5
1
5
0
9
9
2
8
9
4
2
9
8
T
E
L
1
3
9
4
2
2
9
6
5
1
3
9
9
2
8
9
4
2
9
8
0
5
1
5
1
3
6
7
3
Q
Q
TEL 13942296513 QQ 376315150 892498299
TEL 13942296513 QQ 376315150 892498299
http://www.xiaoyu163.com
http://www.xiaoyu163.com
 Loading...