28
VE2700-8
6. Adjustments
AE
C
B
①
D
①
②
L
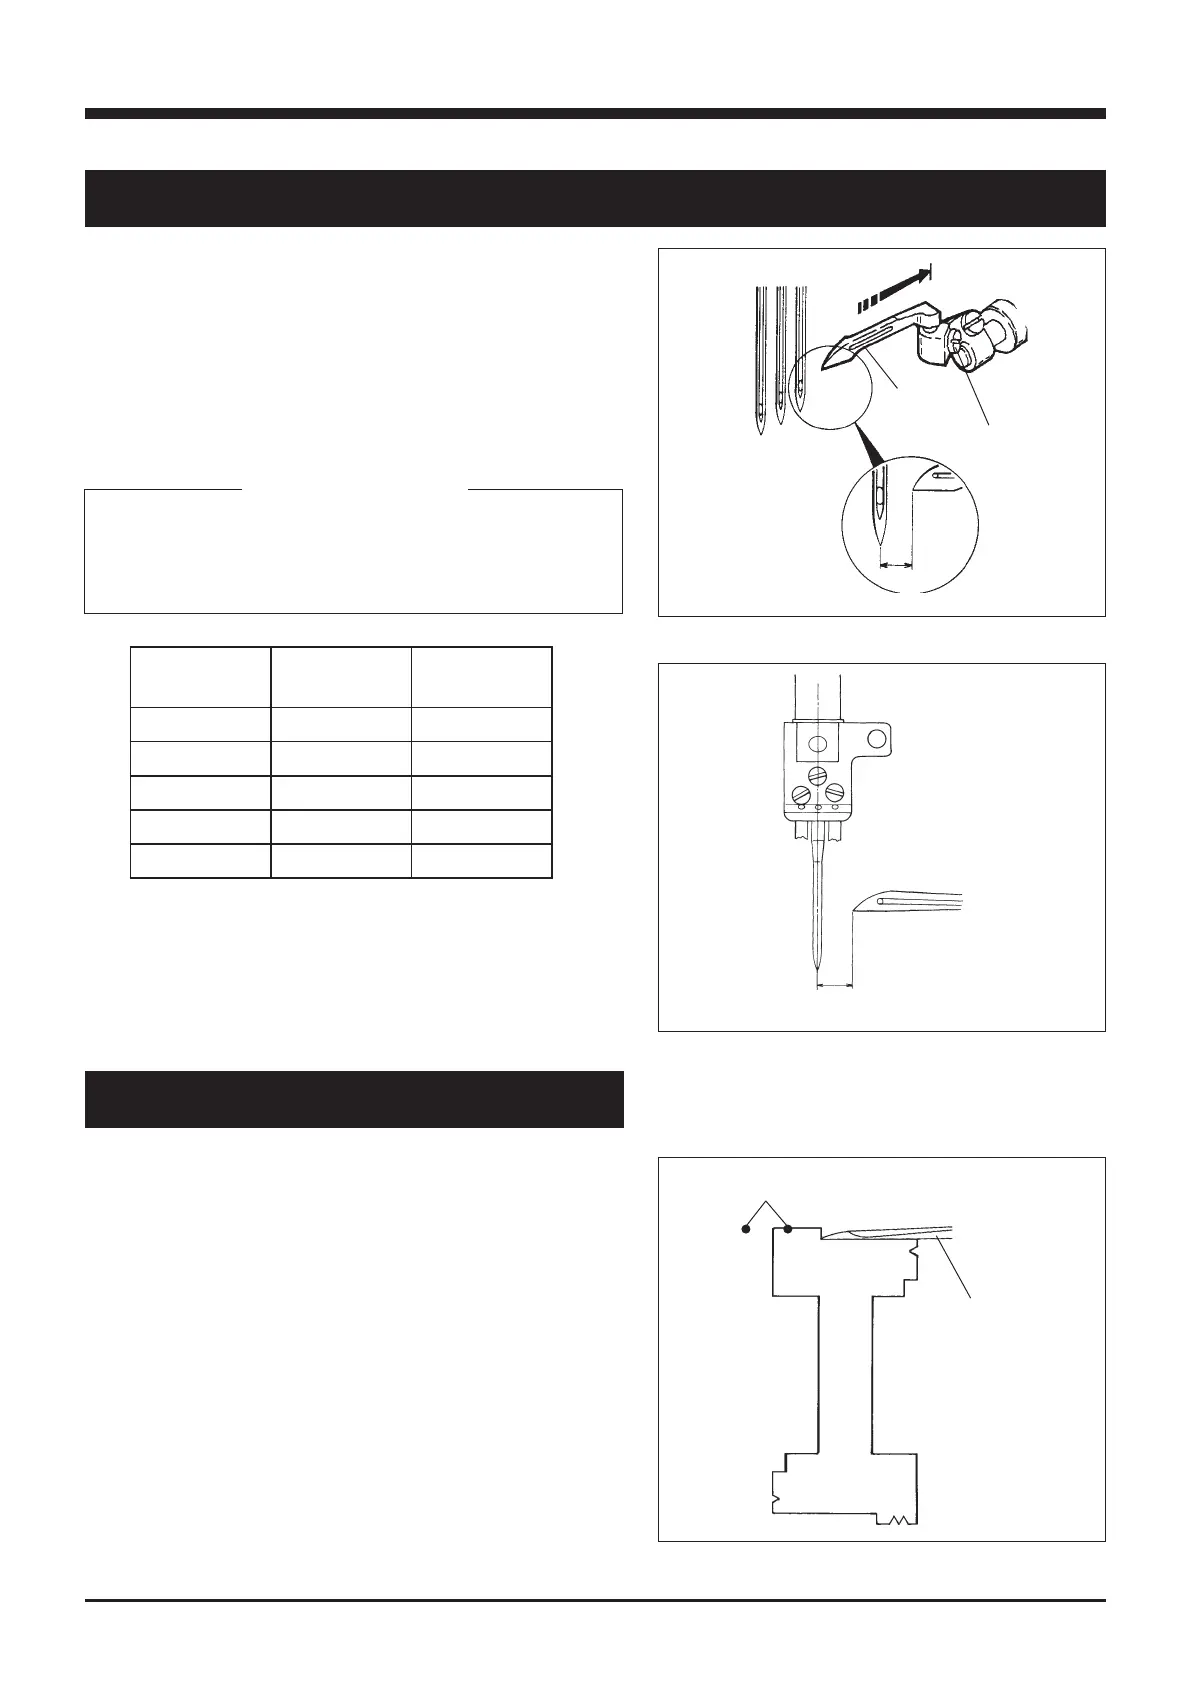
6.6 Using the timing gauge
6.5 Distance between the needle and the looper
The distance L between the looper tip and the center of
the right needle differs according to the needle distance
when the needles are at the lowest points and the looper
① is at the extreme right.
Refer to Table 5 and loosen the screw ② of the looper
holder to adjust the distance.
The distance
L can be adjusted easily by using the timing
gauge (No. 95220).
The gauge is a special order part. Place an order with our
agents or directly with us, if needed.
Fig. 6-19
Fig. 6-18
Fig. 6-17
The gauge has the marks (A, B, C, D, E) for each needle
distance.
Move the looper to the extreme right. Keep tting the
right needle into the V-shaped groove according to the
needle distance, and t the looper tip to the gauge. Then,
tighten the screw ② securely.
Table 5
Needles
The distance between the center of the needle bar and
the looper ① tip is 6.0 mm regardless of the needle dis-
tance.
6.0 ㎜
Needle
distance(mark)
Gauge mark
Looper's
distance (L)
3.2 ㎜ (32)
A
4.4 ㎜
4.0 ㎜ (40)
B
4.0 ㎜
4.8 ㎜ (48)
C
3.6 ㎜
5.6 ㎜ (56)
D
3.2 ㎜
6.4 ㎜ (64)
E
2.8 ㎜
 Loading...