25 support@yardistrystructures.com
HardwareWood Parts
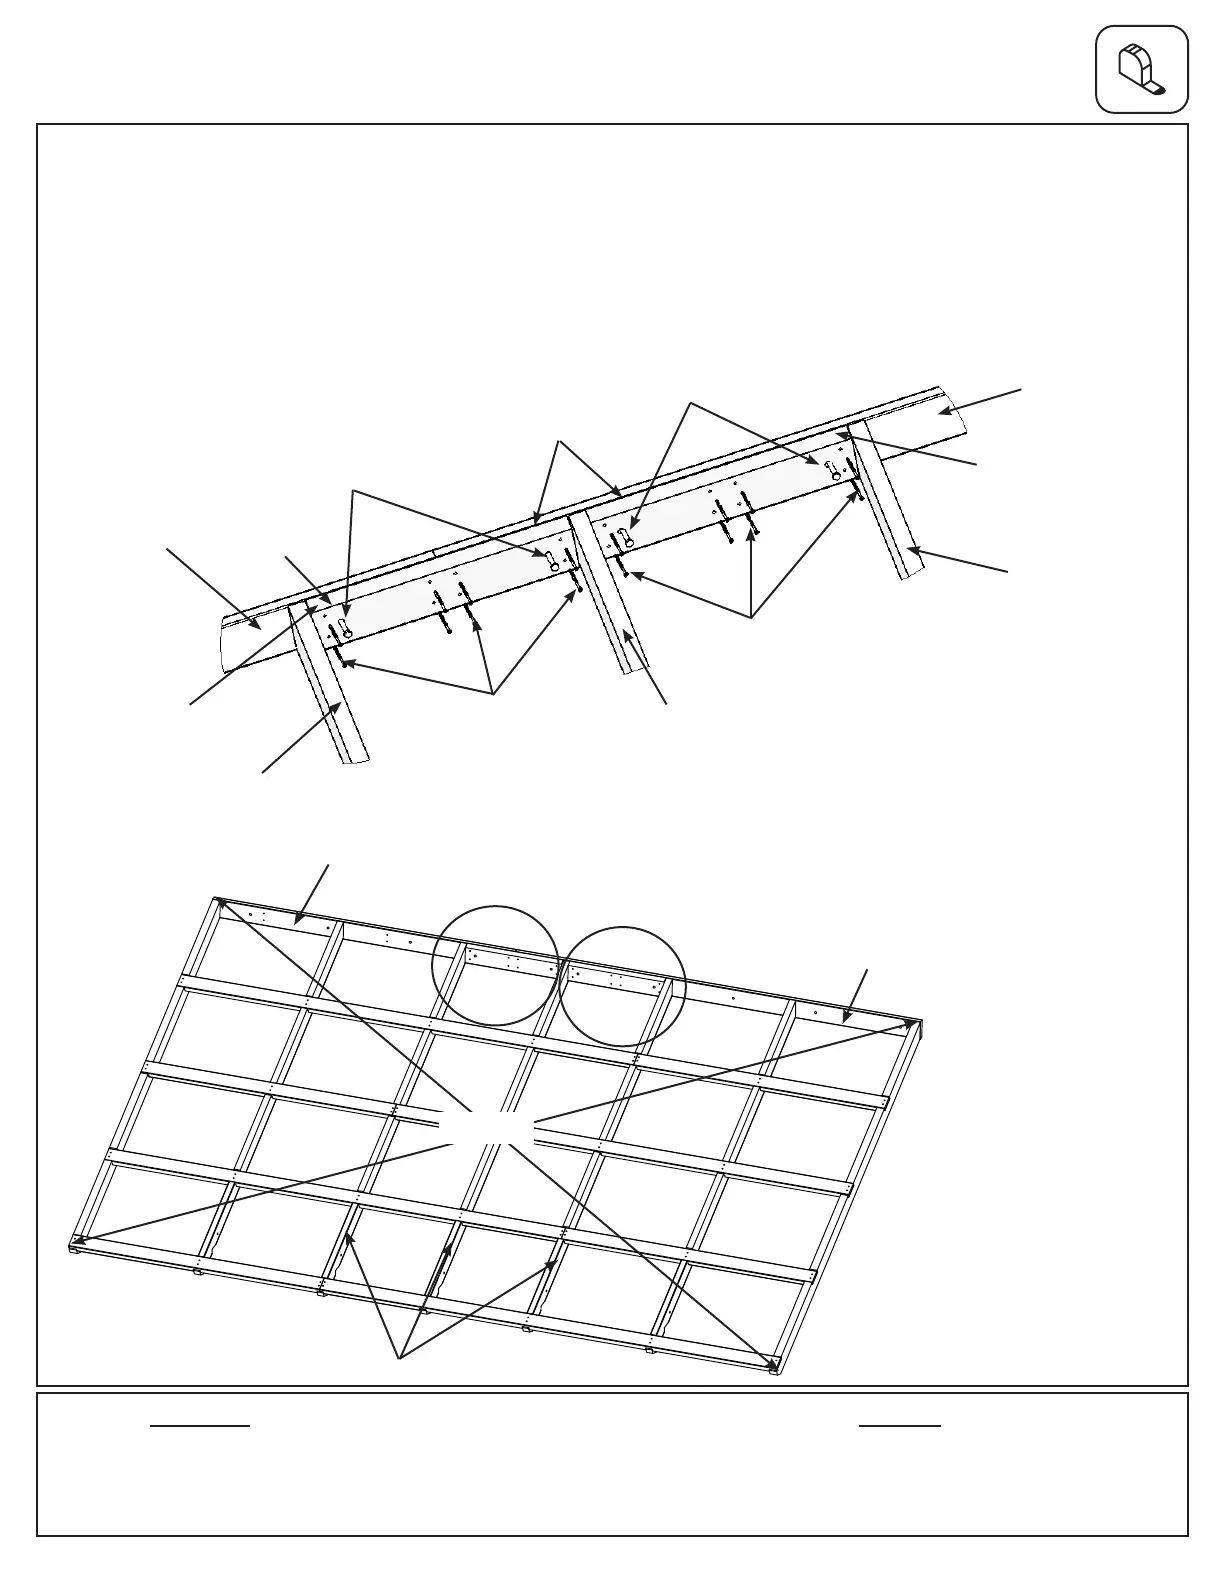
Fig. 8.6
32 x #8 x 1-3/4” Wood Screw
4 x (545) Rafter Brace 25.4 x 101.6 x 489 mm (1 x 4 x 19-1/4”)
(To be used as
guides only in
this step)
Flush
F: Make sure frame is square. Measurements to be as shown in g. 8.6.
G: In the two middle gaps between (539) Rafter As place one (545) Rafter Brace ush to the top of (542) Ridge
Short and (541) Ridge Long. Use two 1/4 x 4-3/4” Hex Bolts per brace as a guide to line up the bolt holes. Attach
(545) Rafter Braces to (469) Rafter Top Short and (467) Rafter Top with eight #8 x 1-3/4” Wood Screws per brace.
Remove each Hex Bolt as they will be used in a later step and not installed here. Note: Angle is at the top of
(545) Rafter Brace (g. 8.6 and 8.7)
H: Repeat Steps A - G to create a second Roof Panel Frame.
Step 8: Frame Roof Panel
Part 3
#8 x 1-3/4
Wood Screws
x 8
Fig. 8.7
(541) Ridge
Long
(539)
Rafter A
(539) Rafter A
(545) Rafter
Brace
1/4 x 4-3/4”
Hex Bolt
(541) Ridge Long
14’
(To be used as
guides only in
this step)
1/4 x 4-3/4”
Hex Bolt
#8 x 1-3/4
Wood Screws
x 8
(539)
Rafter A
(539)
Rafter A
(542) Ridge
Short
(542) Ridge Short
(545) Rafter
Brace
Notice angle at
top of each (545)
Rafter Brace