28 support@yardistrystructures.com
Hardware
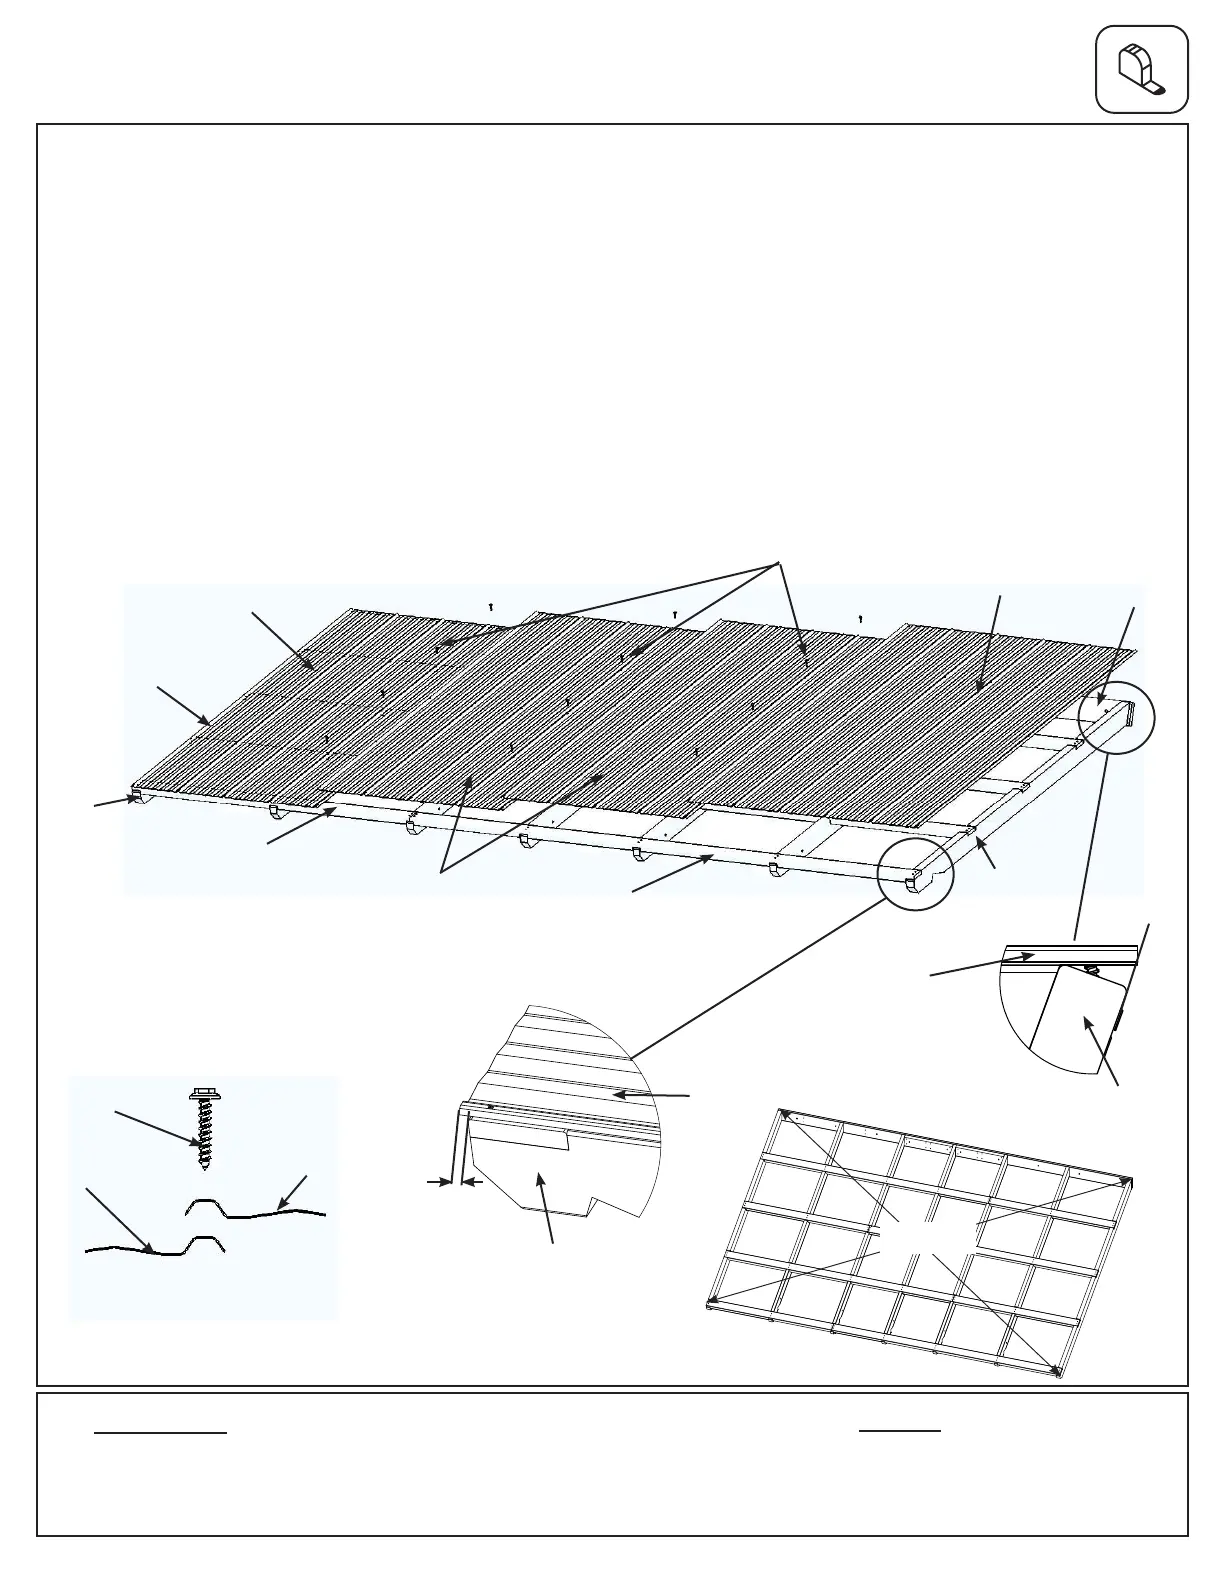
Step 9: Attach Roof Panels
Part 1
Note: Be sure to remove all plastic covering on both sides of the metal panels directly before installing
each piece.
A: Make sure panel is still square then on one Roof Panel Frame place one Main Panel ush to the top and sides
of the outside (540) Rafter B. Panels should be ush to the top of the (541) Ridge Long and (542) Ridge Short.
There will be approximately a 5/16” overhang at the bottom. There are no holes on the ribs at the top of the
panels. (g. 9.1, 9.2, 9.3 and 9.4)
B: Place two more Main Panels beside the rst then lastly one Right Side Panel so the panels overlap and screw
holes line up as shown below. (g. 9.1 and 9.5)
C: Attach all four Panels to Roof Panel Frame using twelve #8 x 1” Hex Roong Screws in locations shown in
g. 9.1. Do not install screws to the outside (544) Strap Short and (543) Strap Long. Be sure not to overtighten
screws.
D: Repeat Steps A - C for the second Roof Panel Frame.
Fig. 9.5
24 x #8 x 1” Hex Roong Screw
Roof Panel Set:
6 x Main Panel
2 x Right Side Panel
Side View
Panels overlap
at the seams
#8 x 1” Hex Roong
Screws x 12
Panel
DO NOT overtighten
screws, could cause
damage to roong
material
Flush
Panel
Panel
Main Panel
(544) Strap Short
(543) Strap Long
#8 x 1” Hex
Roong
Screws
Fig. 9.1
Fig. 9.4
(541) Ridge
Long / (542)
Ridge Short
Fig. 9.2
Side View
Fig. 9.3
(468) Rafter
Panel
5/16”
Bottom
Top
Start on
this end
Main
Panel
Right Side
Panel
(540)
Rafter B
(540)
Rafter B
14’
(542) Ridge
Short