38 support@yardistrystructures.com
14 x 12 - Inst 9 - Attach Truss
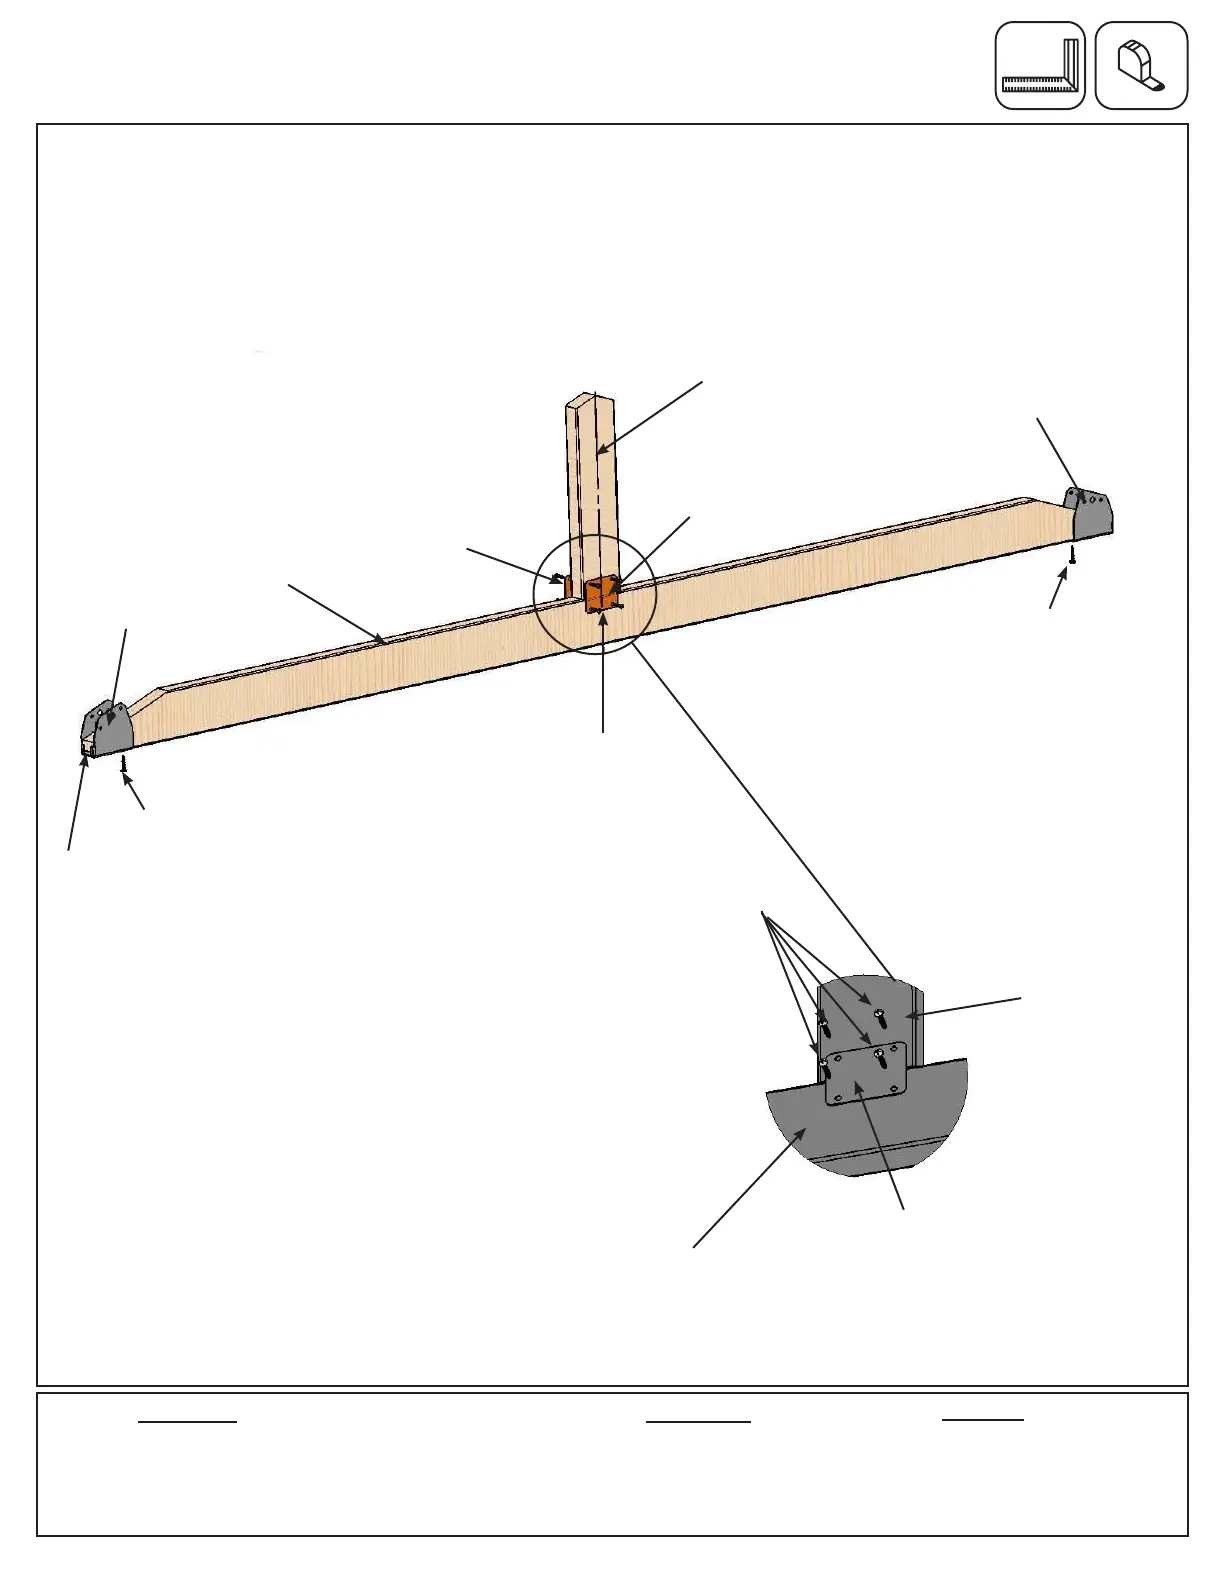
A: Place one (547) Tie Brace centred, tight and square to the top of (546) Tie. Attach (546) Tie to (547) Tie
Brace using two Jamb Mounts (one per side) with four #8 x 1” Pan Screws per mount. Repeat to complete ve
Tie Brace Assemblies. (g. 13.1 and 13.2)
B: Attach one Tie Wrap Bracket to each end of each (546) Tie with one #10 x 1-1/4” Pan Screw per bracket using
the inside holes. (416) Tie is tight to end of bracket. (g. 13.1)
Hardware
40 x #8 x 1” Pan Screw
10 x #10 x 1-1/4” Pan Screw
Componets:
10 x Tie Wrap Bracket
10 x Jamb Mount
Fig. 13.1
Fig. 13.2
#8 x 1” Pan Screw
(4 per bracket)
Step 13: Truss Assemblies
Part 1
Wood Parts
5 x (546) Tie 31.8 x 88.9 x 2333.6 mm (1-1/4 x 3-1/2 x 91-7/8”)
5 x (547) Tie Brace 31.8 x 88.9 x 454 mm (1-1/4 x 3-1/2 x 17-7/8”)
(546) Tie
Tie Wrap
Bracket
Jamb
Mount
(546) Tie
(547) Tie
Brace
#10 x 1-1/4”
Pan Screw
Jamb
Mount
Tie Wrap
Bracket
#10 x 1-1/4”
Pan Screw
Centred
Tight
Jamb
Mount
(547) Tie
Brace