34 support@yardistrystructures.com
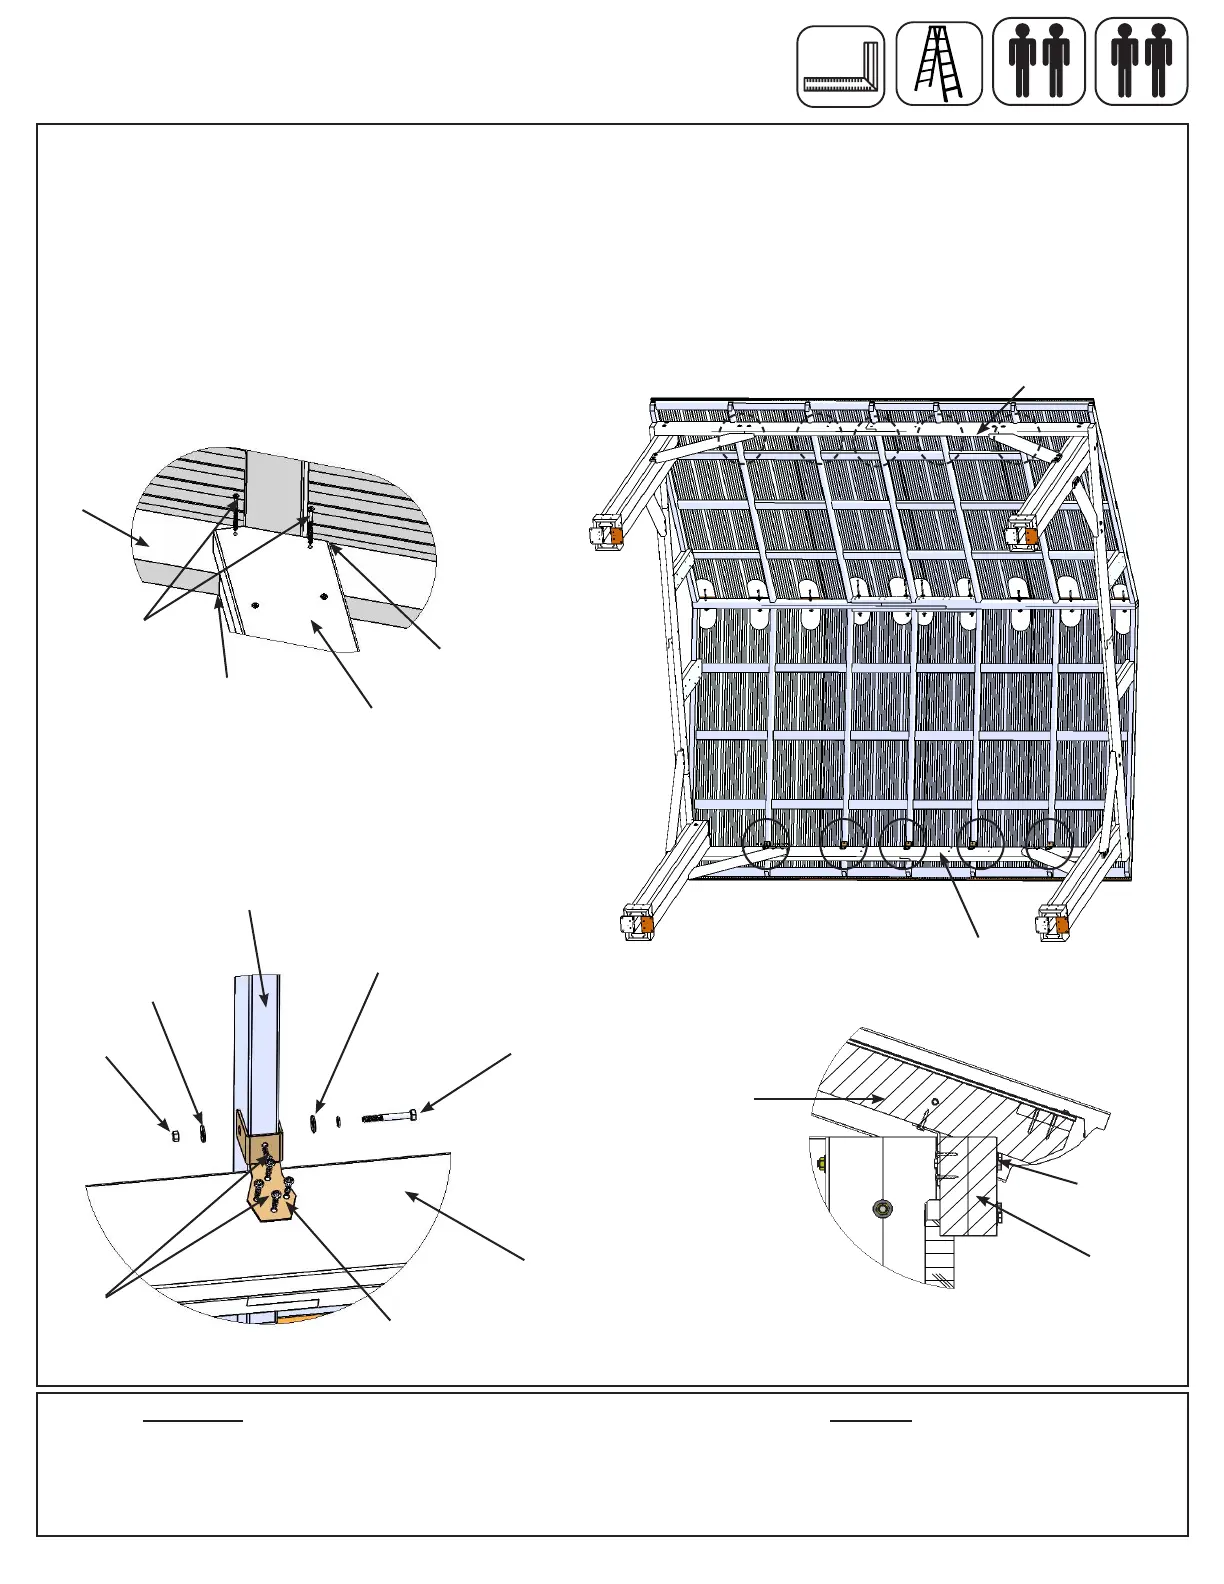
C: Loosely attach each of the (539) Rafter As to the inside of each Side Beam Assembly with one Rafter to Beam
Bracket per rafter using one 1/4 x 2” Hex Bolt (with two 1/4-5/16” large washer and one 1/4” lock nut) per bracket.
Push up on the centre of the Roof Panels so the notches in the rafters are tight to the Side Beam Assembly then
attach ve #10 x 1-1/4” Pan Screws per bracket. Once screws are installed tighten bolts. (g. 10.7,10.8 and
10.9)
D: From inside the assembly make sure the Gable Uprights are still square then attach each (552) Gable Upright
Assembly Right and (553) Gable Upright Assembly Left to rafters with two #8 x 2-1/2” Wood Screws per Gable
Upright Assembly. (g. 10.6)
Fig. 10.7
Fig. 10.8
Hardware
10 x 1/4 x 2” Hex Bolt (1/4-5/16” large washer x 2, 1/4” lock nut)
50 x #10 x 1-1/4” Pan Screw
8 x #8 x 2 1/2” Wood Screw
Step 10: Attach Roof Panels to Frame
Part 3
x 3
1/4” Lock
Nut
1/4 x 2”
Hex Bolt
Side Beam
Assembly
Side Beam
Assembly
10 x Rafter to Beam Bracket
Component
(539)
Rafter A
#10 x 1-1/4”
Pan Screw x 5
per bracket
Rafter to
Beam Bracket
Side Beam
Assembly
Side Beam
Assembly
Tight
Rafter
Fig. 10.9
1/4-5/16”
Large Washer
1/4-5/16”
Large Washer
Fig. 10.6
(539)
Rafter A
#8 x 2-1/2”
Wood Screws
Inside View
Gable Upright
Assembly
Tight
Tight