6 Disassembly and Reassembly of Speed Reducer
6.1 Disassembly and Reassembly of S-Axis Speed Reducer
6-1
176183-1CD
HW1483638
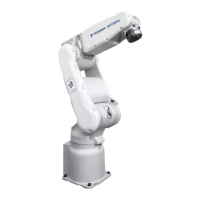
MH5S(II)/MH5F
6 Disassembly and Reassembly of Speed Reducer
6.1 Disassembly and Reassembly of S-Axis Speed Reducer
• Refer to Fig. 6-1 “Disassembly & Reassembly of the S-Axis Speed
Reducer”.
Disassembly
1. Turn OFF the DX100/DX200/FS100 power supply.
2. Connect the backup batteries with the S-, L-, U-, R-, B- and T-axes
motors. After disconnect all the cables connected to the internal wiring
harness, remove the internal wiring harness from the manipulator.
(Refer to Chapter 10 “Cable Wiring”.)
3. Remove the S-axis motor. (Refer to section 5.1 “Disassembly and
Reassembly of the S-Axis Motor”.)
4. Unscrew the GT-SA bolts and remove the M-base together with
the shaft .
5. Unscrew the GT-SA bolts and remove the support B .
6. Unscrew the hexagon socket head cap screws and remove the
gear .
7. Unscrew the hexagon socket head cap screws . Then detach the
base from the S-head with the removal tap for the base.
8. Remove the bearing from the M-base.
9. Unscrew the hexagon socket head cap screws and remove the
circular spline/ the flex spline from the S-head.
10. Remove the wave generator from the bearing and the bearing
and the oil seal from the S-head as well.
11. Remove old sealing from each parts.
Reassembly
1. Mount the oil seal on the S-head.
2. Apply ThreeBond 1206C to the matching face between the circular
spline/ the flex spline and the S-head. Then mount the circular
spline/ the flex spline on the S-head.
3. Attach the conical spring washers to the hexagon socket head cap
screws and tighten them with the tightening torque shown in
Table 6-1 “S-Axis Speed Reducer Parts Checklist”.
4. Press fit the bearing into the wave generator . (When replace the
speed reducer, replace the bearings too.)
5. Apply Harmonic Grease SK-1A to the bearing of the wave
generator . Then insert the wave generator in the circular spline/
the flex spline .
6. Press fit the bearing into the base. (The bearing has the sealing
on one side. Turn the sealing side to the gear (the base side) and the
non-sealing side to the S-head.)
7. Mount the collar on the gear . Then mount them on the S-base.
8. Apply ThreeBond 1206C to the matching face between the circular
spline/ the flex spline and the base. Then mount the circular spline/
the flex spline on the base.
 Loading...