ADPZP0CC - MHYRIO FLASH CONTROLLER - User Manual Page - 31/36
7.10 Description of the set model Function
The only parameter present in SET MODEL function is CONNECTED TO.
By setting this parameter, operator can connect ZAPI Console to every ZAPI
product connected to CAN-BUS line. This functionality allows completely control
of every ZAPI product without changing the position of the Console connector.
This is the only way to connect ZAPI Console to Mhyrio Flash controller because
the Console connector is not present in Mhyrio Flash controller.
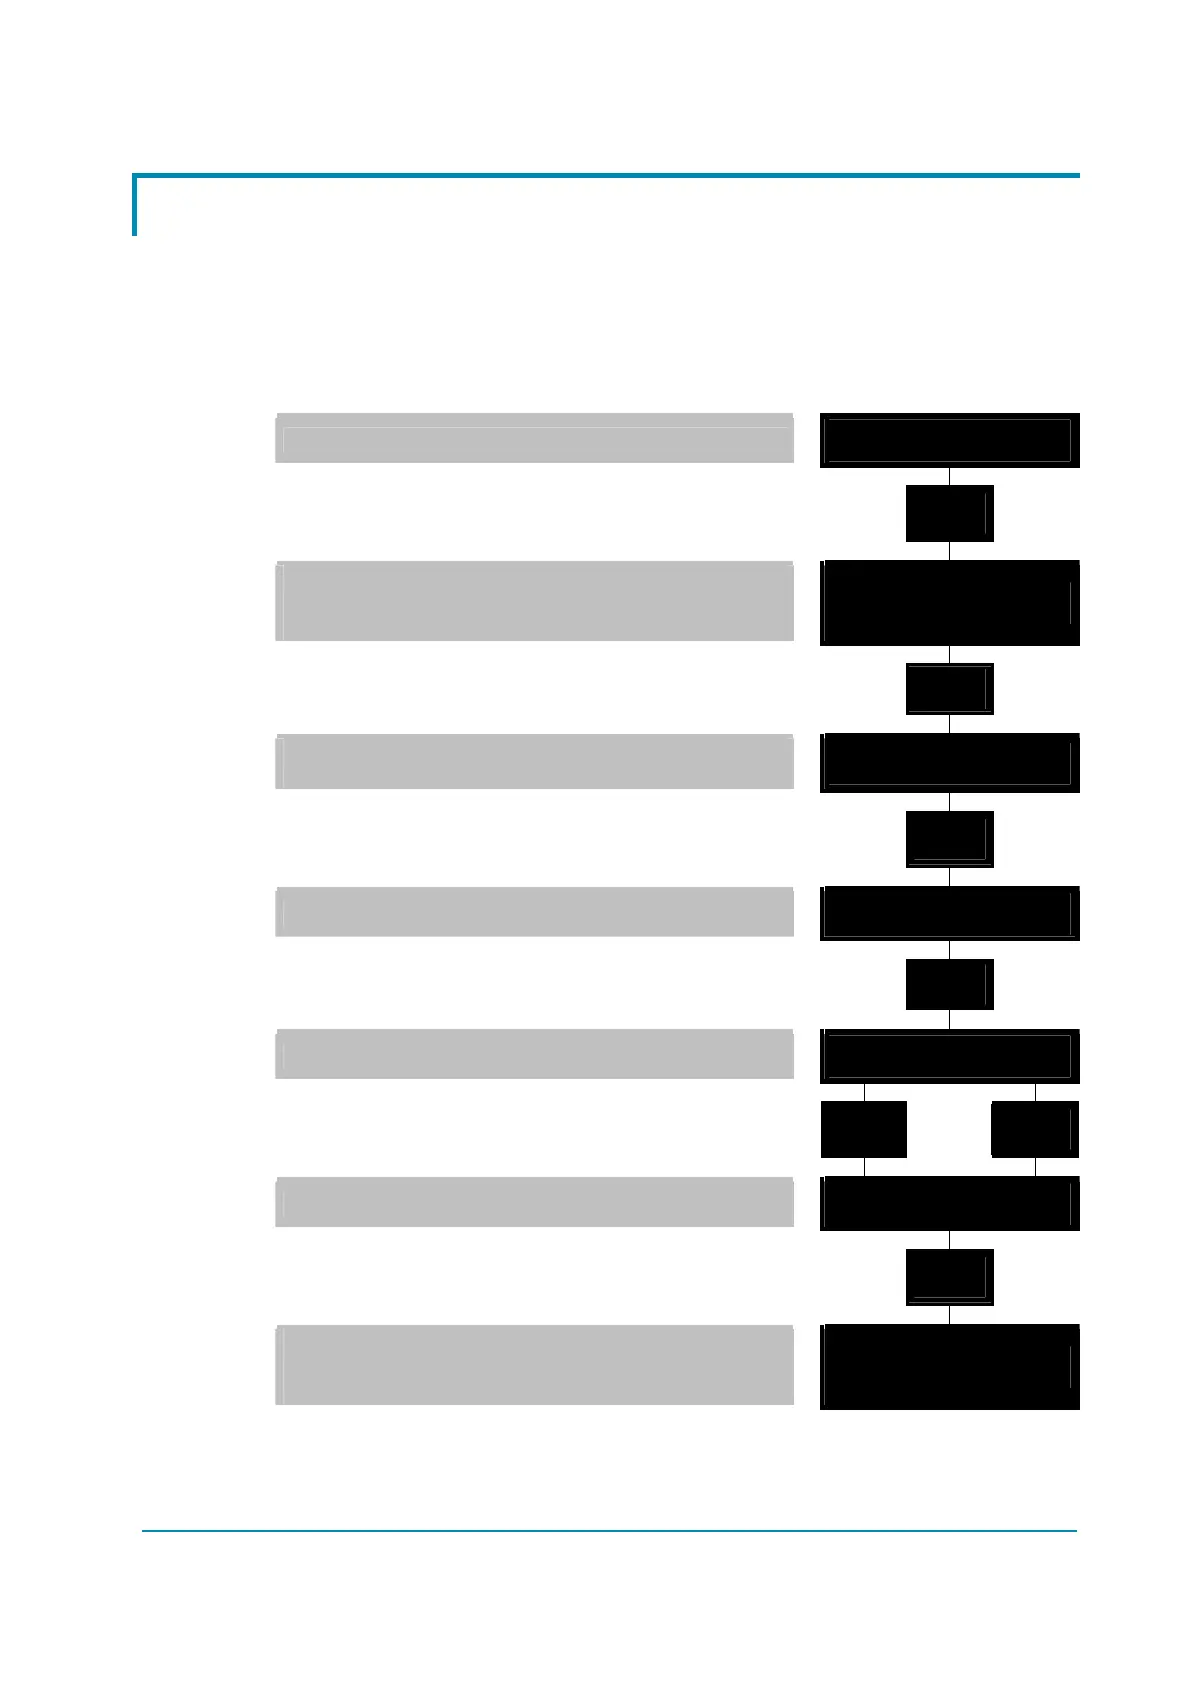
1) Opening Zapi Menu.
MHYRIO F ZAPI V0.0
48V 0A 00000
2) Press ROLL UP & SET UP buttons together
to enter SET MENU.
% ' %
' ' '
3) The Display will show: SET MODEL.
If another menu is displayed, press ROLL UP or
ROLL DOWN until SET MODEL appears.
CONFIG MENU
SET MODEL
4) Press ENTER to go into the SET MODEL Menu.
' % '
' ' '
5) The display will shows the first option, only
CONNECTED TO option is present in this menu.
CONNECTED TO
9
6) Press SET UP or SET DOWN buttons in order to
select the desired value for selected option.
' ' %
' ' %
7) New desired value appears.
CONNECTED TO
2
8) Press OUT to exit the Menu.
' ' '
' % '
9) Confirmation request appears.
ARE YOU SURE?
YES=ENTER NO=OUT
10) Press ENTER to accept the changes, or press
OUT if you do not accept the changes.
' % '
' ' '
' ' '
' % '
11) SET MODEL Menu appears.
CONFIG MENU
SET MODEL
12) Press OUT again. Console now disconnects
and reconnects.
' ' '
' % '
13) Display now shows the Opening Zapi Menu
of the ZAPI product corresponding to option
selected at point 7.
AC2 ZAPI V0.0
48V 0A 00000