Primovert Start-Up and Operation ZEISS
12/2014 415510-7244-001 43
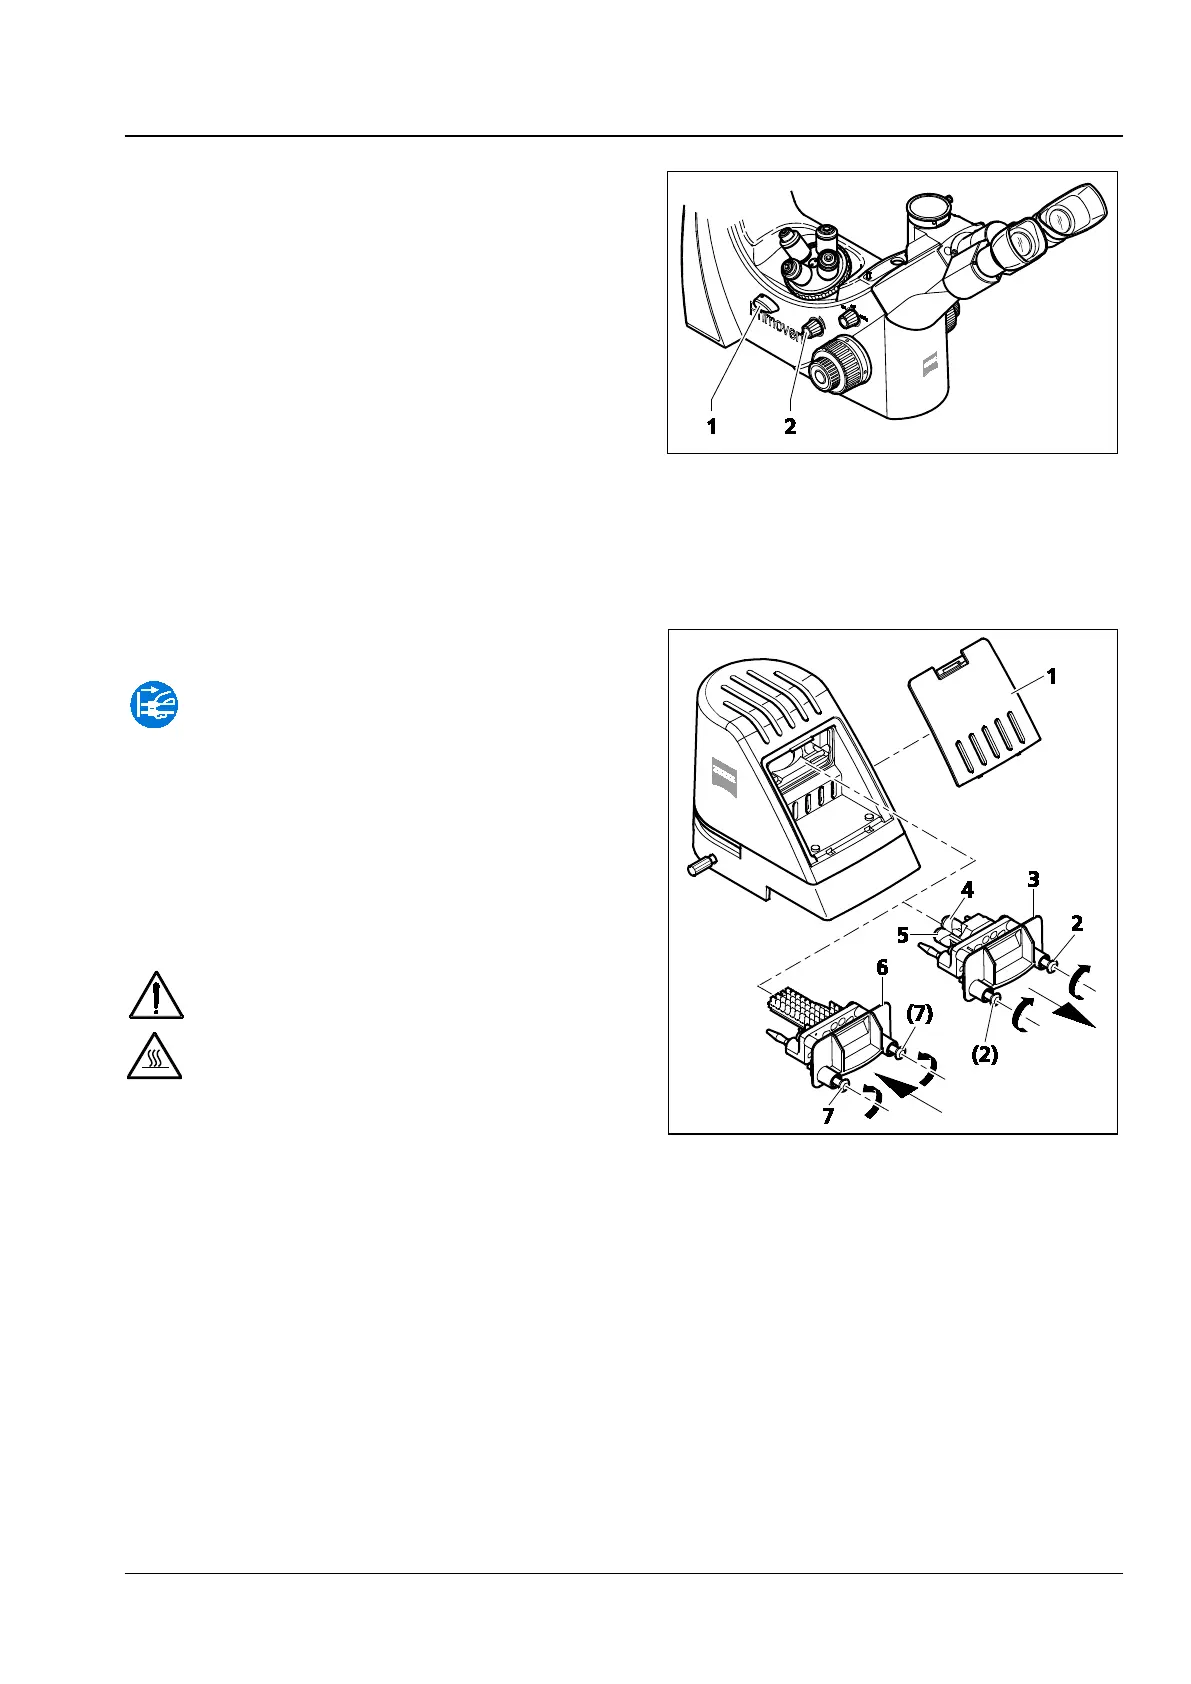
3.8 Reflected-Light Fluorescence
• Turn the transmitted light / reflected light
changeover switch (Fig. 35/1) upward to the
reflected-light position (Fluorescence).
• Switch on the reflected-light illuminator using
the rotary knob (Fig. 35/2) and adjust the
desired illumination intensity.
3.9 Retrofitting the Microscope
Unplug the plug-in power unit from
line power before retrofitting the
microscope.
3.9.1 Replacing the Halogen Bulb
6 V / 30 W of the Transmitted-Light
Illuminator or the Transmitted-
Light Illuminator with LED
Switch off the microscope before
replacing the transmitted-light
illuminator with LED or the halogen
bulb 6 V / 30
W, allow for a sufficient
cool-down time and remove the plug-
in power unit from the socket.
• Press down the clamping lug of the cover
(Fig. 36/1) and remove the cover from the
stand.
• Loosen both fastening screws (Fig. 36/2) of the
transmitted-light illuminator (e.g. transmitted-
light illuminator with halogen bulb, Fig. 36/3).
In doing so, slightly press the screws against the
spring and turn them by 90°: Turn left and right
screw clockwise.
• Pull the transmitted-light illuminator (Fig. 36/3) out of the stand.
• Pull the halogen bulb (Fig. 36/4) out of the lamp carrier and insert the new halogen bulb. Do not
touch the new lamp with bare fingers as this will decrease the life of the bulb.
Fig. 35 Adjusting reflected-light
fluorescence
Fig. 36 Replacing the halogen bulb
6 V / 30 W or the transmitted-light
illuminator with LED