ZEISS Start-Up and Operation Primovert
44 415510-7244-001 12/2014
A spare bulb (Fig. 36/5) can be placed in the transmitted-light illuminator with halogen bulb
and remain there during the operation.
The transmitted-
light illuminator with LED has to be replaced completely. The LED alone
cannot be replaced.
• Push the transmitted-light illuminator (e.g. transmitted-light illuminator with LED, Fig. 36/6) into the
stand and fasten it with the two screws (Fig. 36/7). In doing so, slightly press the screws against the
spring and turn them by 90°: Turn right and left screw counterclockwise.
• Attach the cover (Fig. 36/1) again to the stand and let it snap into place.
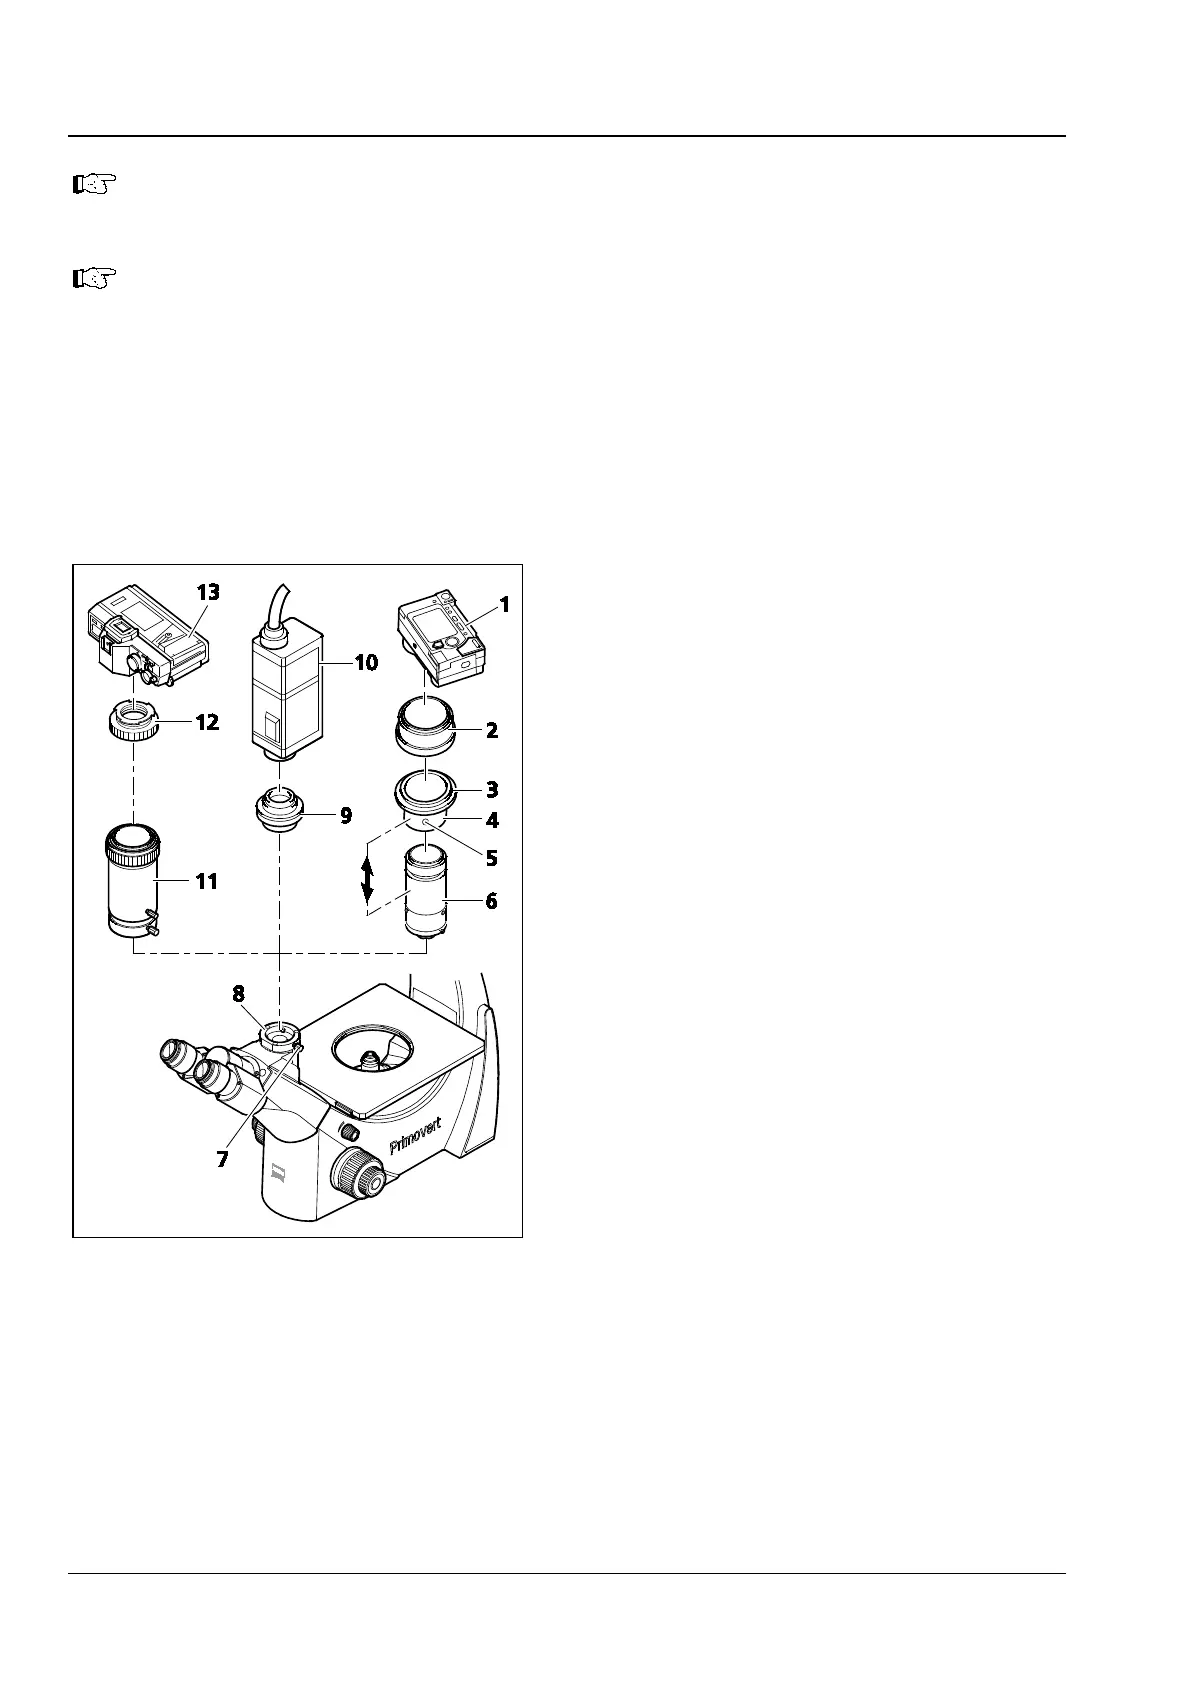
3.9.2 Attaching a Camera to the Stand
with Binocular Phototube
You can attach a digital camera, a video camera or
a compact digital camera of your choice to the
microscope with binocular phototube using the
four available camera adapters (see Section 2.1).
• Loosen the clamping screw (Fig. 37/7) and
remove the dust cap from the camera port
(Fig. 37/8) of the binocular phototube.
Attaching a Compact Digital Camera
• Sliding mount (Fig. 37/4), thread adapter ring
M37/52 (Fig. 37/3) and lens mount (Fig. 37/6)
are supplied pre-assembled as Digital Camera
Adapter P95 M37/52x0.75. The opposite
drawing shows this unit dismantled.
Furthermore, you may unscrew the thread
adapter ring M37/52 (Fig. 37/3) from the sliding
mount (Fig. 37/4) (not shown) so that you can
also attach cameras with M37 thread.
• Mount the adapter ring (Fig. 37/2) (optional
accessory for the corresponding camera) to the
camera (Fig. 37/1) (see the operating
instructions of the camera).
• Screw the unit consisting of sliding mount (Fig. 37/4), thread adapter ring M37/52 (Fig. 37/3) and lens
mount (Fig. 37/6) into the adapter ring (Fig. 37/2).
• Insert the camera with adapter into the phototube as far as it will go. Align it and fasten it with the
clamping screw (Fig. 37/7).
Fig. 37 Attaching the camera