Primovert Start-Up and Operation ZEISS
12/2014 415510-7244-001 45
• Depending on the microscope equipment or the camera used, it may be necessary to optimize the
distance between camera lens and lens mount (Fig. 37/6) (see double-headed arrow). This will be
necessary in particular if it is impossible to obtain an unvignetted image in any of the zoom positions
of the camera lens. To this end, adjust the camera as follows:
− Switch off autofocus.
− Set the object distance to ∞.
− Set aperture-priority auto exposure mode.
− Choose an aperture as large as possible (i.e. small aperture number!).
Not all cameras provide these options. Please consult the operating manual of the camera used.
• Loosen the set screw (Fig. 37/5).
• Vary the camera lens/lens mount distance gradually, i.e. displace the sliding mount with camera on the
lens mount in defined steps.
• Zoom the camera lens through from wide angle (W) to tele position (T).
• Carry out this test until the image is format-filling without masking or vignetting.
• Retighten the set screw (Fig. 37/5).
With camera/adapter combinations that have
not been recommended expressly by Zeiss, it
may be quite impossible to obtain an unvignetted image.
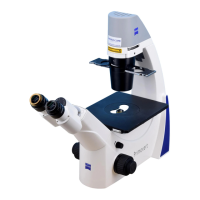
Attaching a Digital Camera, Single-Lens Reflex Camera or Video Camera with C-Mount Thread
Cameras with C-mount thread are to be connected to the phototube of the microscope by means of the
camera adapter P95-C 2/3" 0.65x or P95-C 1/2" 0.5x (Fig. 37/9).
• Put the video camera
(Fig. 37/10) or single-lens reflex camera (Fig. 37/13) (using the T2 adapter for
this camera (Fig. 37/12) together with the corresponding camera adapter
(Fig. 37/9 or 11) into the
phototube as far as it will go, align it and fasten it with the clamping screw
(Fig. 37/7).