133D Systems, Inc.
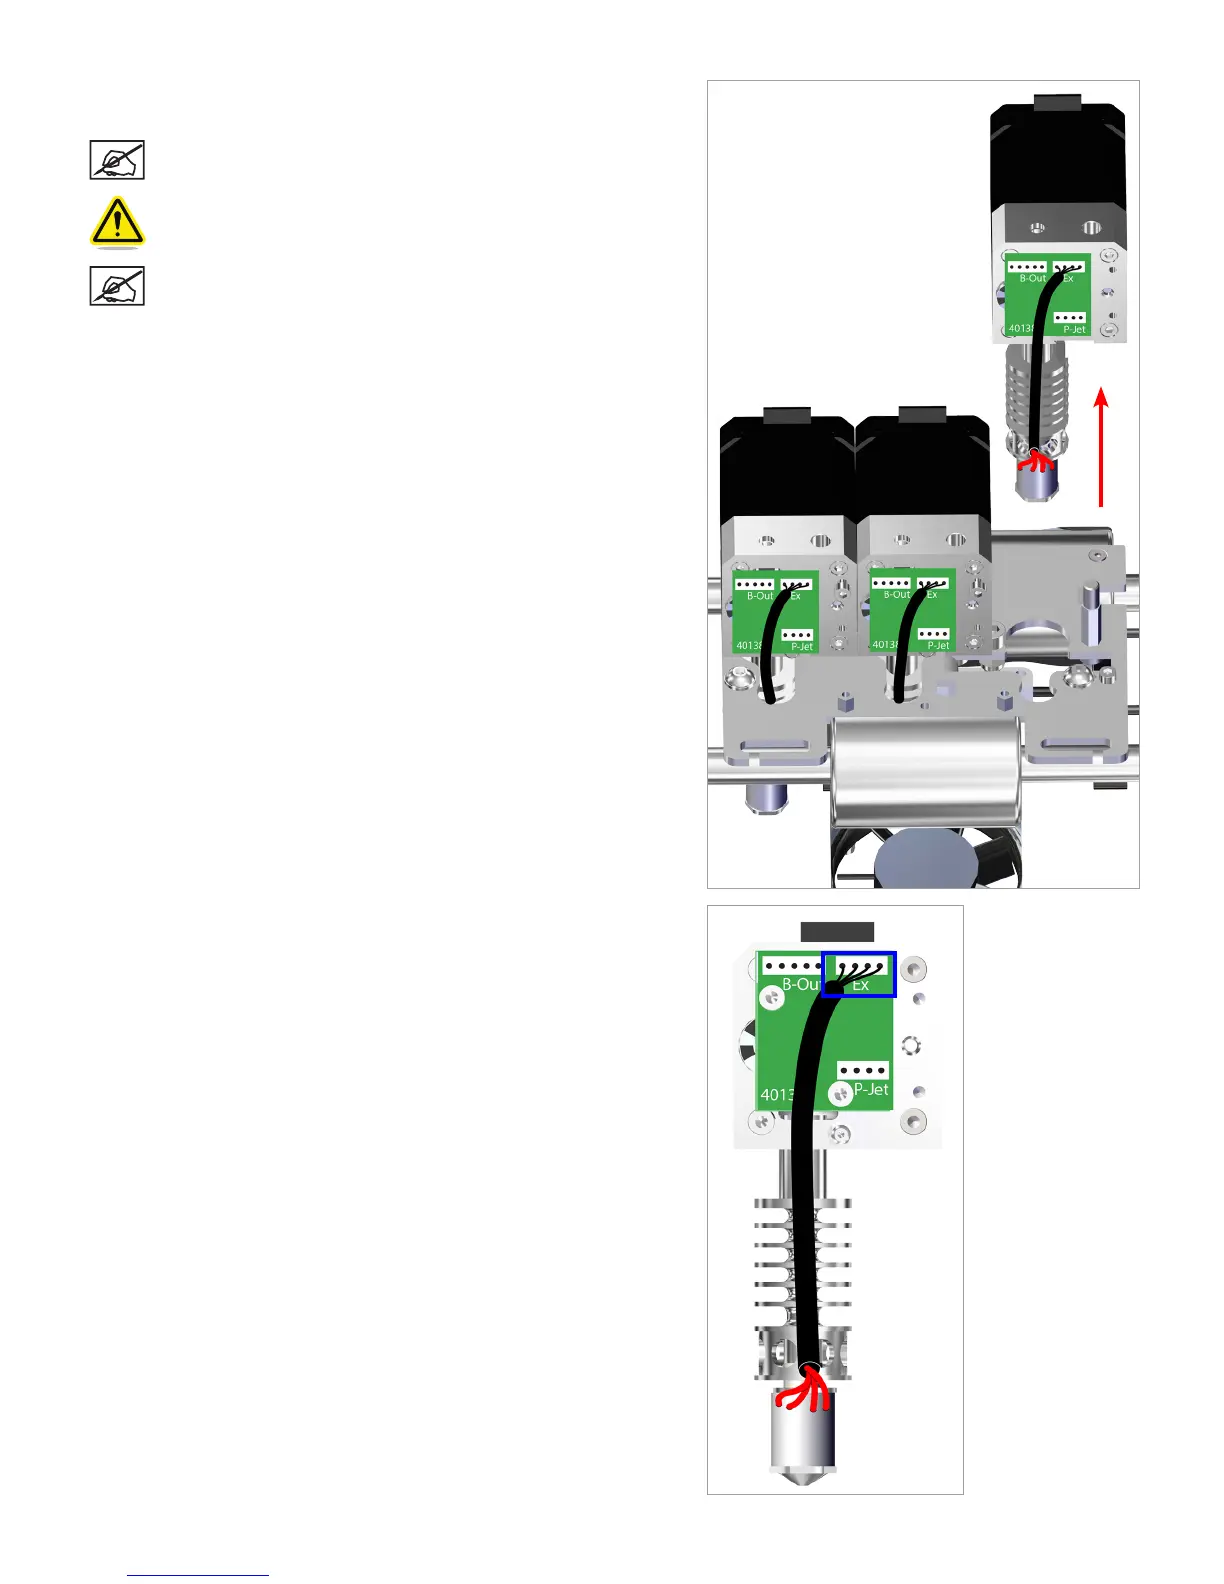
21. Carefully remove the affected extruder assembly from the carriage
plate.
NOTE: Do not lose the screws that were loosened in the
previous step.
CAUTION: Be careful not to damage the print jet cables
connected to junction Ex of the extruder PCBs.
NOTE: For clarity, the main extruder PCB was removed
from the illustration. It does not need to be removed for this
procedure.
22. Disconnect the print jet cable from junction Ex from the Extruder PCB.
Back View