Service Manual FireCR
+
Computed Radiography Scanner
22 Parts Removal/Replacement | FireCR
+
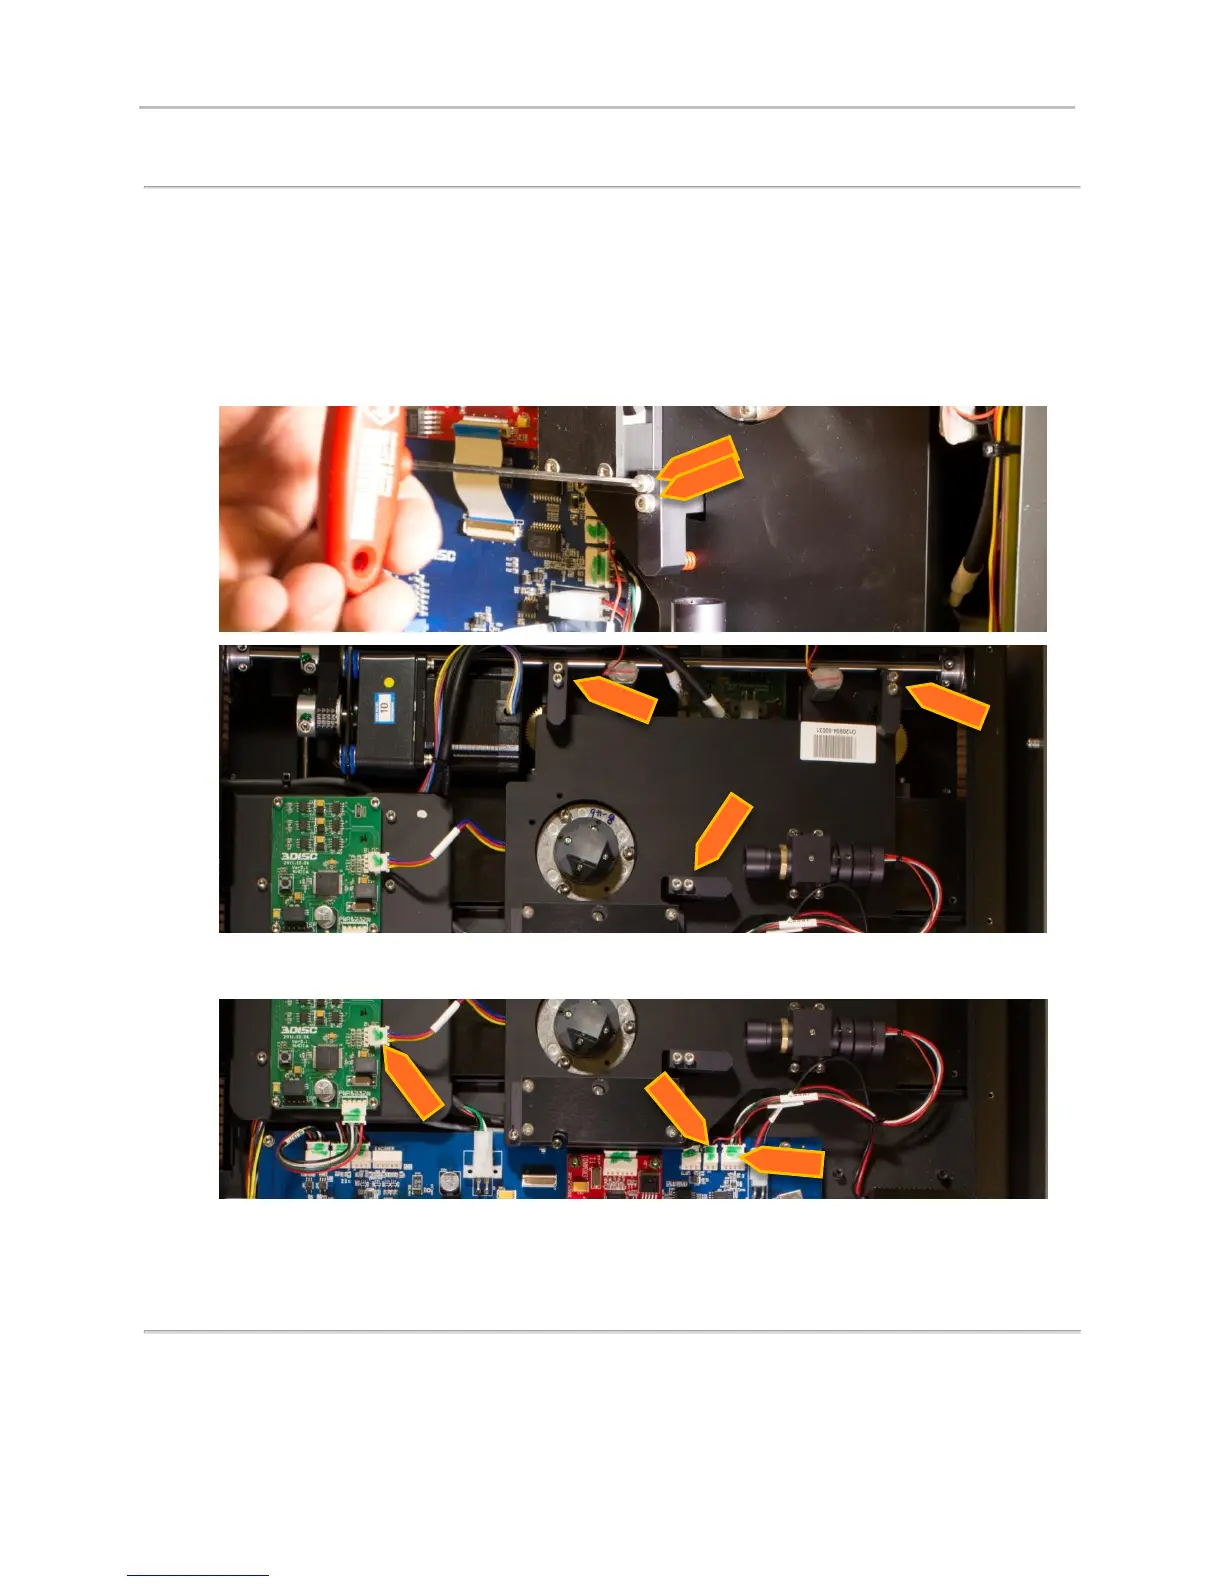
Optic Plate
1. Remove Top Cover. (Pg. 14)
2. Remove Internal Cover. (Pg. 16)
3. Remove 2 screws from each of the three spring loaded brackets (2.5mm hex). Note: Keep
pressure over the spring while removing and re-installing screws.
4. Unplug the 3 wire connectors (1 to BLDC, 2 to Main Board)
5. Lift out Optic Plate.
6. Reinstall in reverse order.