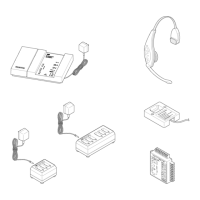
a. Turn on the headset. (Audible tones will be heard in the headset indicating that the programming is
complete.)
b. To identify which lane a headset is assigned to, attach the applicable lane number decal (included with
each headset) as shown in Figure 3.
Be sure to reprogram all the headsets in the system to their respective channel and lane numbers.
Ear
Pad
Headset
Lane
Number
Decal
Talk/
Page
Switch
Lane
Select
Switch
Figure 3. Headset Lane Identification and Cross-Lane Remote Switch
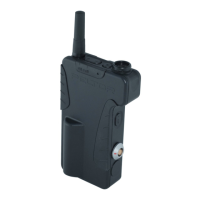
2. Using a remote switch cord, connect a Cross-Lane Remote Switch to one of the headsets in the system. The
Dual-Lane remote has a Lane Select switch which allows the operator to selectively communicate with
either lane 1 or lane 2.
Important!
Only one of the system headsets should be used at any time for
cross-lane operation. This headset must have a Dual-Lane Remote
(with a Lane Select switch) for cross-lane operation.
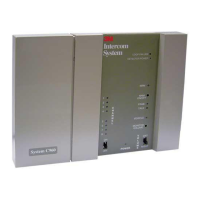
3. Turn on both base stations and slide the switch on the Cross-Lane Module to the ON position.
4. Check for proper cross-lane operation as follows:
D
Set the Lane Select Switch on the remote to the lane 1 position; you should be able to listen/talk to
lane 1.
D
Set the Lane Select Switch on the remote to the lane 2 position; you should be able to listen/talk to
lane 2.
D
Set the Lane Select Switch to lane 2 and then activate the lane 1 vehicle alert. You should hear one
repeating “beep” in the headset. Set the lane select switch to lane 1 and then activate the lane 2 vehicle
alert. You should hear two repeating “beeps” in the headset. (These steps verify that the Cross-Lane
Module allows the vehicle alerts to “cross over” from one base station to the other.)
Printed on 50% recycled
waste paper, including 10%
post-consumer waste paper.
Food Services Trade Department
3M Center
St. Paul, Minnesota 55144--1000
Printed in U.S.A.
E3M 1995 March
78-6912-0487-5/Rev. B