14 RHD250 to 4000 (Contrac) ELECTRICAL ROTARY ACTUATOR | SEI/RHD250/4000-EN REV. A
… 4 Maintenance
… Motor
Motor removal
Danger to life due to unexpected movement of the actuator!
Note that the actuator position may be changed accidentally
by the external load on the drive when the brake is released, or
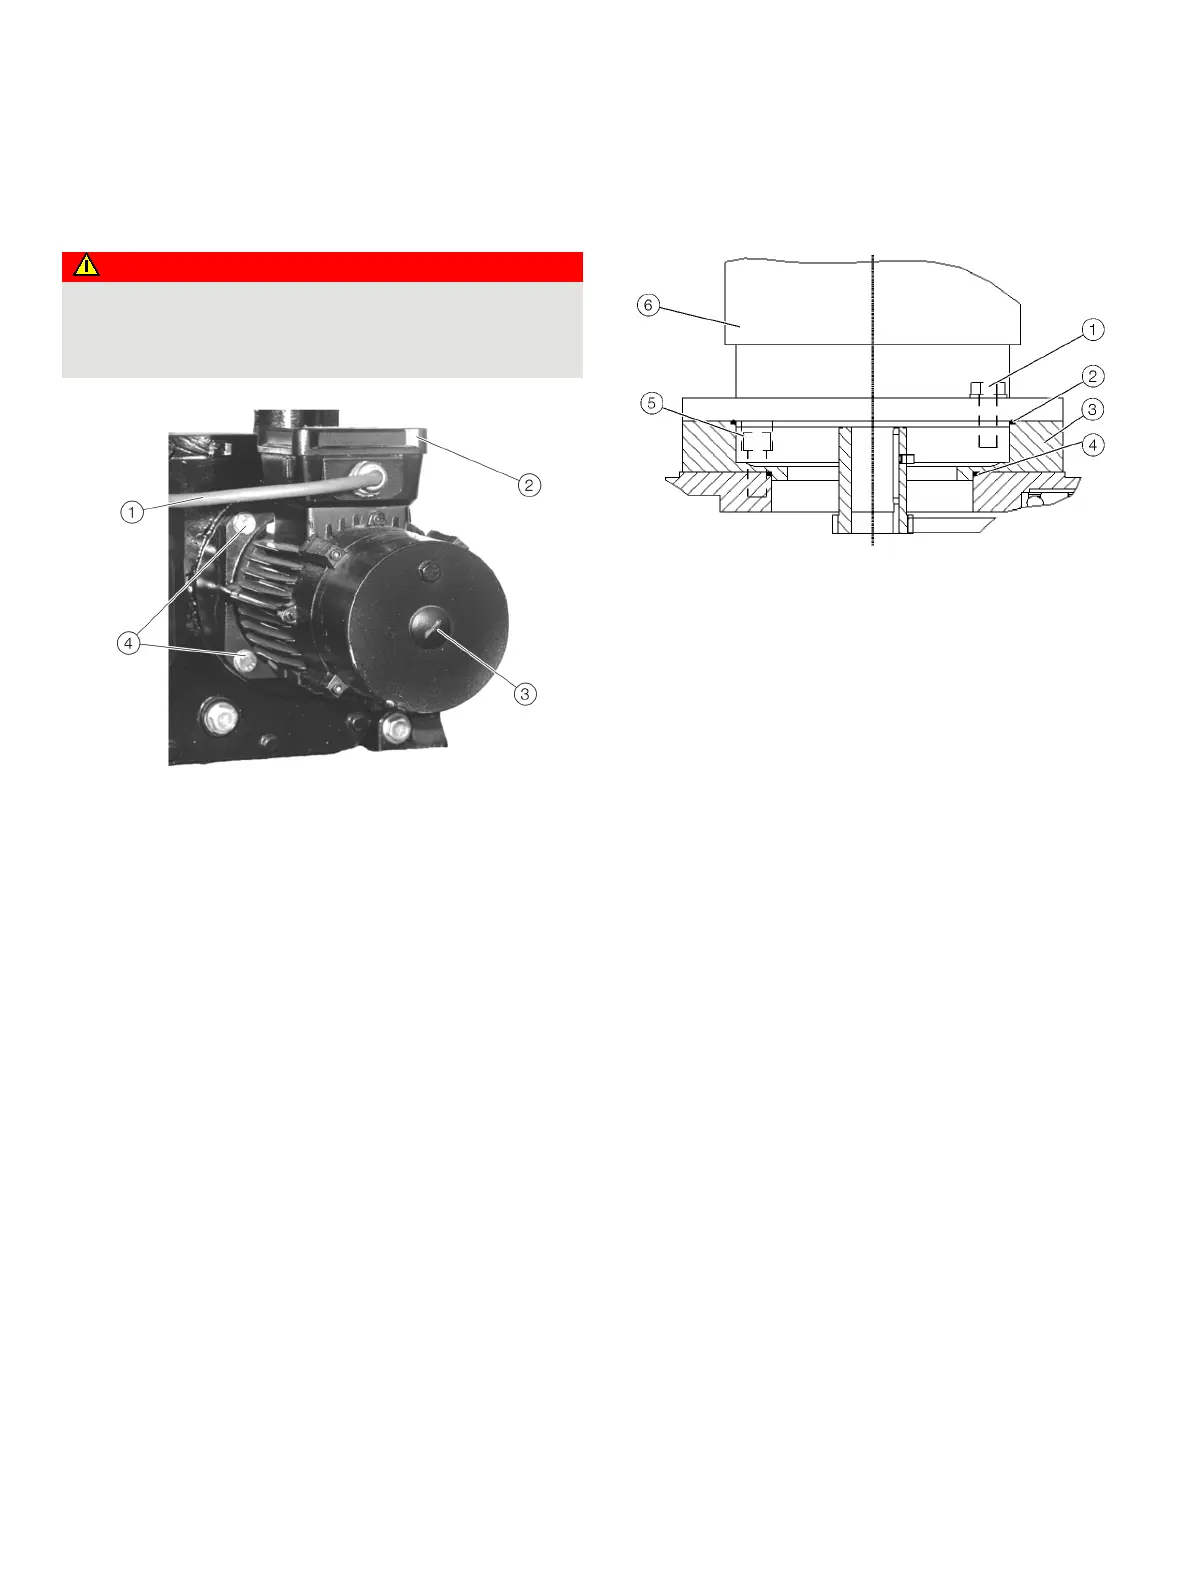
Motor connection cable
Motor terminal box
Motor
Motor fastening screws
Figure 12: Rear motor view (exemplified)
1. Disconnect the motor / actuator from any electrical supply.
2. Disconnect motor connection cable in motor terminal box.
3. Drain the oil (see Mounting position on page 6 for details).
4. Undo the 4 motor fastening screws.
5. Pull the motor carefully out.
6. Once the motor overhaul is finished, replace the motor
sealing ring in any case.
7. Install the motor in reverse order.
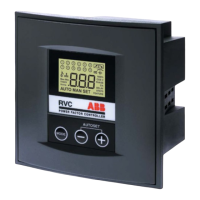
Motor flange O-ring
Motor screw
O-ring
Flange
O-ring
Screw
Motor
Figure 13: Exemplary depiction of motor connection; additional flange
not used for
all motors
In order to change the flange O-ring proceed as follows:
1. Disconnect the electrical power supply prior to any
maintenance
2. Make sure that the oil level is below the O-ring
4
3. Drain the oil if necessary Mounting position on page 6.
4. Disconnect the cables in the motor terminal box
5. Turn the motor screws
1 out and put the motor aside;
remove O-ring
2
6. Turn the screws
5 of the add. flange out and put the
flange
3 aside; remove O-ring 4
7. Replace O-ring
4
8. Mount the additional flange
3 at the actuator housing and
fasten it with the flange screws
5
9. Put the new O-ring
2 into the flange groove and fasten the
motor with the screws
1; consider tightening torque shown
Motor assignment and tightening torque on page 13.