EN - 14
6 Putting into operation CAT 3
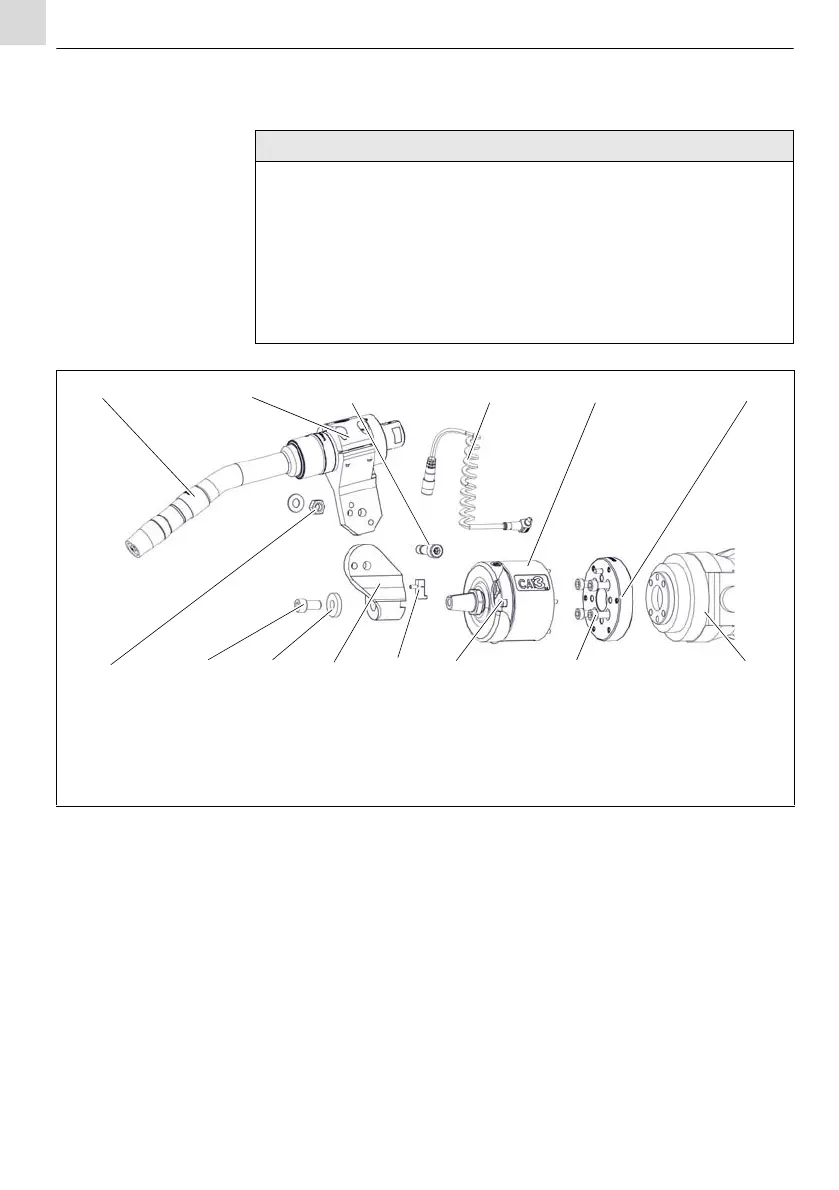
6.1 Attaching the CAT 3 to the robot
1 Use the cylinder head screw (8) to attach the distance flange (6) to the
robot (7).
2 Use cylinder head screws (9) to attach the CAT 3 (5) to the
distance flange (6).
3 Use the clamping ring (12) and cylinder head screw (13) to attach the
bracket (11) to the CAT 3 (5).
4 Use the dowel screw (3) and nut (14) to attach the torch mount (2) to the
bracket (11).
• Before attaching the CAT 3 (5), first move the robot (7) into the
maintenance position.
• To fasten the CAT 3 (5) to the robot (7), a distance flange (6) is
required. This must correspond to the hole patterns of the CAT 3 (5) and
the robot (7).
• To fasten the torch (1) to the CAT 3 (5), a torch mount (2) is required.
This mount depends on the type of torch.
1 Torch
2 Torch mount
3 Dowel screw 8 H7
4 Helix cable
5CAT3
6 Distance flange
7 Robot
8 Cylinder head screw
9 Cylinder head screw M4x55 (6 pcs)
10 Feather key
11 Bracket
12 Clamping ring
13 Cylinder head screw M8
14 Nut M8 with washer
Fig. 7 Attaching the CAT 3 to the robot